

In customers, you can add new customer information. You can also update, delete, and print your desired customer information.

Adding a New Customer
To add a new Customer, go to Inventory > Masters > Customers, the Customers page is displayed.
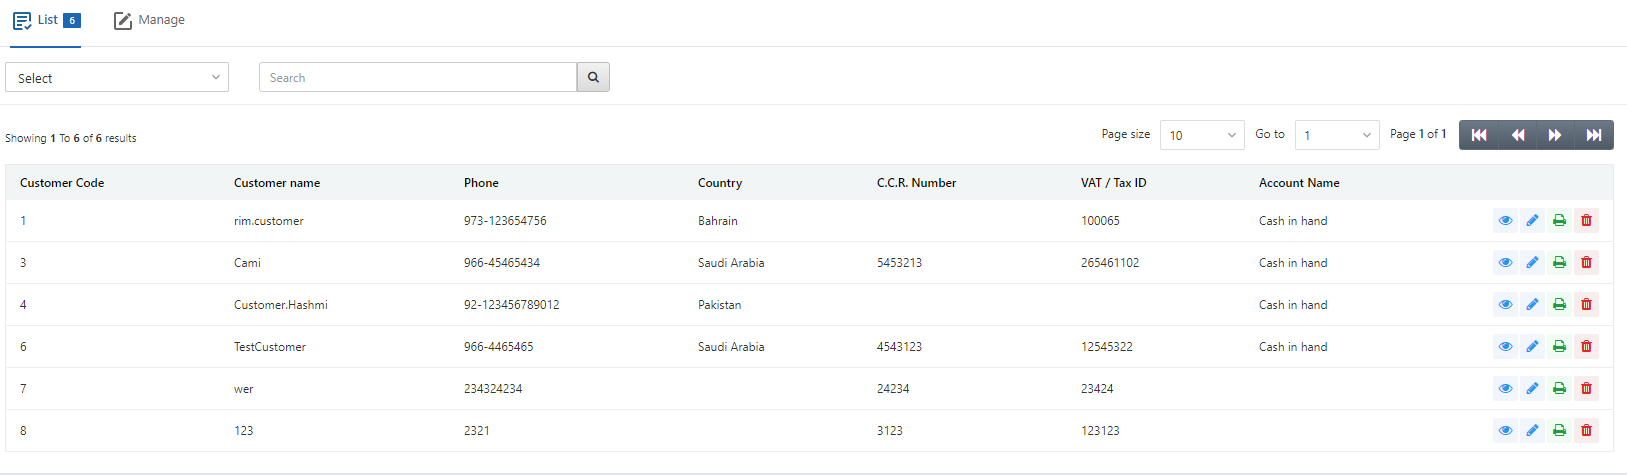
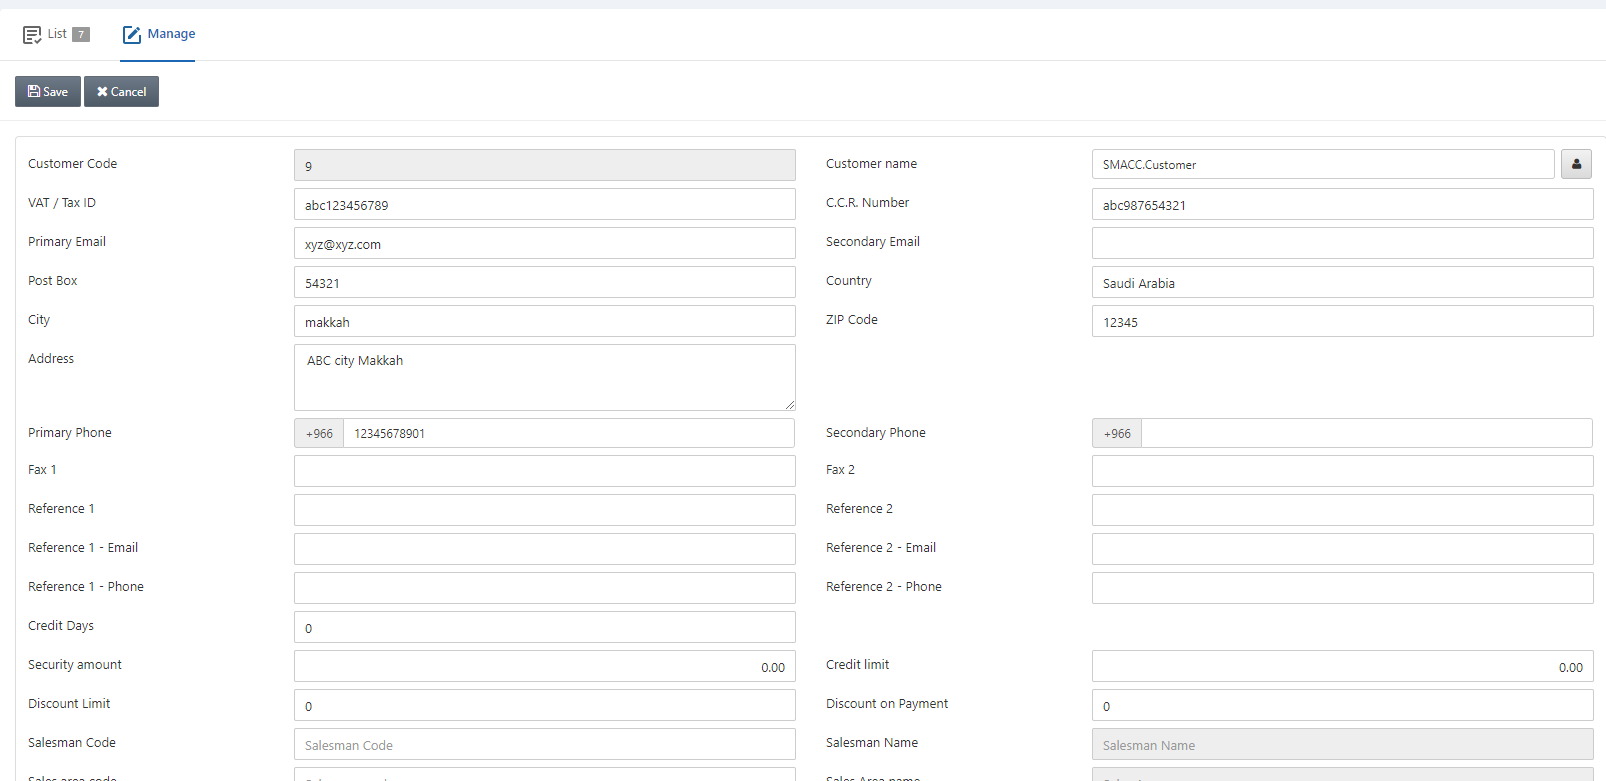
Click on the Manage button at the top of the page.
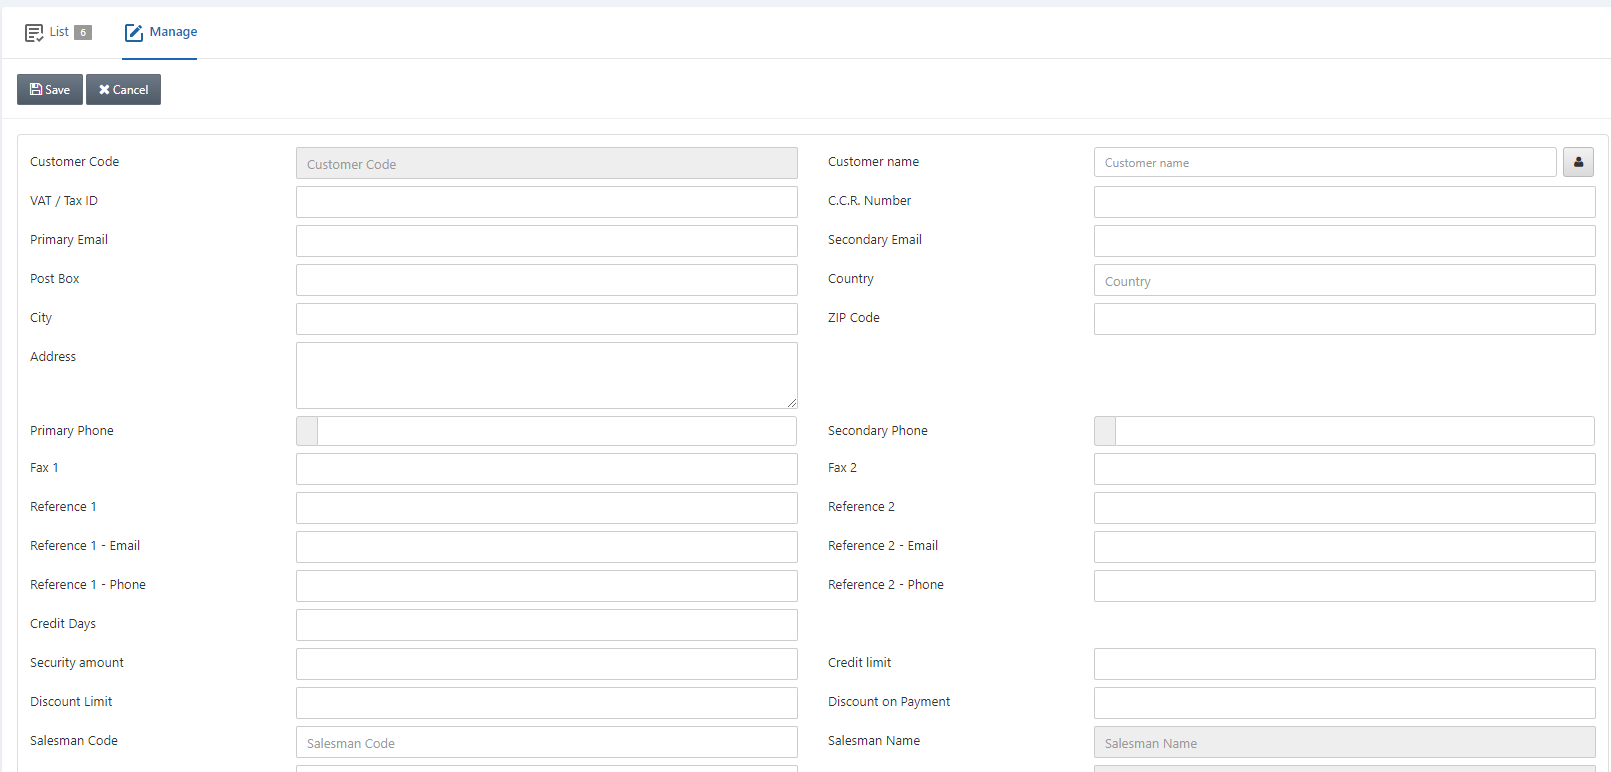
Customer Code: This field is auto-generated by the system.
Customer Name: Enter the customer name.
Manage Names: Click on the Manage Names button to set the name of the customer in multiple languages.
![]()

VAT/ Tax ID: This field sets the VAT/Tax ID against a customer. VAT stands for the Value-added Tax.
Note: VAT numbers are used for tax purposes and are only given to businesses/ customers that are registered for VAT.
C.C.R Number: This field sets the central contractor registration number against a customer.
Primary Email: This field sets the primary email of a customer.
Secondary Email: This field sets the secondary email of a customer.
Post Box: This field sets the post box.
Country: This field allows the selection of the country from a drop-down list.
City: This field sets the city.
ZIP Code: This field sets the Postal code of the location of the customer.
Address: This field sets the residential address of the customer.

Primary Phone: This field sets the primary phone number of the customer.
Secondary Phone: This field sets the secondary phone number of the customer.
Fax 1: This field sets the Fax number 1 for the customer.
Fax 2: This field sets the Fax number 2 for the customer.
Reference 1: This field sets the reference contact person 1.
Reference 2: This field sets the reference contact person 2.
Reference 1 – Email: This field sets the Email address of Reference 1.
Reference 2 – Email: This field sets the Email address of Reference 2.
Reference 1 –Phone: This field sets the Phone number of Reference 1.
Reference 2 –Phone: This field sets the Phone number of Reference 2.

Credit Days: This field sets the duration of credit allowed.
Security Amount: This field sets the security amount on the behalf of a customer.
Credit Limit: This field sets the credit limit for a customer.
Discount Limit: This field sets the maximum percentage amount of discount from 0 to 100.
Discount on Payment: This field sets the discount on payment for a customer.

Salesman Code: This field allows the selection of salesman code from the drop-down list.
Salesman Name: This field is auto-fetched by the system based on the selection of the salesman code.
Sales area code: This field allows the selection of sales area code from the drop-down list.
Sales Area name: This field is auto-fetched by the system based on the selection of the sales area name.
Price Channel: This field allows the selection of price channel from the drop-down list.

Stop Dealing? This checkbox if checked stops the dealing of the customer. If unchecked it allows the dealing of the customer.
Tax Exempted? This checkbox is checked allows the exemption of tax.
Ecommerce Login Permitted: This checkbox if checked allows the login permission for Ecommerce login.
Account Code: This field allows the selection of the account code for the customer.
Account Name: This field is auto-fetched by the system based on the selection of account code.
Click on the Save button at the top of the page to save the information of the customer.
Updating Customer
To update the Customer, go to Inventory > Masters > Customers, the Customers page is displayed.
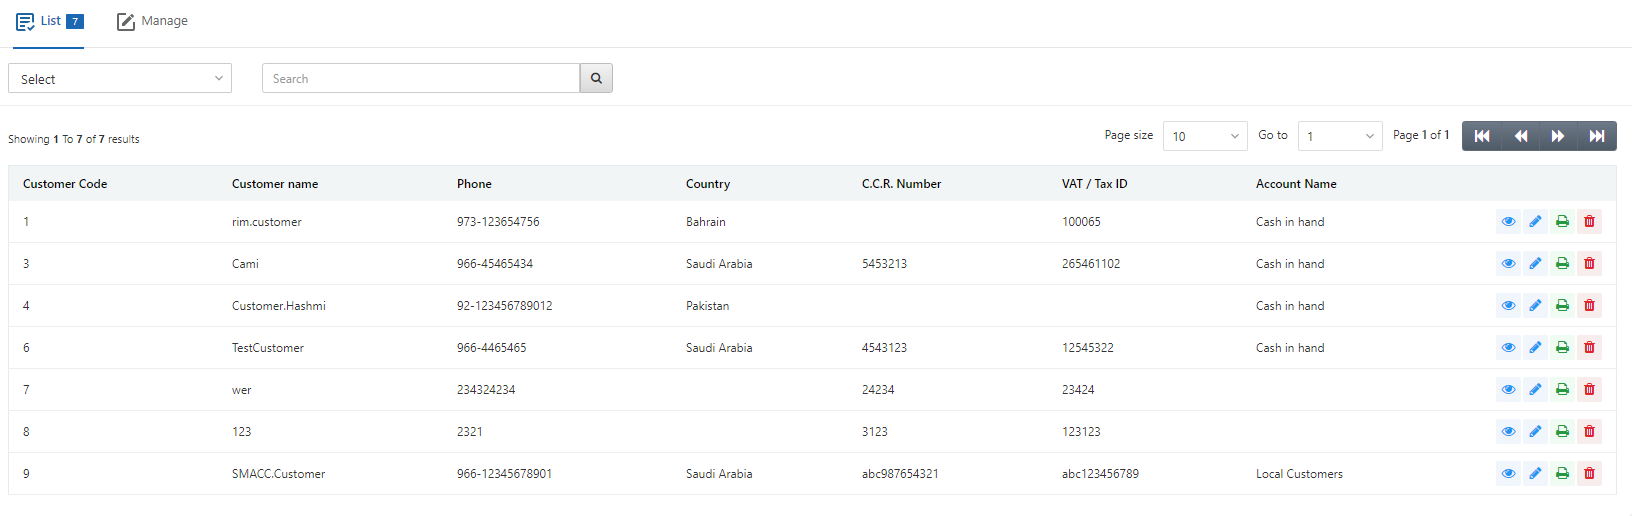
Select the desired row of the selected customer.
There are four icons of Load, Edit, Print, and Delete in front of every customer’s entry in the list.
![]()
Click on the Edit (blue pencil) icon to update the information of the customer.
Update the information of the customer and click on the Save button at the top of the page.
Deleting Customer
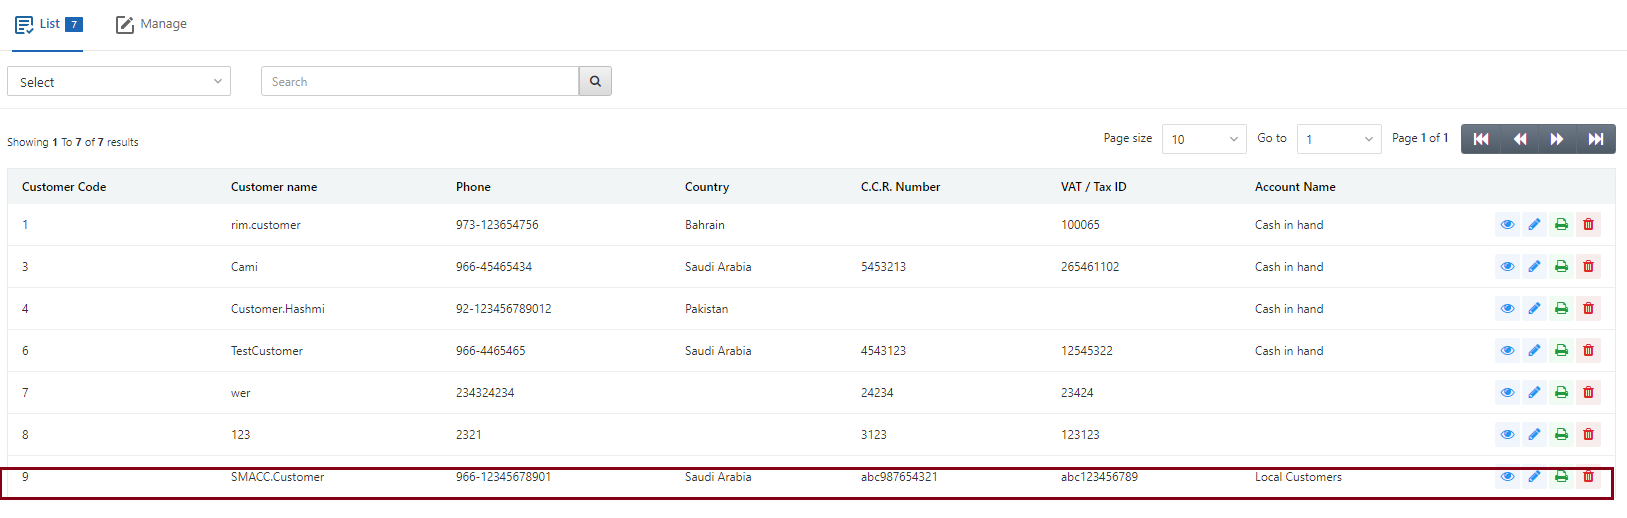
To update the Customer, go to Inventory > Masters > Customers, the Customers page is displayed.
Select the desired row of the selected customer.
There are four icons of Load, Edit, Print, and Delete in front of every customer’s entry in the list.
![]()
Click on the Delete (red) icon to update the information of the customer.
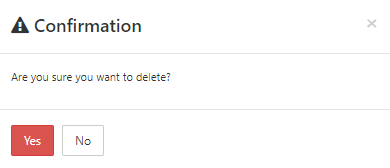
Click on the Yes button to confirm the deletion of the customer.
Printing Customer
To print the Customer, go to Inventory > Masters > Customers, the Customers page is displayed.
Select the desired row of the selected customer.
There are four icons of Load, Edit, Print, and Delete in front of every customer’s entry in the list.
![]()
Click on the Print (green) icon to print the customer information.