

In the item card, you can add new item details in your desired language. You can set item type, item picture, units of items, equivalent item, and supplier code, and supplier name. You can update, delete, and print items.
Adding a new Item in Item Card
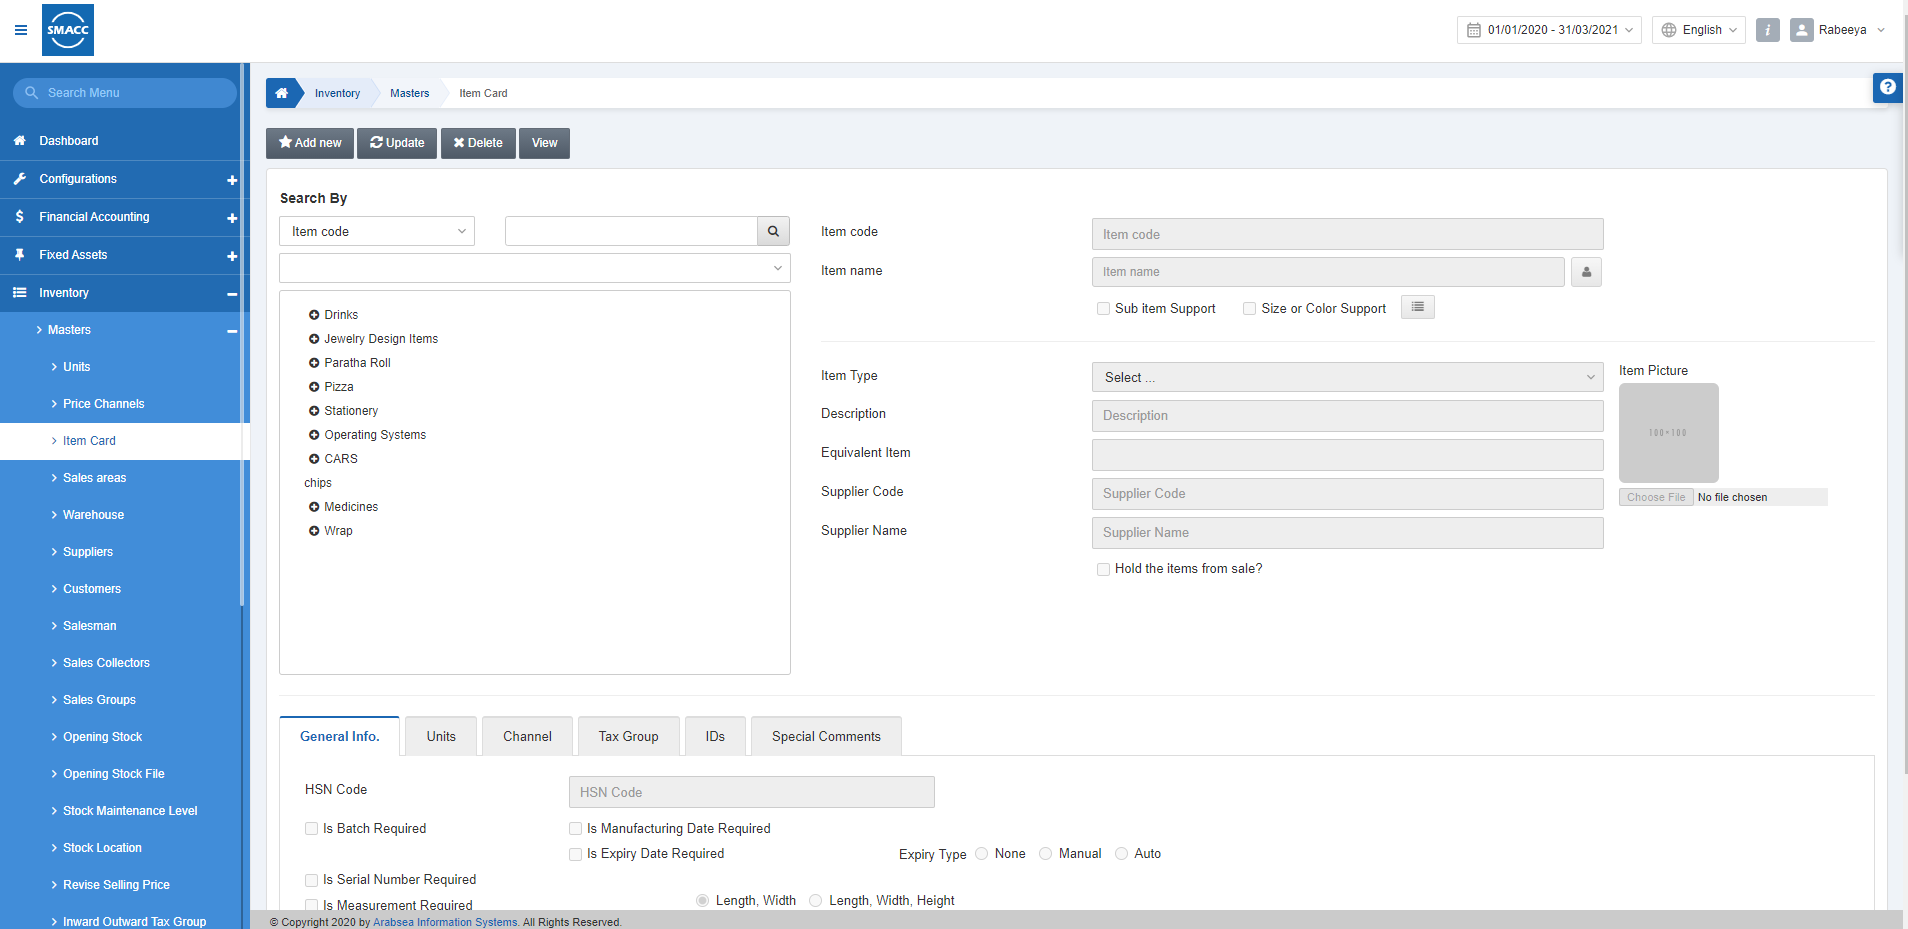
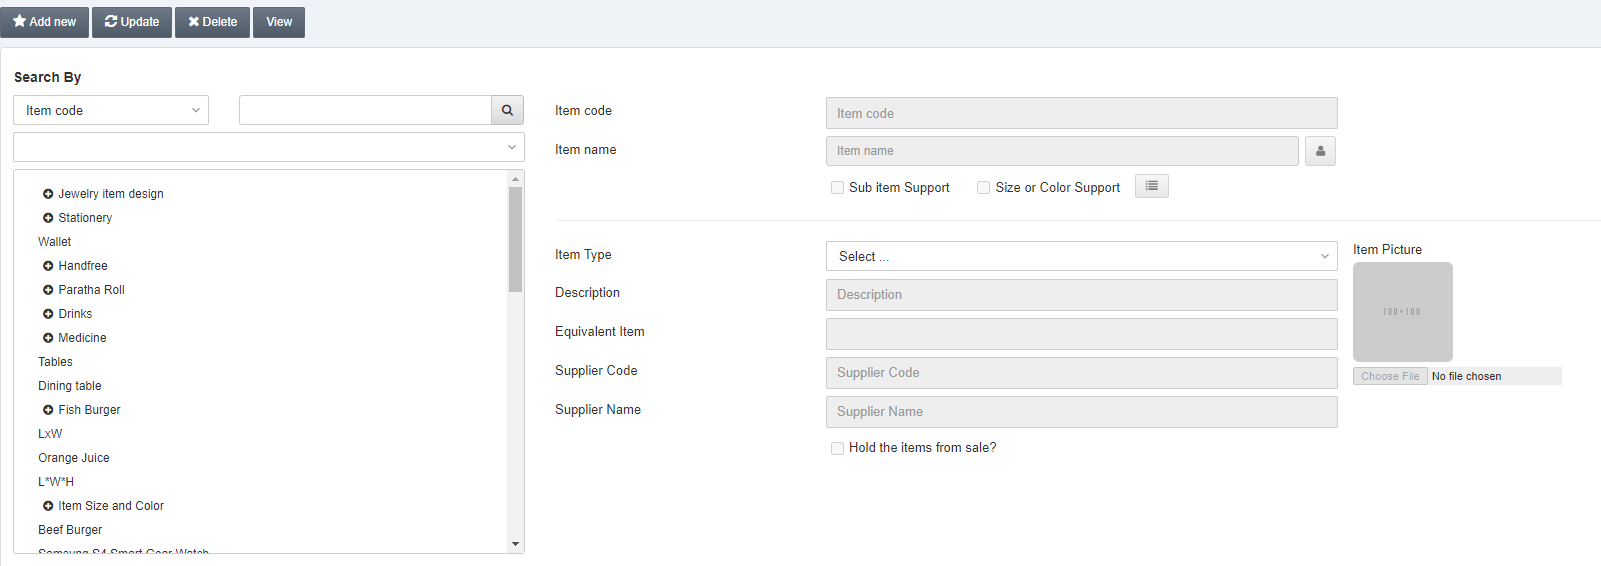
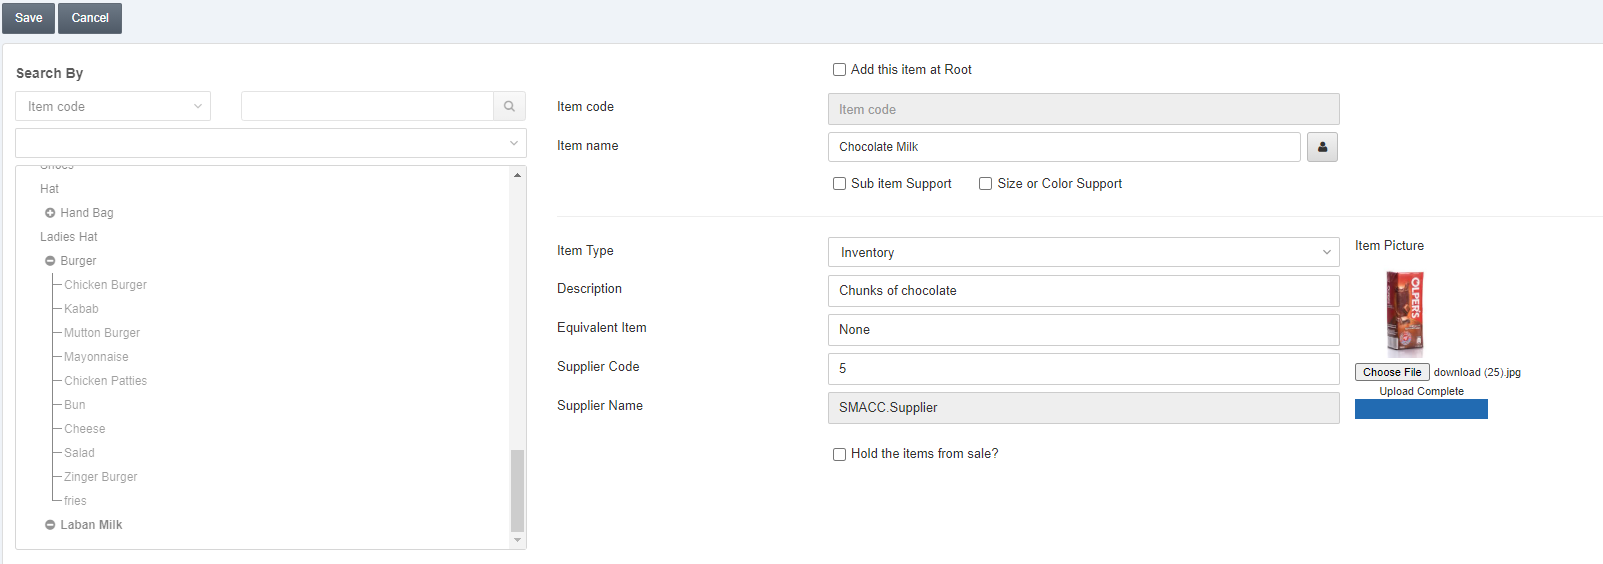
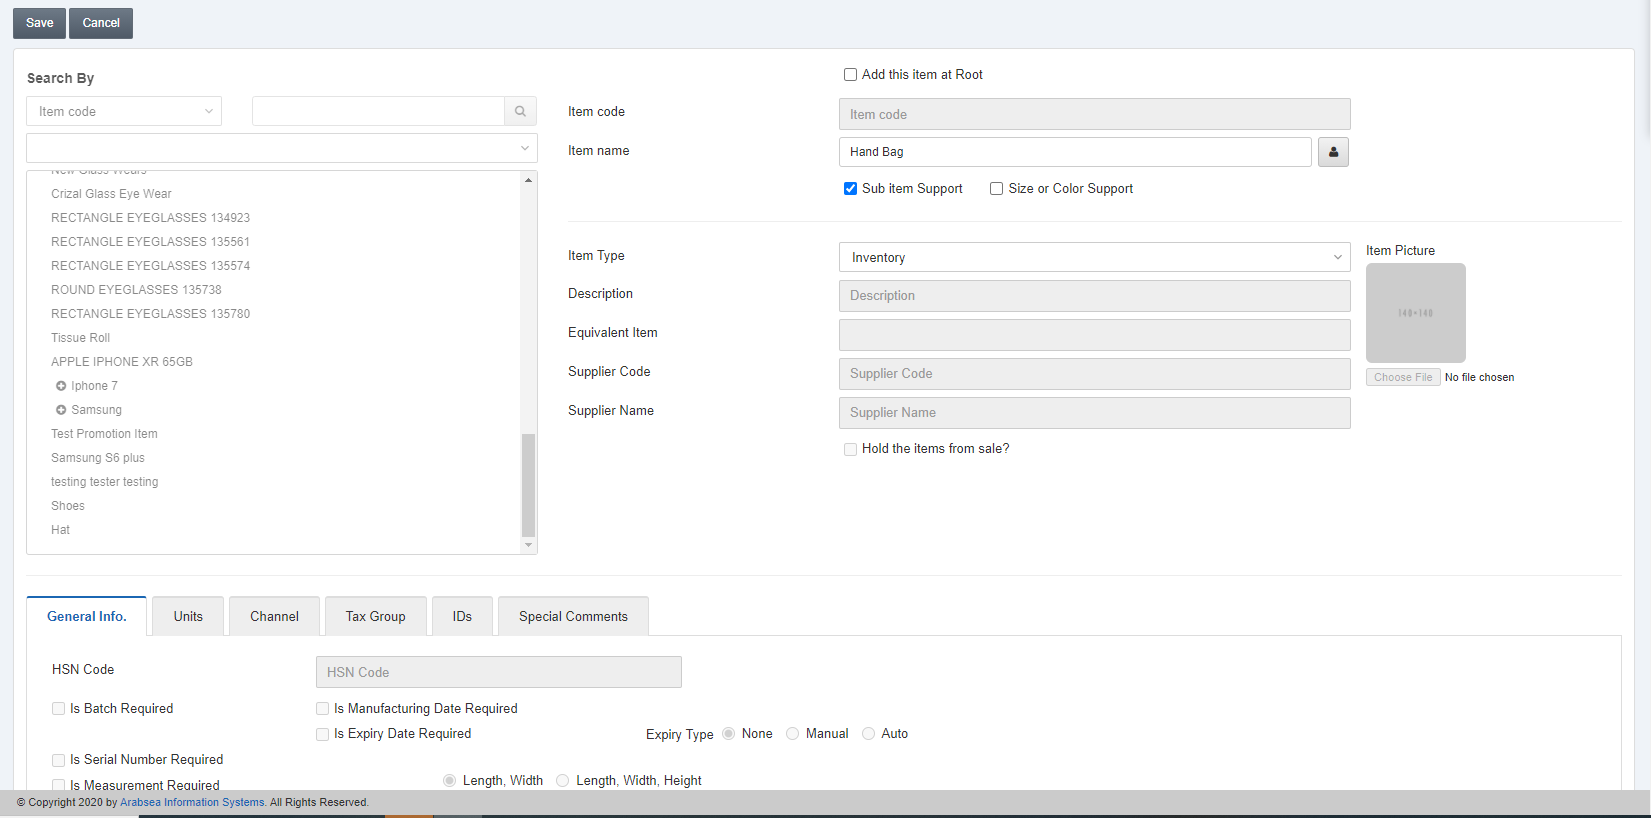
To add a new Item in Item Card, go to Inventory > Masters > Item Card, the Item Card page is displayed.

Click on the Add new button at the top of the page.
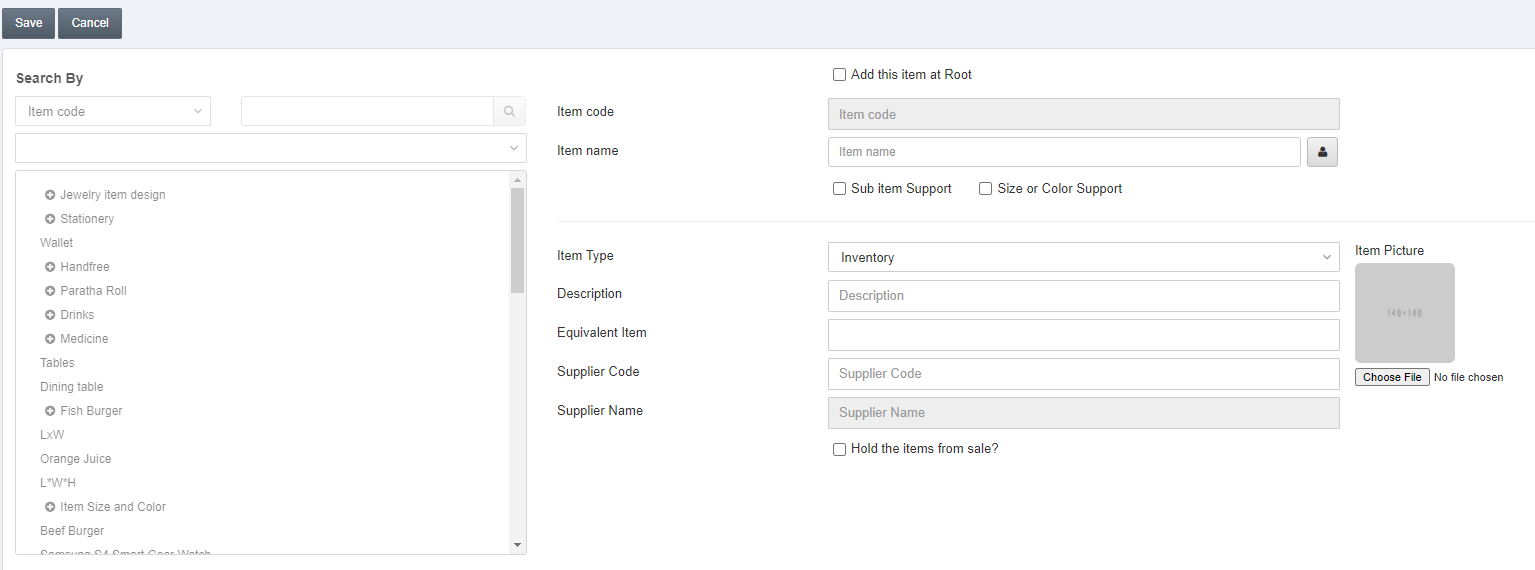

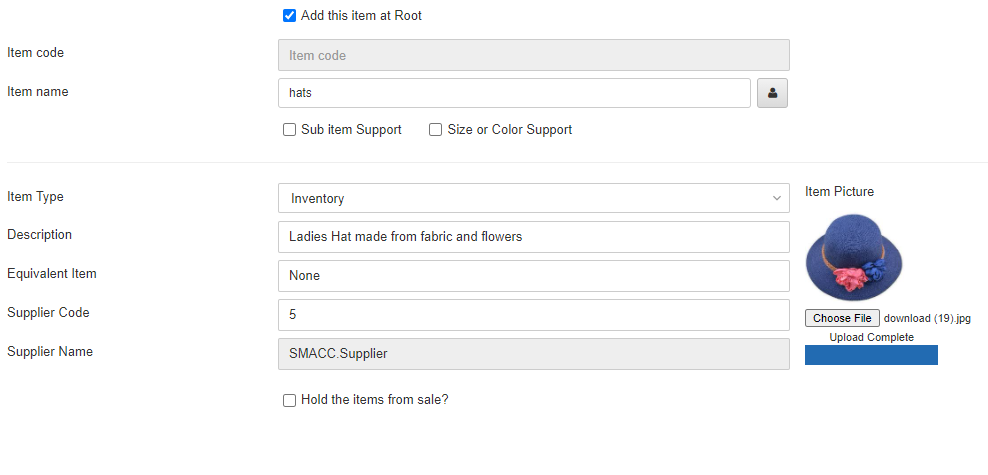
Add this Item at Root: This checkbox when checked allows the item to be added at the bottom (root) of the list of other items.
Item Code: This field is auto-generated by the system.
Item Name: Enter the name of your item.
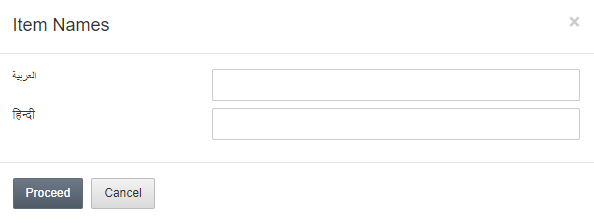
Manage Names: click on the button in front of the Item.
![]()

You can set the Item Names in multiple languages.
Click the Proceed button to save the information.
Sub Item Support: This checkbox is checked to create a sub-item of the main item.
Size or Color Support: This checkbox is checked to identify items on color and sizes basis. Further explanation is in the upcoming context.
Item Type: This field allows the selection of Item Type from the drop-down list. There are three options: Inventory, Service, and Sales Group.
Description: This field sets the description or detail of the item.
Equivalent Item: This field sets the equivalent item for the item defined.
Supplier Code: This field allows the selection of the supplier code from the drop-down list.
Supplier Name: This field is auto-fetched by the system.
Hold this Item from Sale: This checkbox when checked stops the sales of this particular item.
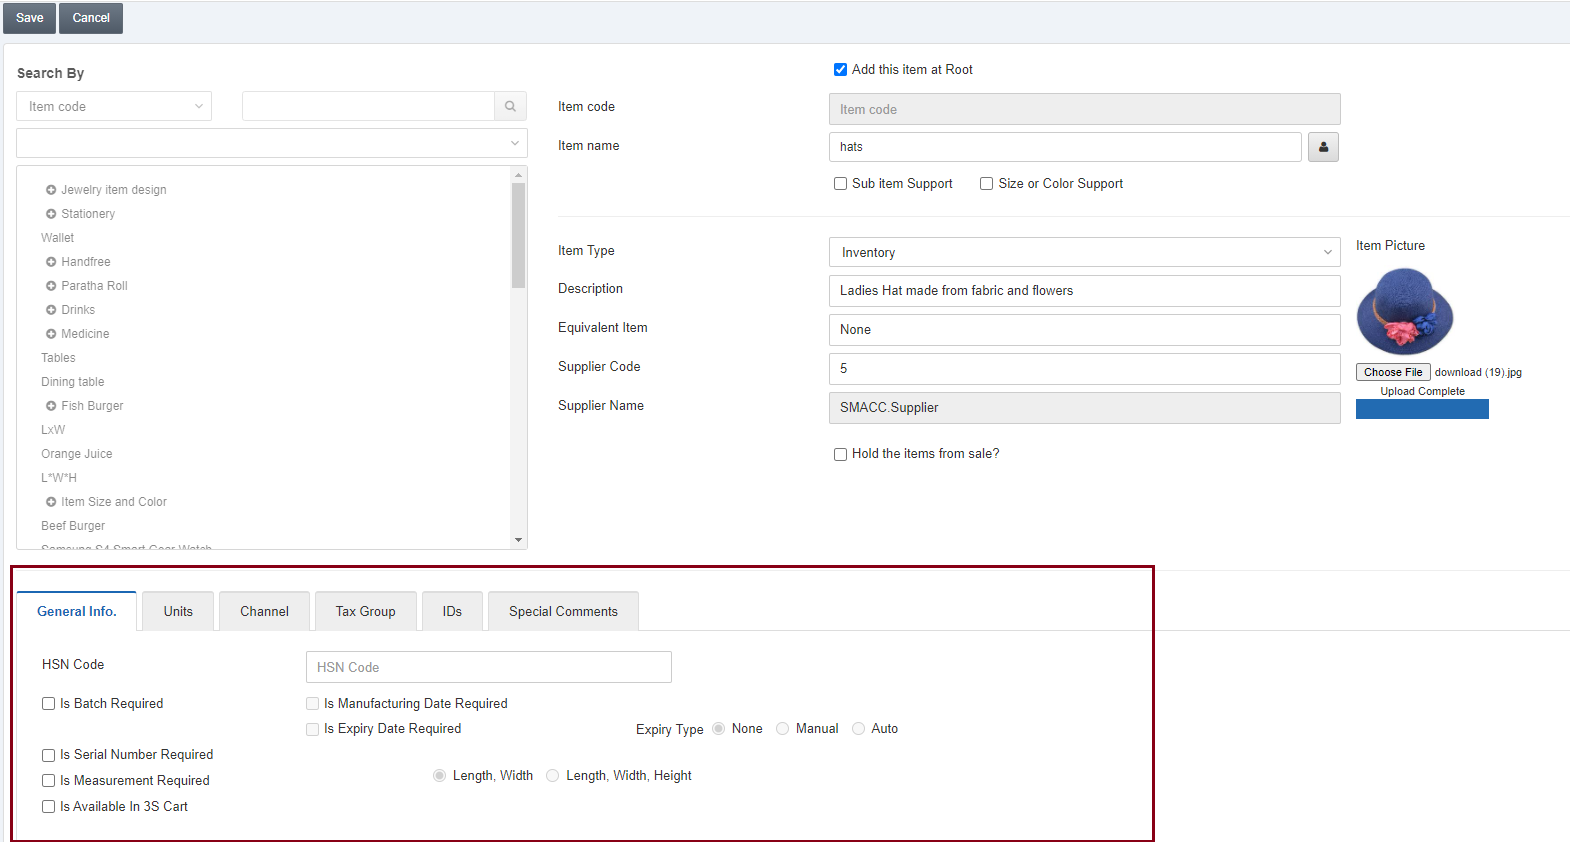
General Info tab.
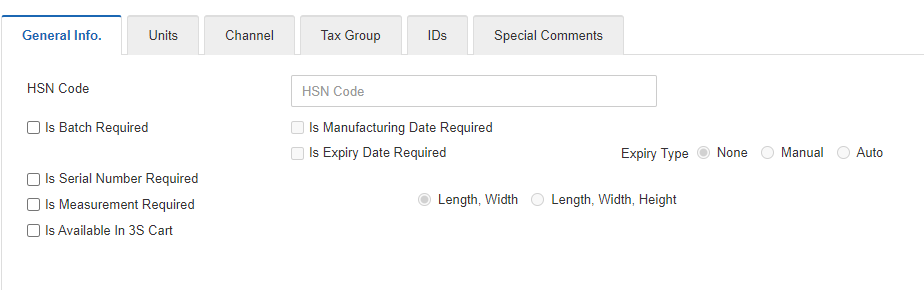
HSN Code: This field sets the Harmonized System Nomenclature code. HSN code is a 6-digit uniform code that classifies 5000+ products and is accepted worldwide. It was developed by the World Customs Organization (WCO).
Is Batch Required: This checkbox when checked allows the functionality of batch numbers.
Is Manufacturing Date Required: This checkbox allows the enabling of the manufacturing date.
Is Expiry Date Required: This checkbox allows the enabling of the expiry date.
Expiry Type: Select one of the three radio buttons of none, manual and auto.
Is Serial Number Required: This checkbox when checked allows the functionality of serial numbers.
Is Measurement Required: Select one of the two radio buttons of length, width and length, width, height.
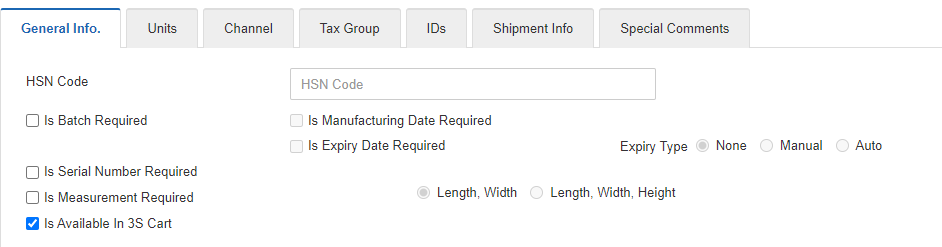
Is Available in 3S Cart: This checkbox when checked enables a new tab of shipment info.
Units tab:

The default unit is Pieces (Pcs).
Unit Code: Define a unique unit code, for example, hat.
Unit Fraction: This field is by default 1 for pieces. It shows the number of units in packing.
Cost Price: Enter the cost price of the item.
Average Cost: Enter the average price of the item.

Click on the Add Unit button to add the units.

Channel tab:

This tab shows the price channels. You can select the desired price channels (more than one) and set their values (prices).
Tax Group tab:
Inward Tax Group: This field allows the selection of the Inward tax group from the drop-down list.
Outward Tax Group: This field allows the selection of the Outward tax group from the drop-down list.

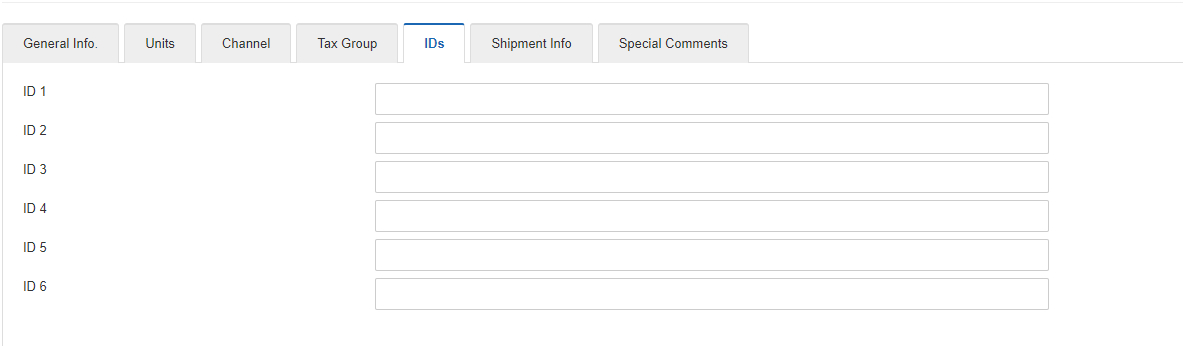
IDs tab:
Enter the ID 1 up to ID 6 for the particular item.
Shipment Info tab:
Add the Weight unit, weight, Size unit, and Length, Width, Height.

Special Comments tab:
Add Comment: Click on the add comment button to add a comment.

Click on the Save button at the top of the page to allow the insertion of the item card.
Note: These special comments will be shown in POS WPF, iOS, and Android applications.
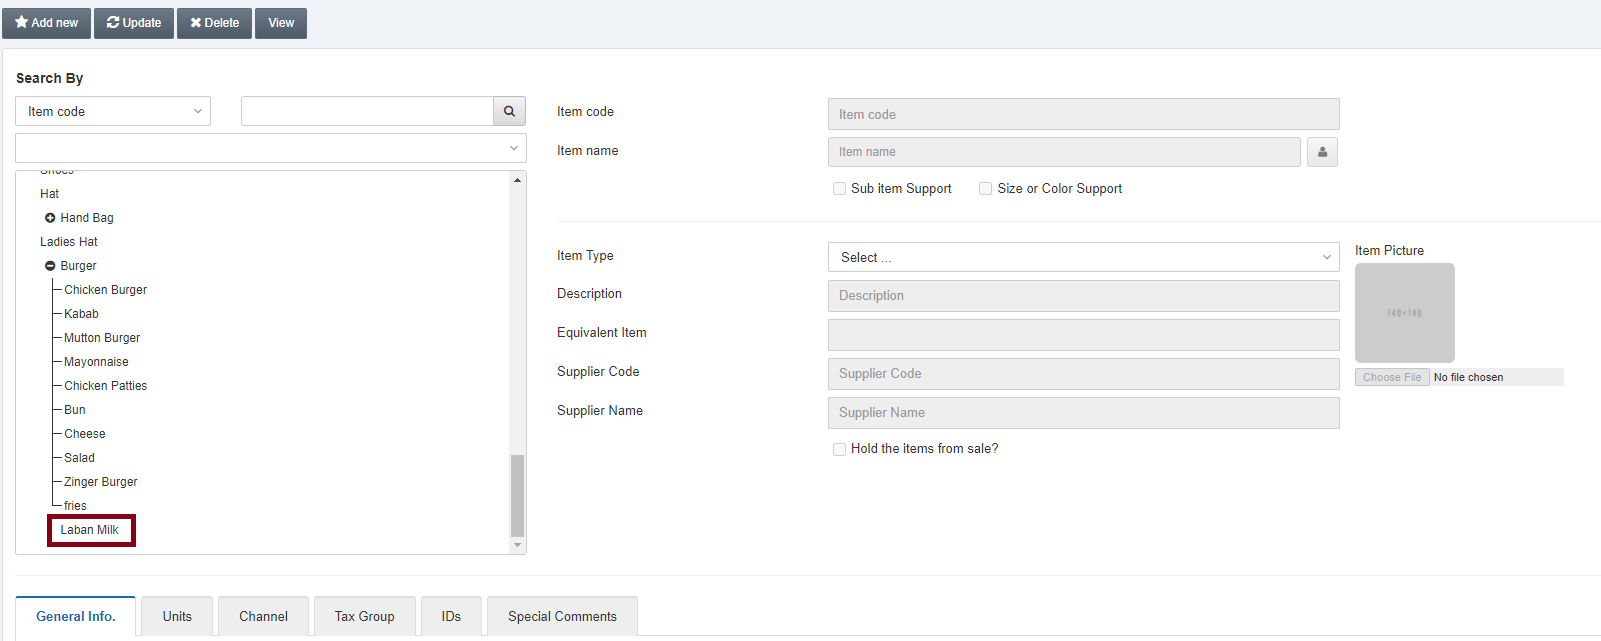
Adding Sub Item and Nested Item
To add Sub Item Nested Item in Item Card go to Inventory > Masters > Item Card, the Item Card page is displayed.
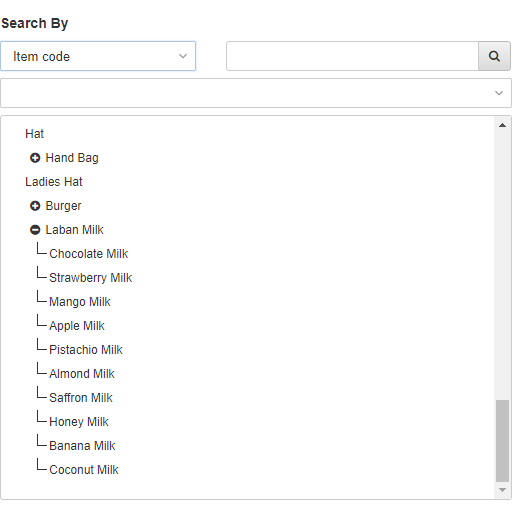
Select the desired item from the list by clicking on its name or typing the item code in the search bar.
Click on the Update button and select the checkbox of Sub Item Support.
Note: This action converts the item card into a category with a “+” or “–“sign.
Again click on the desired item and then the button of Add New.
Repeat the same process for the tabs of General Info, Units, Channel, Tax Group, IDs, and Special Comments as discussed above.
Click on the Save button to save the nested item.
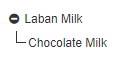
This is how nested items are made and shown.
Note: You can add as many nested items you want to add.
Adding Sub Item and Color in Item Card
To add Sub Item in Item Card go to Inventory > Masters > Item Card, the Item Card page is displayed.
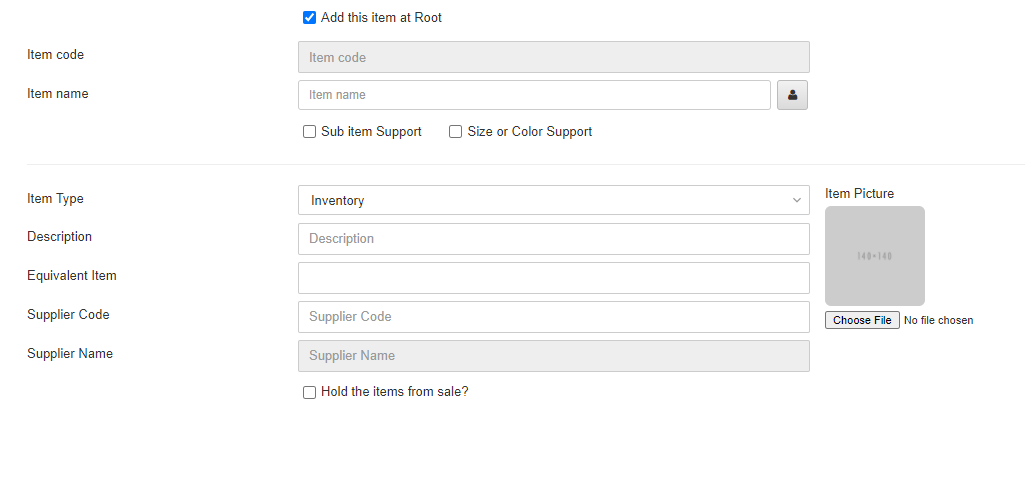
Click on the Add new button at the top of the page.

Add this Item at Root: This checkbox when checked allows the item to be added at the bottom (root) of the list of other items.
Item Code: This field is auto-generated by the system.
Item Name: Enter the name of your item.
Manage Names: click on the button in front of the Item.
![]()
You can set the Item Names in multiple languages.
Click the Proceed button to save the information.
Sub Item Support: This checkbox is checked to create a sub-item of the main item.
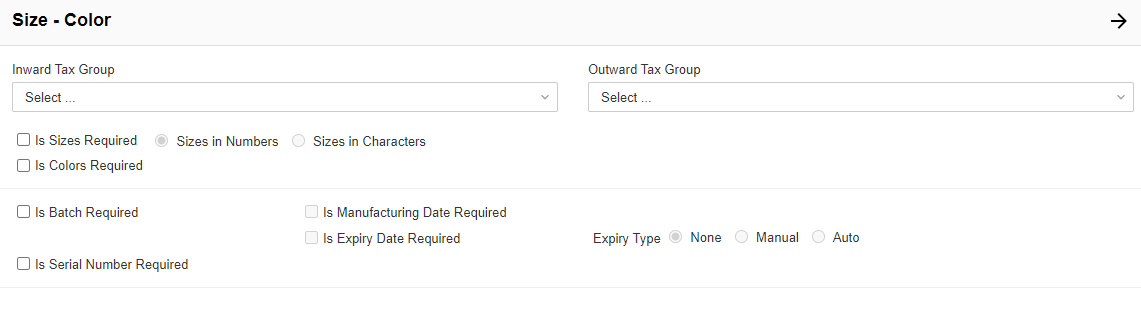
Size or Color Support: This checkbox is checked to identify items on color and sizes basis.
Check the Size and Color support checkbox and the following pop-up is shown:
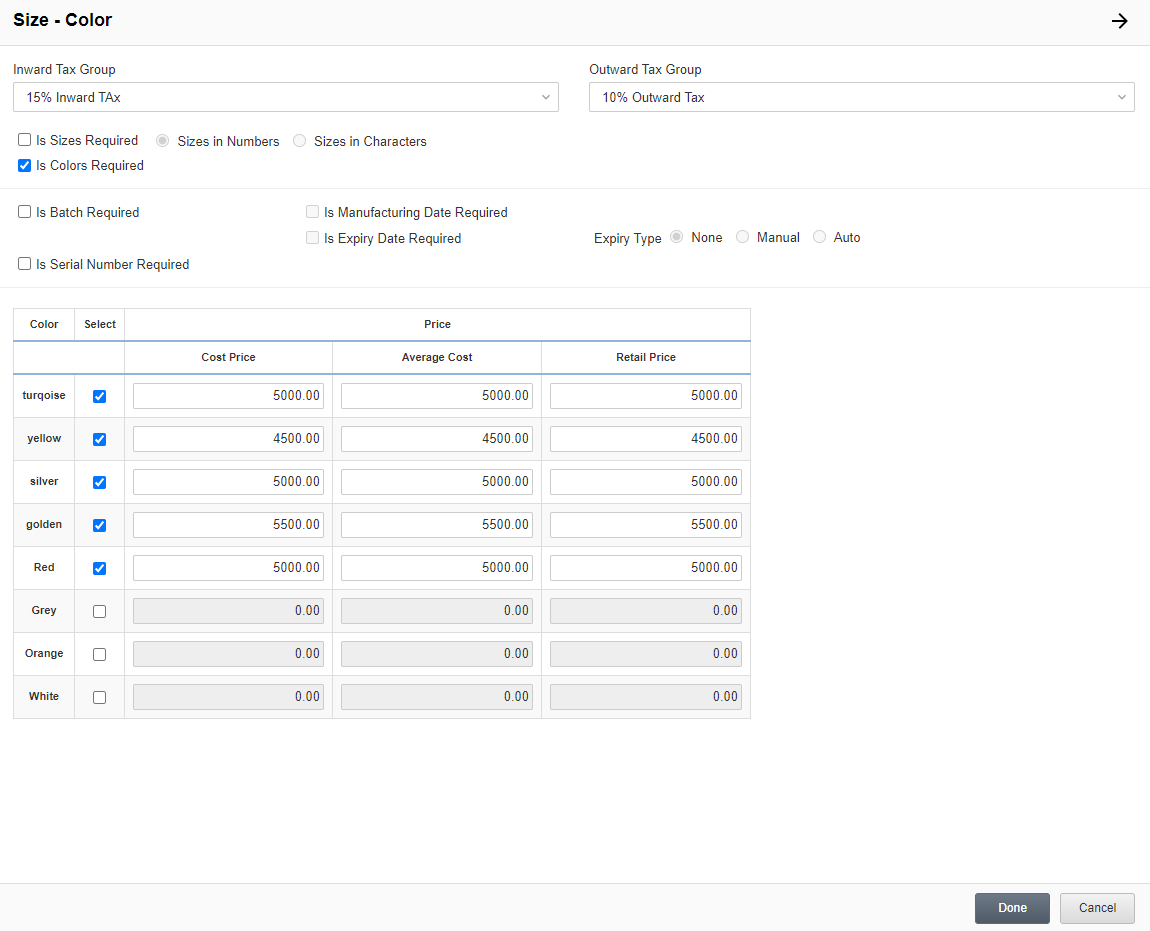
Click on the Done button.
Click on the Save button at the top of the page.
Adding Sub Item and Size in Item Card
To add Sub Item in Item Card go to Inventory > Masters > Item Card, the Item Card page is displayed.
Click on the Add new button at the top of the page.
Add this Item at Root: This checkbox when checked allows the item to be added at the bottom (root) of the list of other items.
Item Code: This field is auto-generated by the system.
Item Name: Enter the name of your item.
Manage Names: click on the button in front of the Item.
![]()

You can set the Item Names in multiple languages.
Click the Proceed button to save the information.
Sub Item Support: This checkbox is checked to create a sub-item of the main item.
Size or Color Support: This checkbox is checked to identify items on color and sizes basis.

Check the Size and Color support checkbox and the following display is shown:


Click on the Done button.
Click on the Save button at the top of the page.
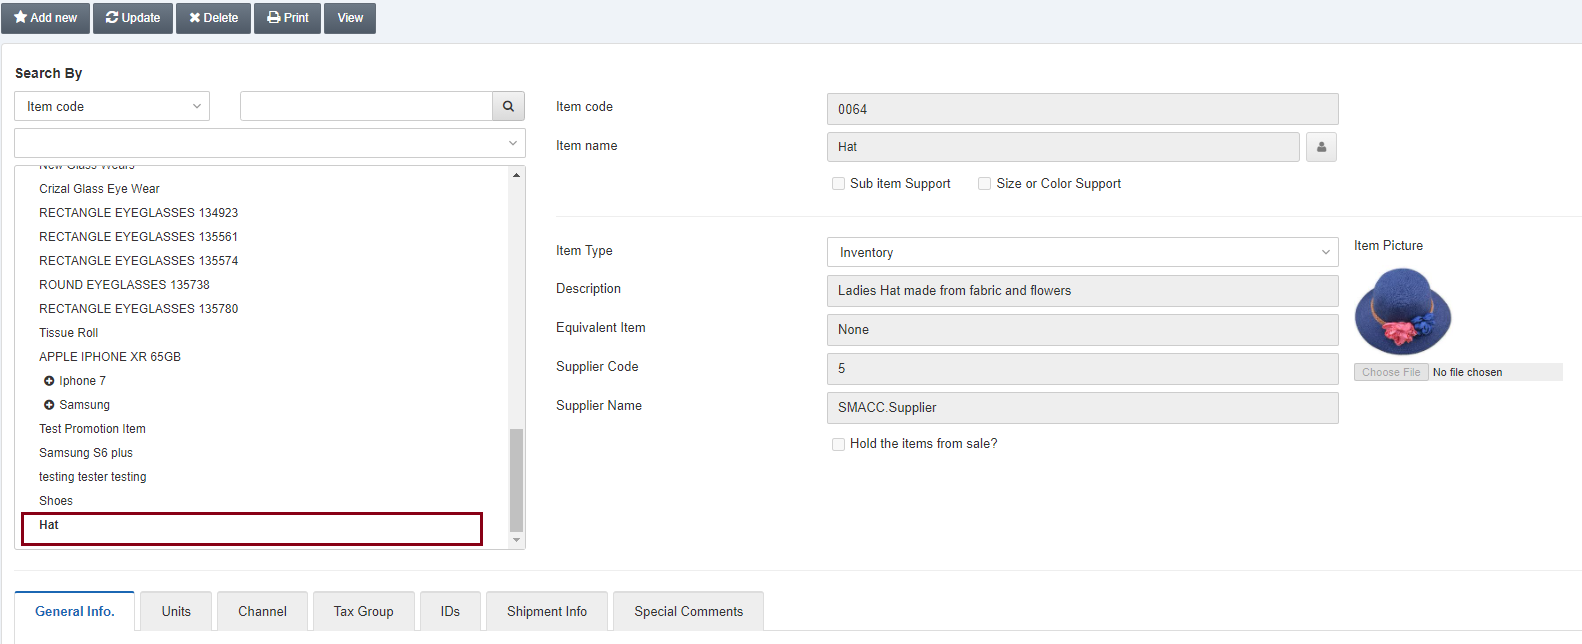
Editing/Updating Item
To edit/update Item, go to Inventory > Masters > Item Card, the Item Card page is displayed.
Select the desired item from the list of items.
Click on the Update button to edit the information on the item card.
You can update the editable information and click on the Save button to save the information.
Deleting Item
To delete Item, go to Inventory > Masters > Item Card, the Item Card page is displayed.
Select the desired item from the list of items.
Click on the Delete button to delete the information on the item card.
Click on the Yes button to confirm the deletion.
Printing Item
To print Item, go to Inventory > Masters > Item Card, the Item Card page is displayed.
Select the desired item from the list of items.
Click on the Print button to print the information on the item card.