The sales invoice listing helps you view the report of the sales invoice list.

Viewing the Sales Invoice Listing
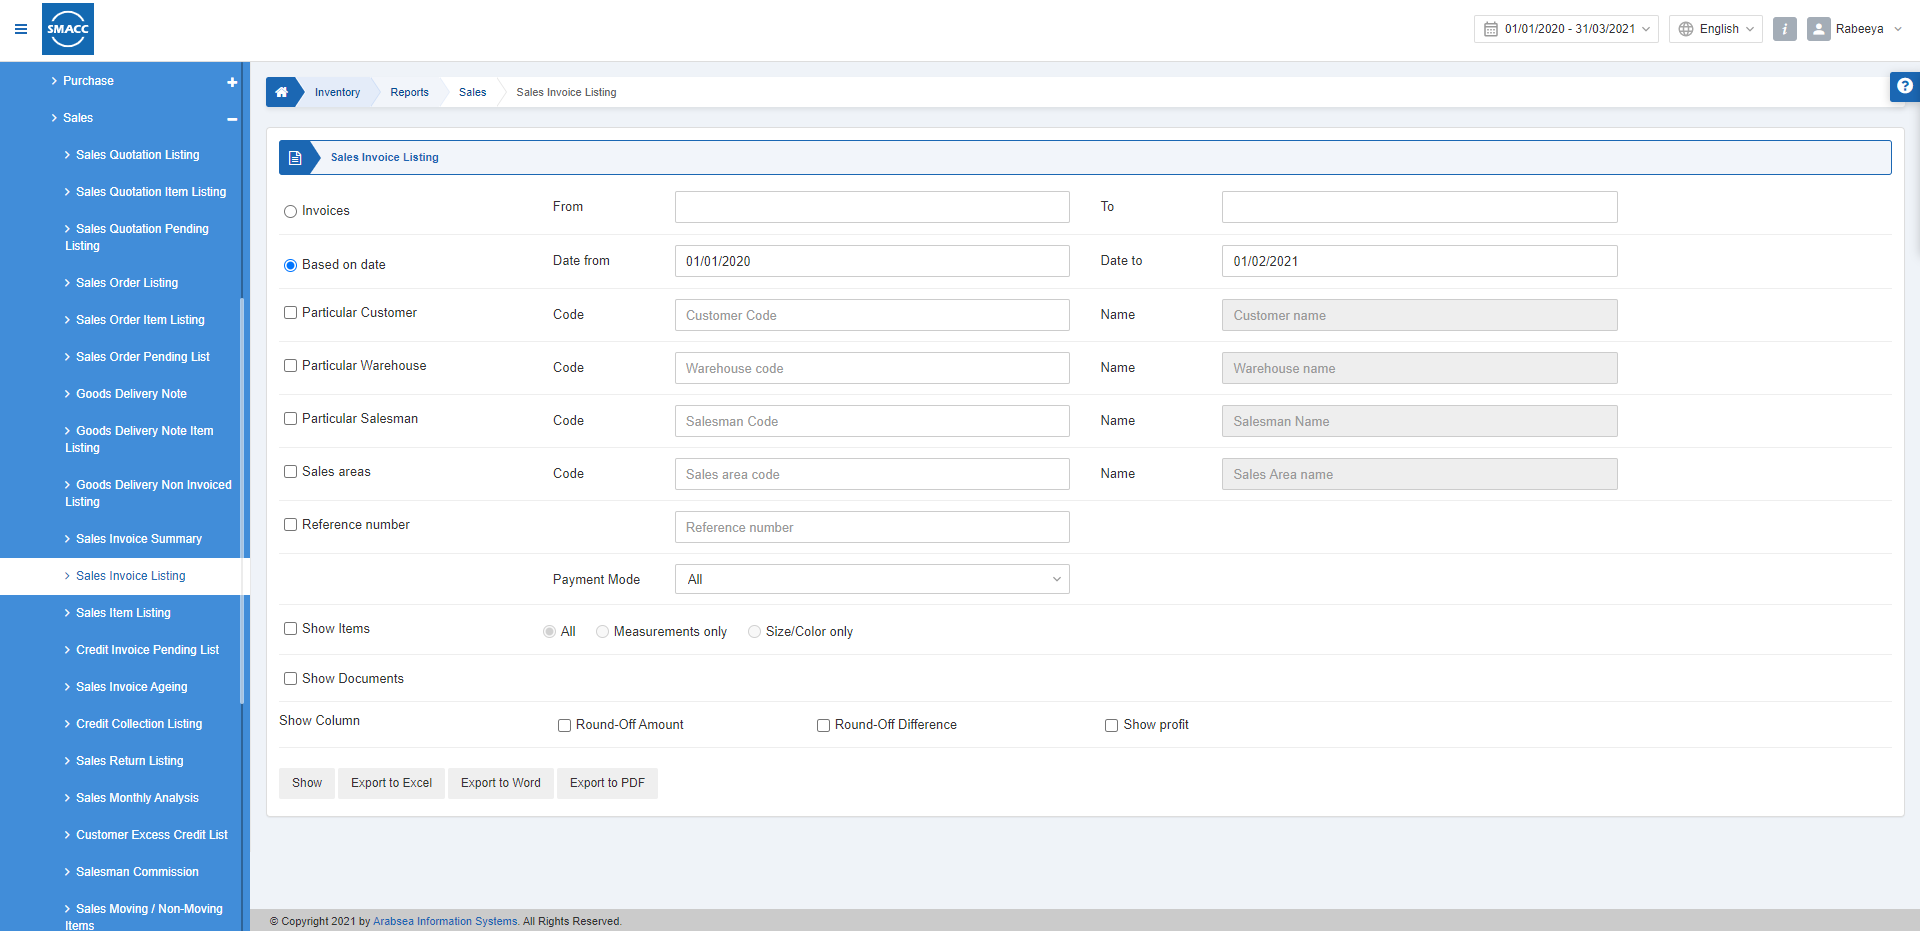
To view the sales invoice listing, go to Inventory > Reports > Sales > Sales Invoice Listing, the sales invoice listing page is displayed.

There are two radio buttons out of which you can select one at a time.

Invoices: You can select the invoices from a particular invoice number to another particular invoice number.
From: Starting Invoice Number.
To: Ending Invoice Number.
Based on date: You can select the starting and ending date of the report.
Date from: This field sets the Starting Date.
Date to: This field sets the Ending Date.
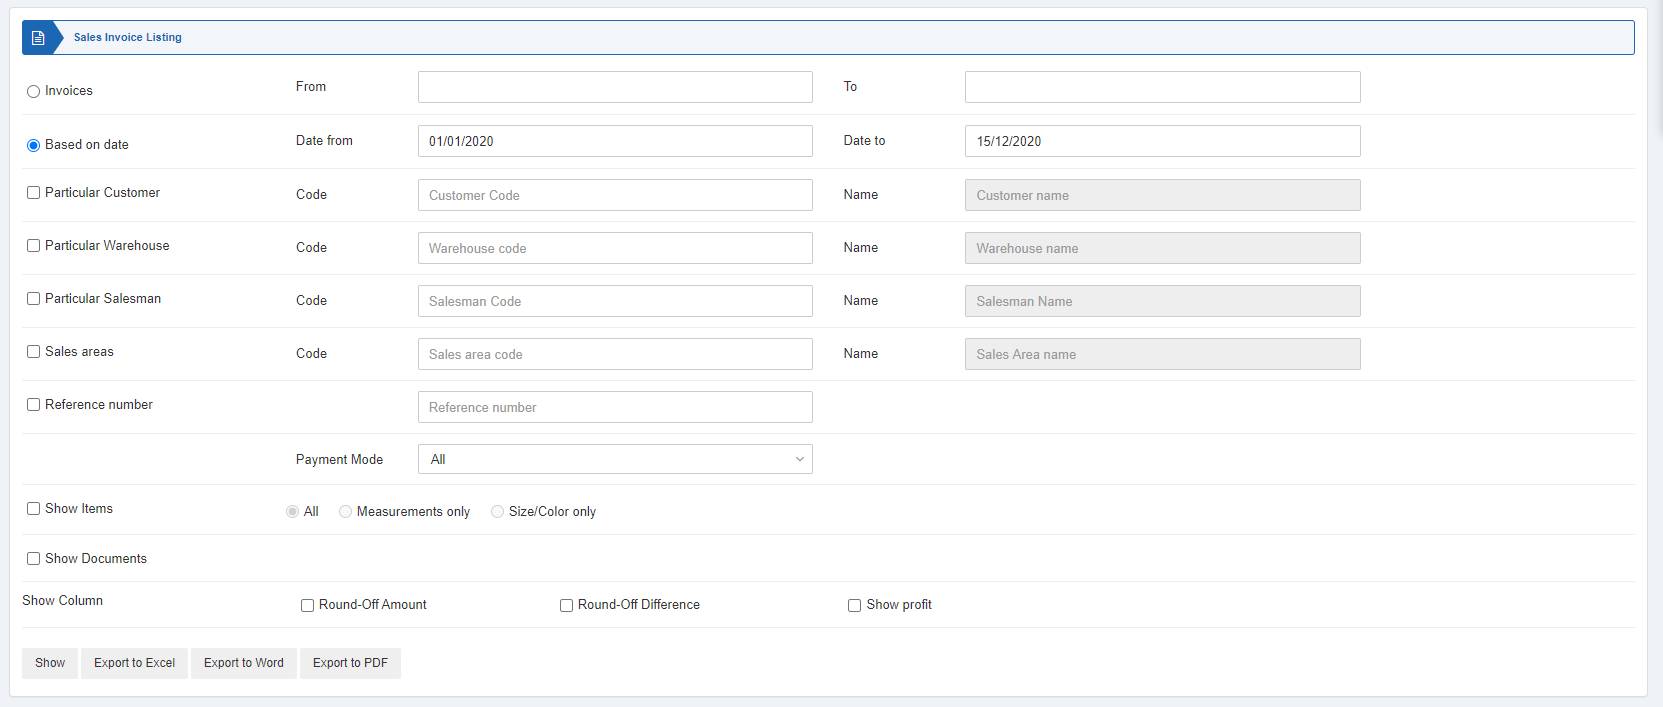
Four checkboxes serve as filters for this report.

Particular Customer: This checkbox when checked allows the selection of a particular customer code. If unchecked all customers will be shown.
Particular Warehouse: This checkbox when checked allows the selection of a particular warehouse code. If unchecked all warehouses will be shown.
Particular Salesman: This checkbox when checked allows the selection of a particular salesman code. If unchecked all salesmen will be shown.
Sales Area: This checkbox when checked allows the selection of a particular sales area. If unchecked all sales areas will be shown.
![]()
Reference Number: This checkbox when checked shows the report with the entered reference number.

Payment Mode: This field allows the selection of payment mode from the drop-down list. To allow all types of payments select “All”. The types include cash, credit, bank, type-4 and type-5.

Show Items: This checkbox when checked shows the relevant items. There are three radio buttons in front of it, out of which you can select one at a time. You can select “All” to include all the types of items. “Measurements only” means the selection of dimensional items and “Size/color only” means the selection of size/colour items.
Show Documents: This checkbox when checked shows the relevant documents.
![]()
Show Column: There are three checkboxes in front of it. It shows what is included in the report’s columns.
Round-off Amount: This checkbox when checked helps in rounding off the amount.
Round-off Difference: This checkbox when checked helps in rounding off the difference.
Show Profit: This checkbox when checked shows the profit.

Show: This button represents the report as per the selected filters.
Export to Excel: This button allows the data of the report to be exported to Excel.
Export to Word: This button allows the data of the report to be exported to Word.
Export to PDF: This button allows the data of the report to be exported to PDF.
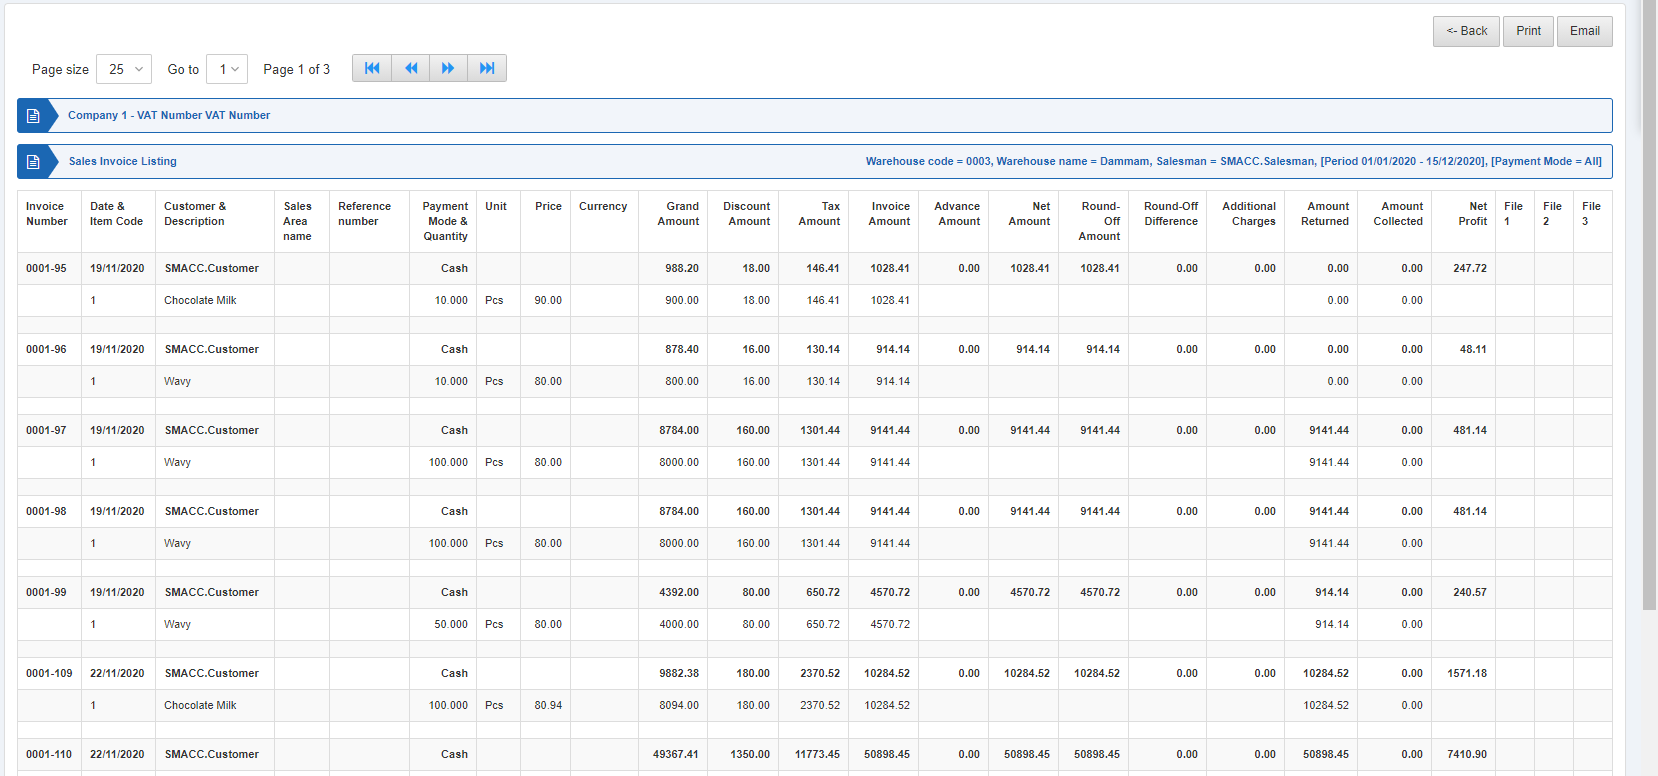
Click on the Show button to view the report.

Also, there are navigation buttons for the page view.

Page Size: You can adjust the number of entries per page.
Go to: You can go to the page number you want to view.

You can go back to the previous page or print or email the report.

