

In payments, you can add new payments based on different types like cash, cheque, deposit, and e-transfer. You can also update, delete, print, and view the payments.
Adding a New Payment in Cash Mode
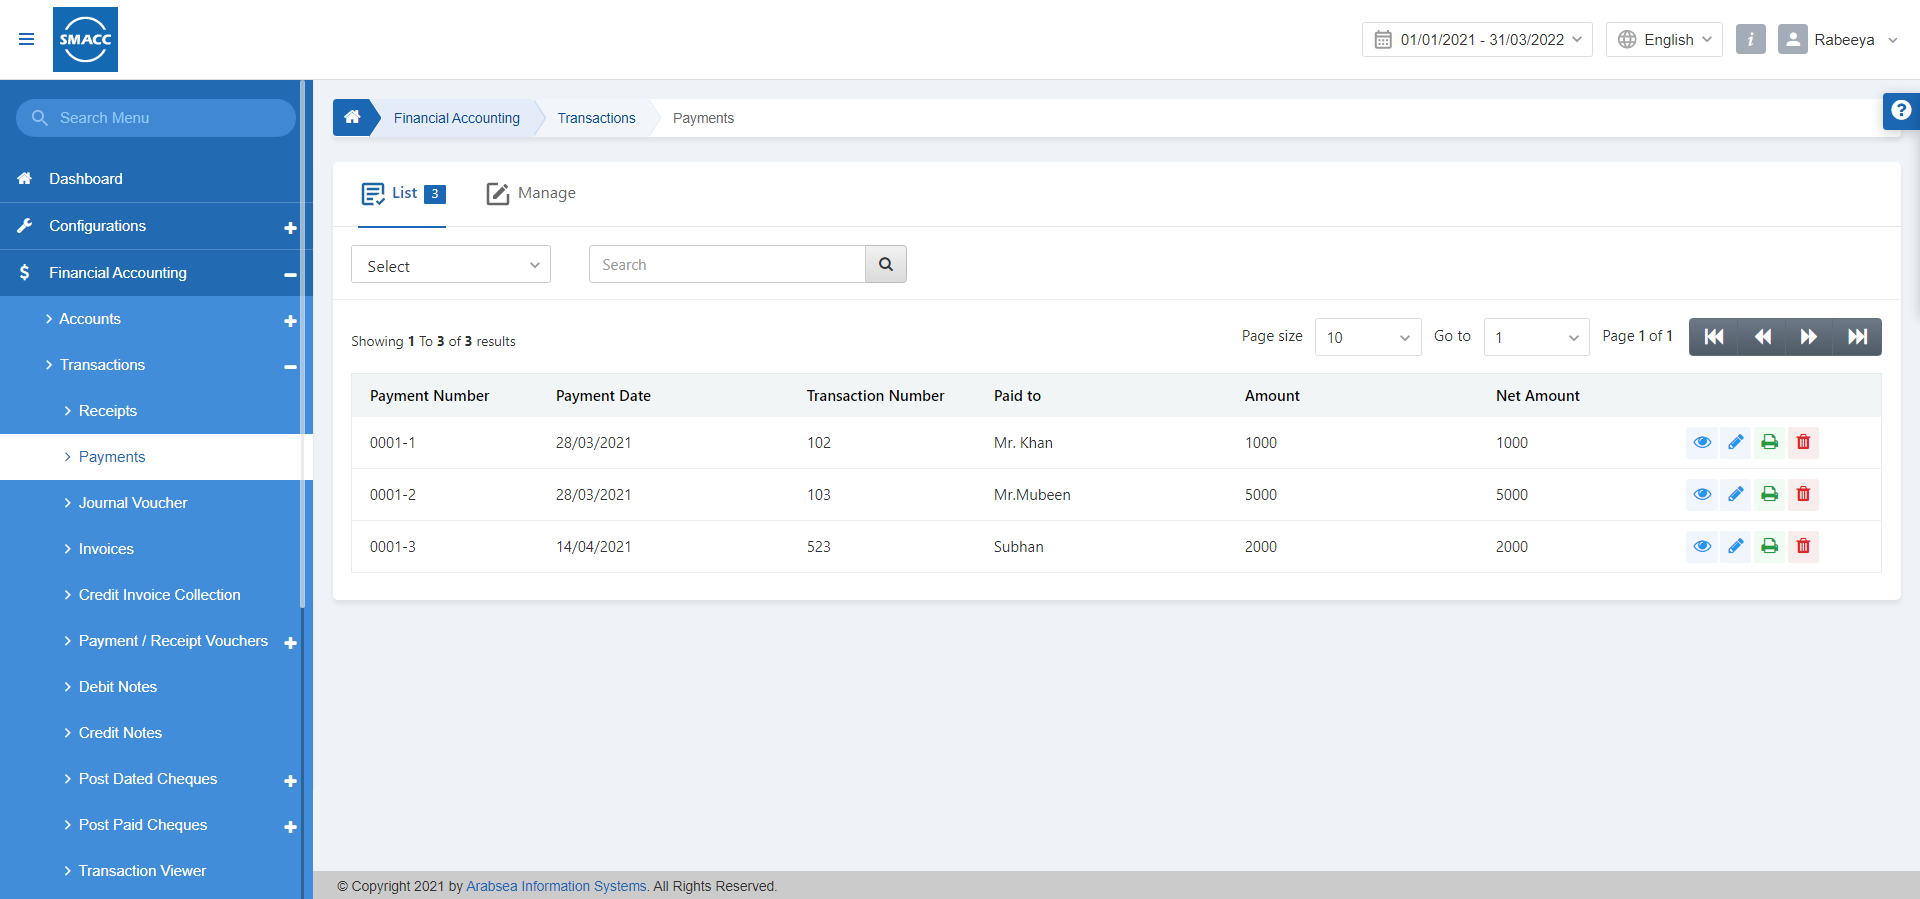
To add a new payment in cash mode, go to Financial Accounting > Transactions > Payments, the Payments page is displayed.
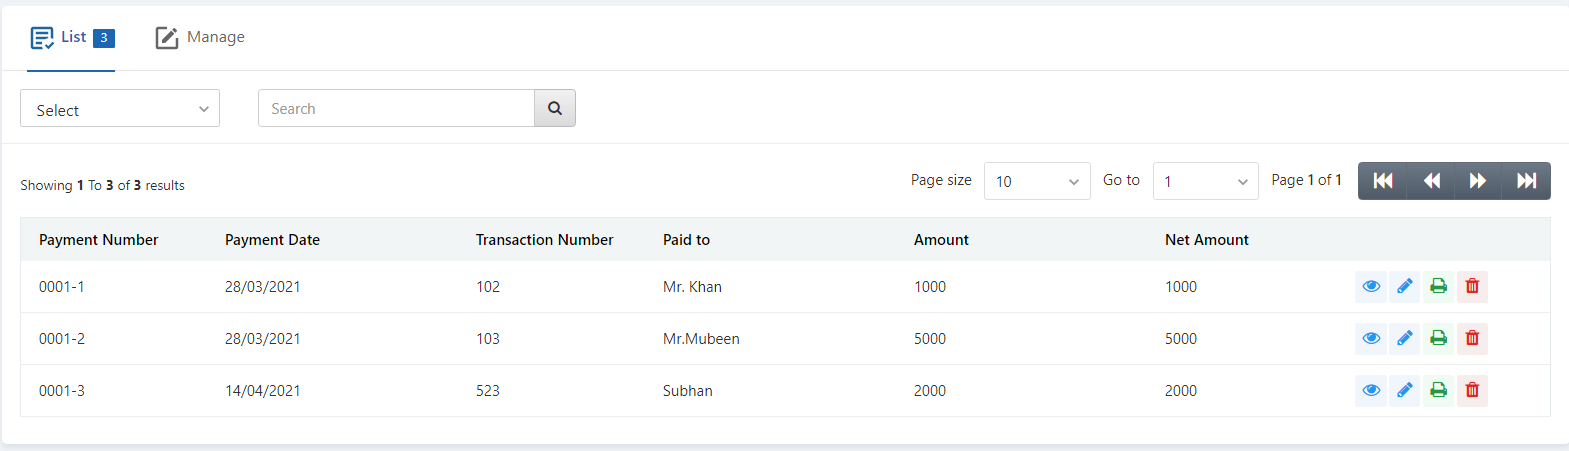
Click on the Manage button at the top of the page.
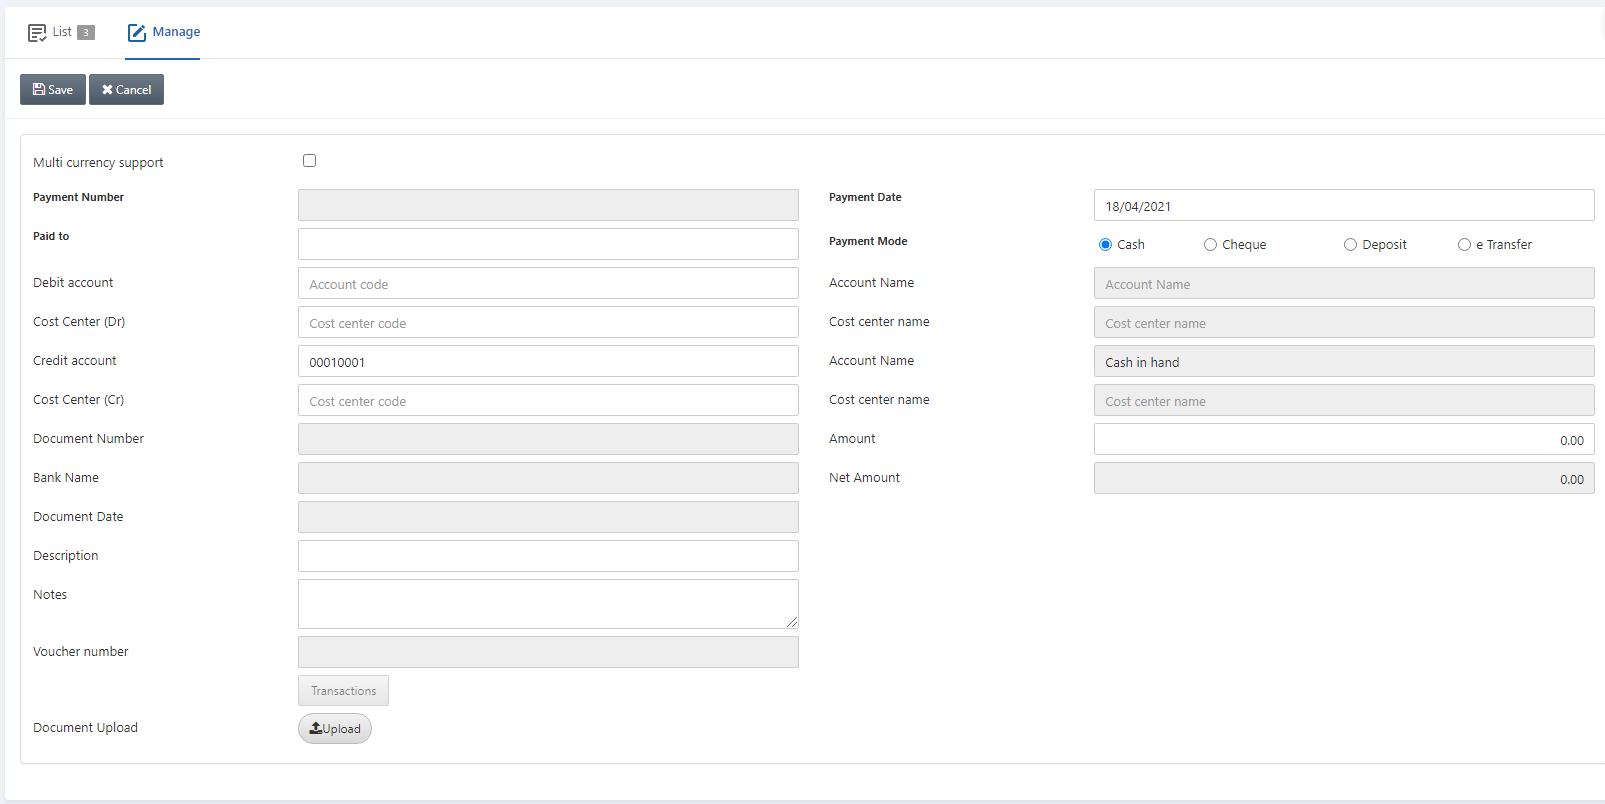
Multi currency support: This checkbox is checked to allow multiple currency support.
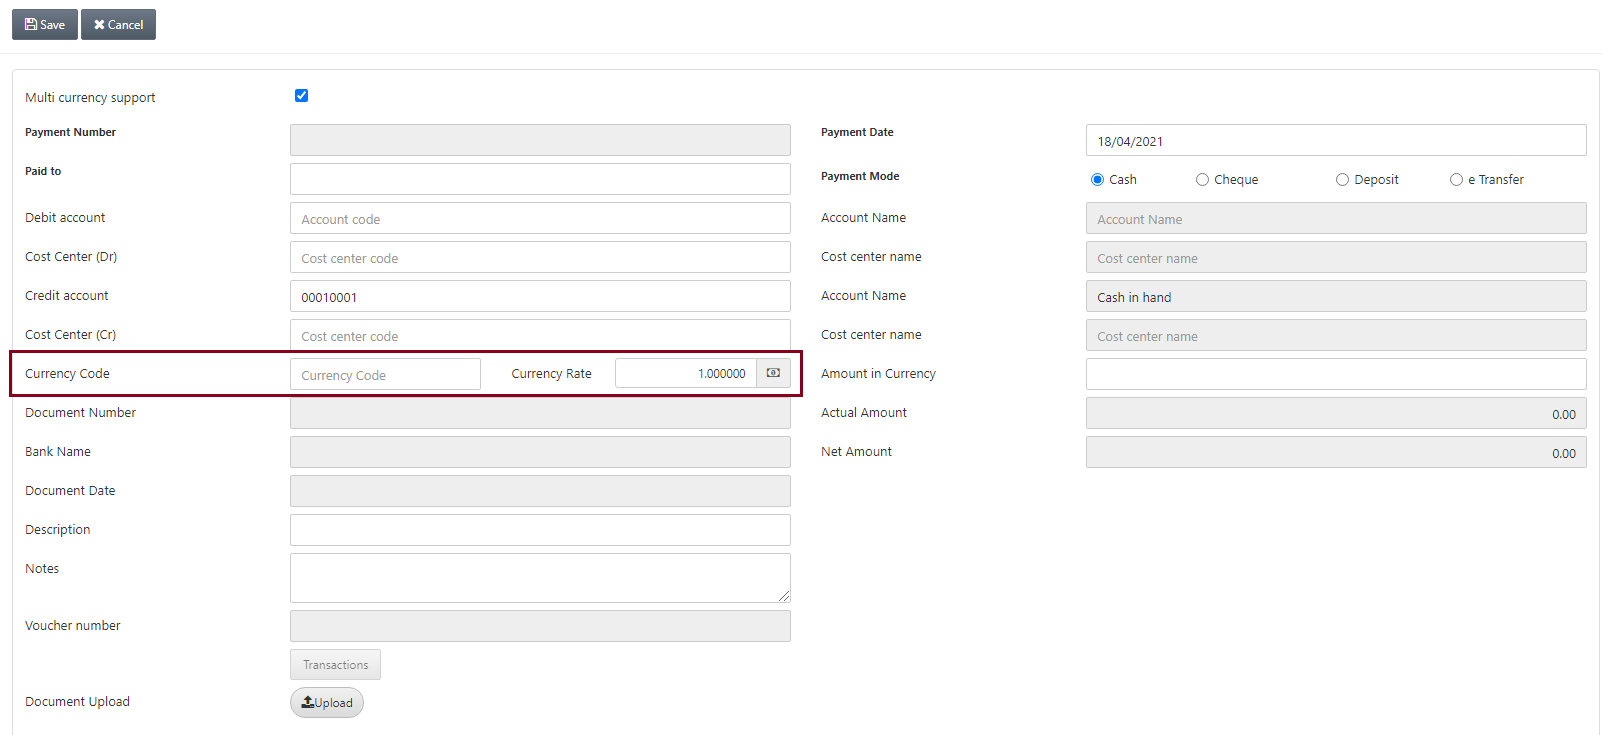
Payment Number: This number is auto-generated by the system.
Payment Date: Enter the date of payment. By default, the current date is displayed in this field. (Diazepam)
Paid To: Enter the name of the recipient of the payment.
Payment Mode: Select the Cash radio button.

Debit Account: Select the desired account.
Account Name: This field is auto-fetched by the system based on the debit account.
Cost Center (Dr): In case any cost center is linked with the account, this field is enabled, otherwise disabled like shown above.
Cost Center Name: This field is auto-fetched by the system based on the cost center.
Credit Account: Enter the credit account in which you want to transfer the cash received. In this case, cash in hand account is selected.
Cost Center (Cr): In case any cost center is linked with the account, this field is enabled, otherwise disabled like shown above. You can also manually enter the cost center.
Cost Center Name: This field is auto-fetched by the system based on the cost center.
![]()
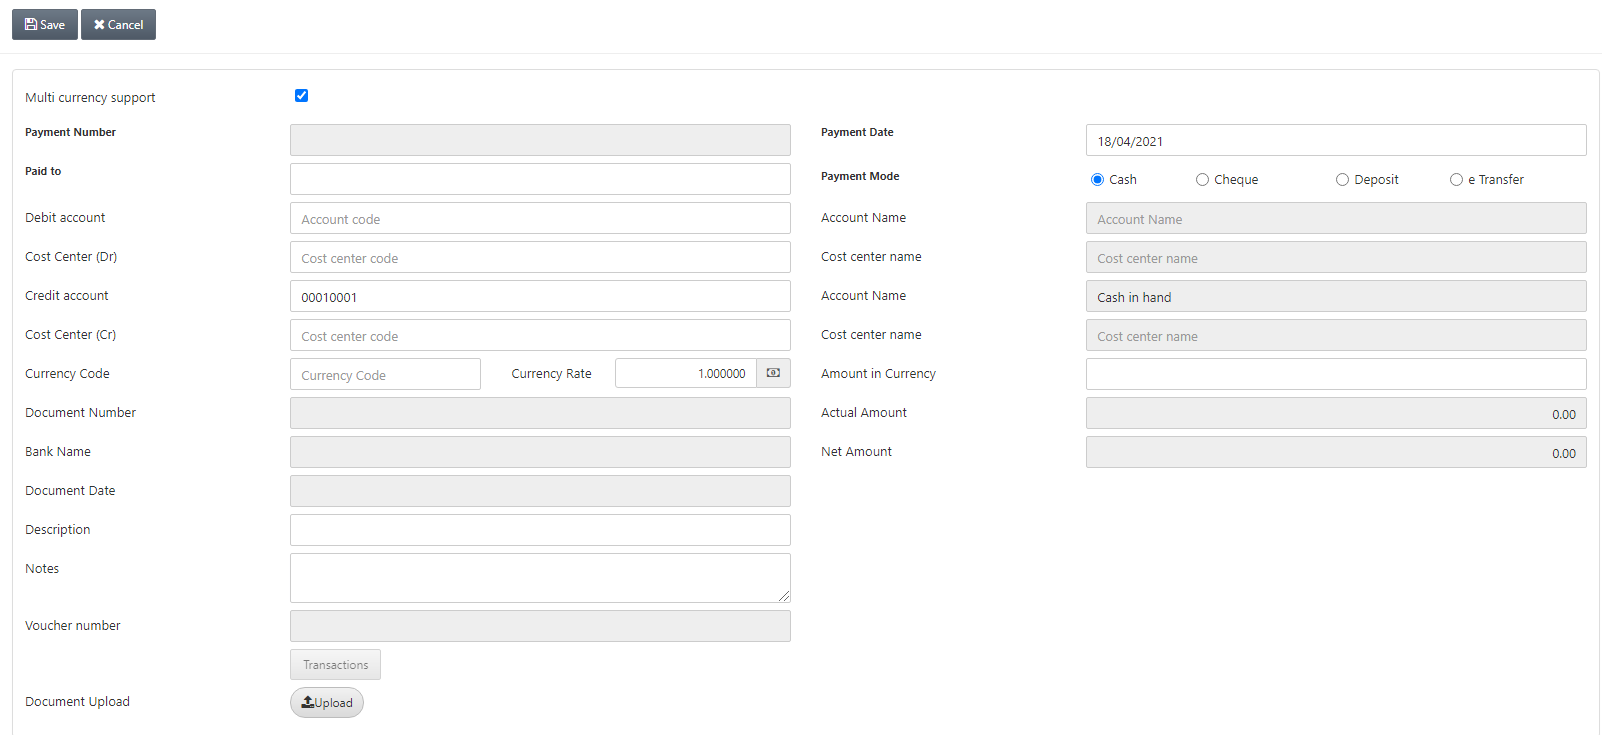
Currency Code: This field allows the selection of currency code from the drop-down list.
Currency Rate: This field is auto-fetched by the system based on the currency code.
Amount in Currency: Enter the amount in the selected currency.
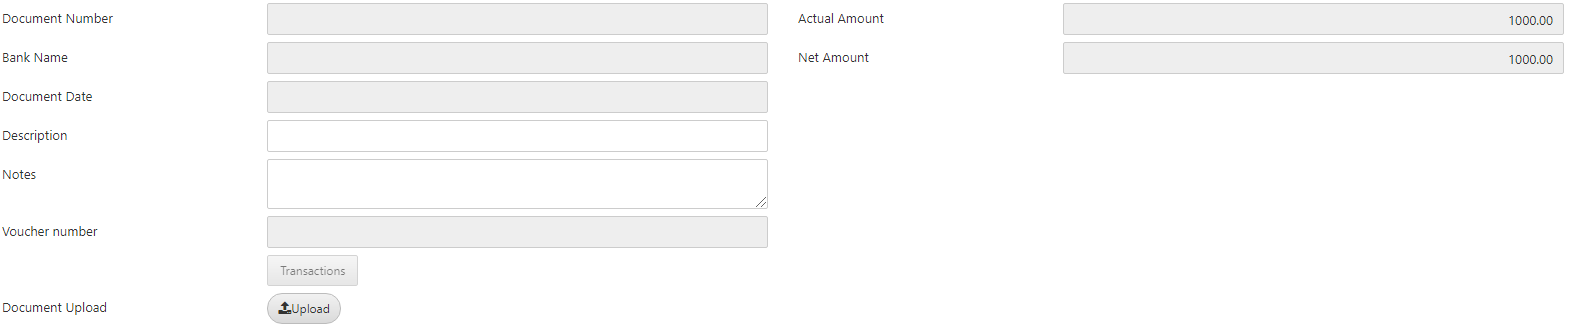
Description: Enter the description of the payment like some explanation of the subject.
Notes: Enter any relevant notes for the payment.
Note: The rest of the fields are disabled in this case.
Document Upload: Click on the Upload button.
![]()
You can upload any relevant files of images or scanned documents.
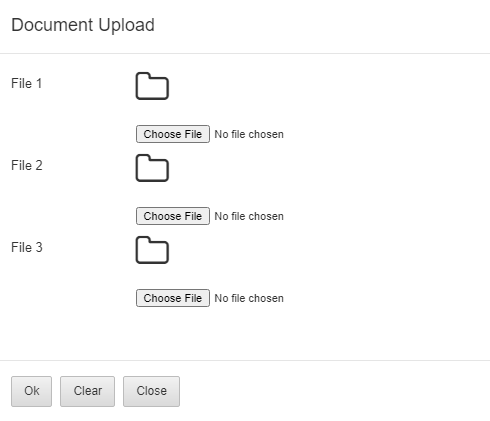
You can click on the Choose File button and click on the Ok button to insert the files.
Click on the Save button at the top of the page.
![]()

Adding a New Payment in Cheque Mode
To add a new payment in cheque mode, go to Financial Accounting > Transactions > Payments, the payments page is displayed.
Click on the Manage button at the top of the page.
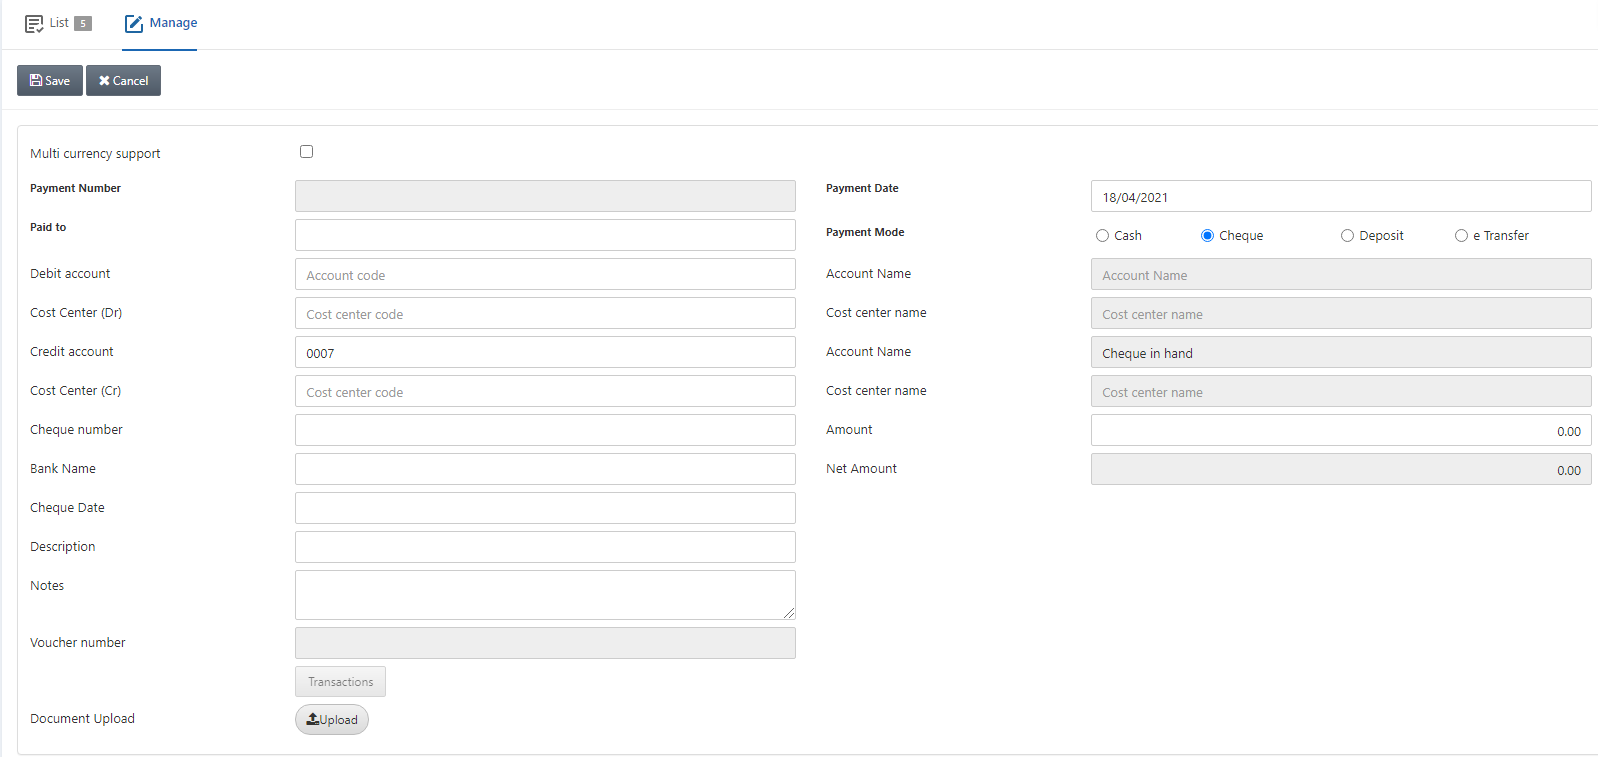
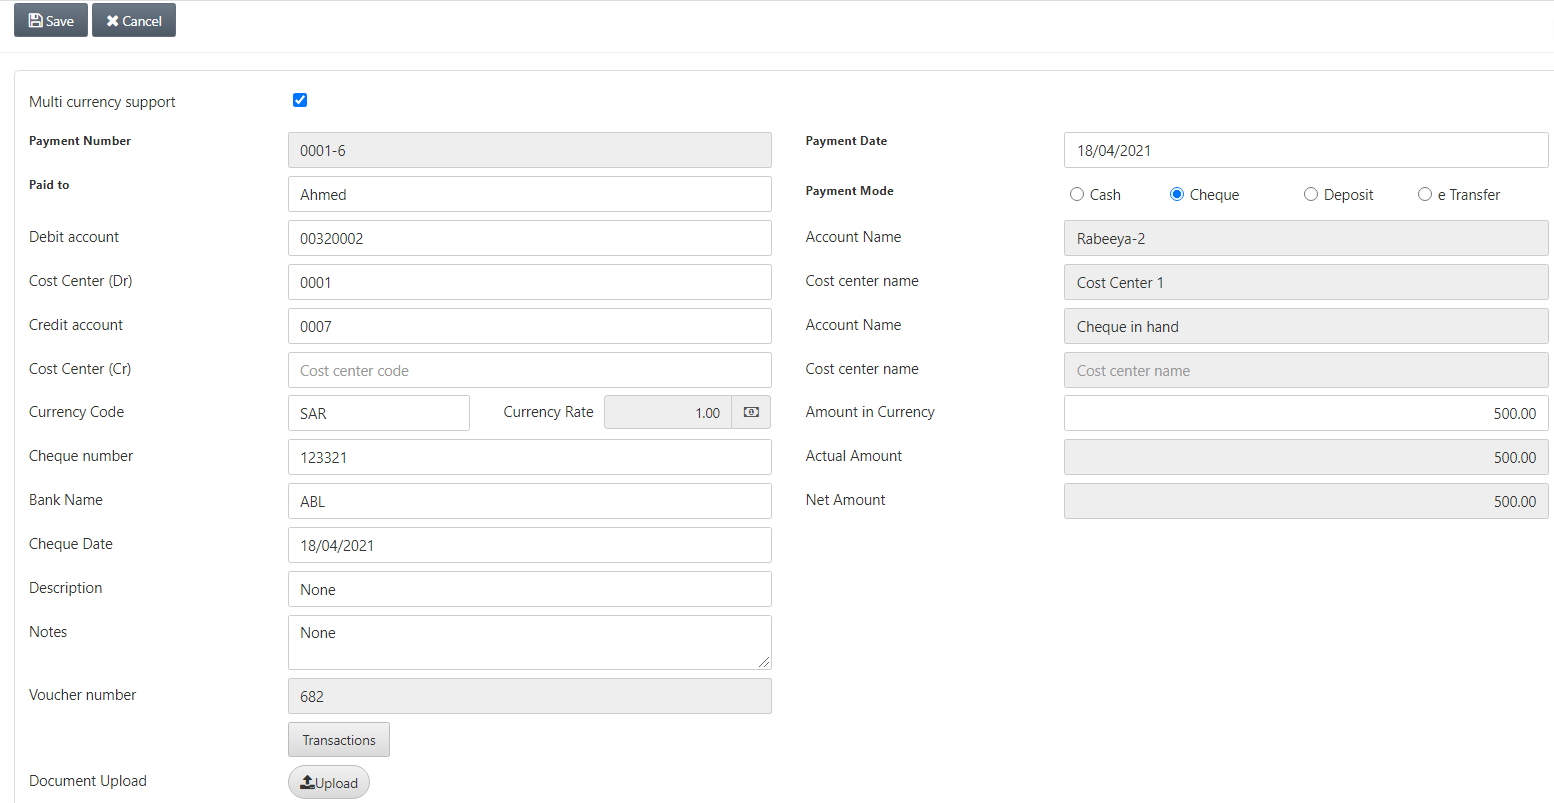
Multi currency support: This checkbox is checked to allow multiple currency support.
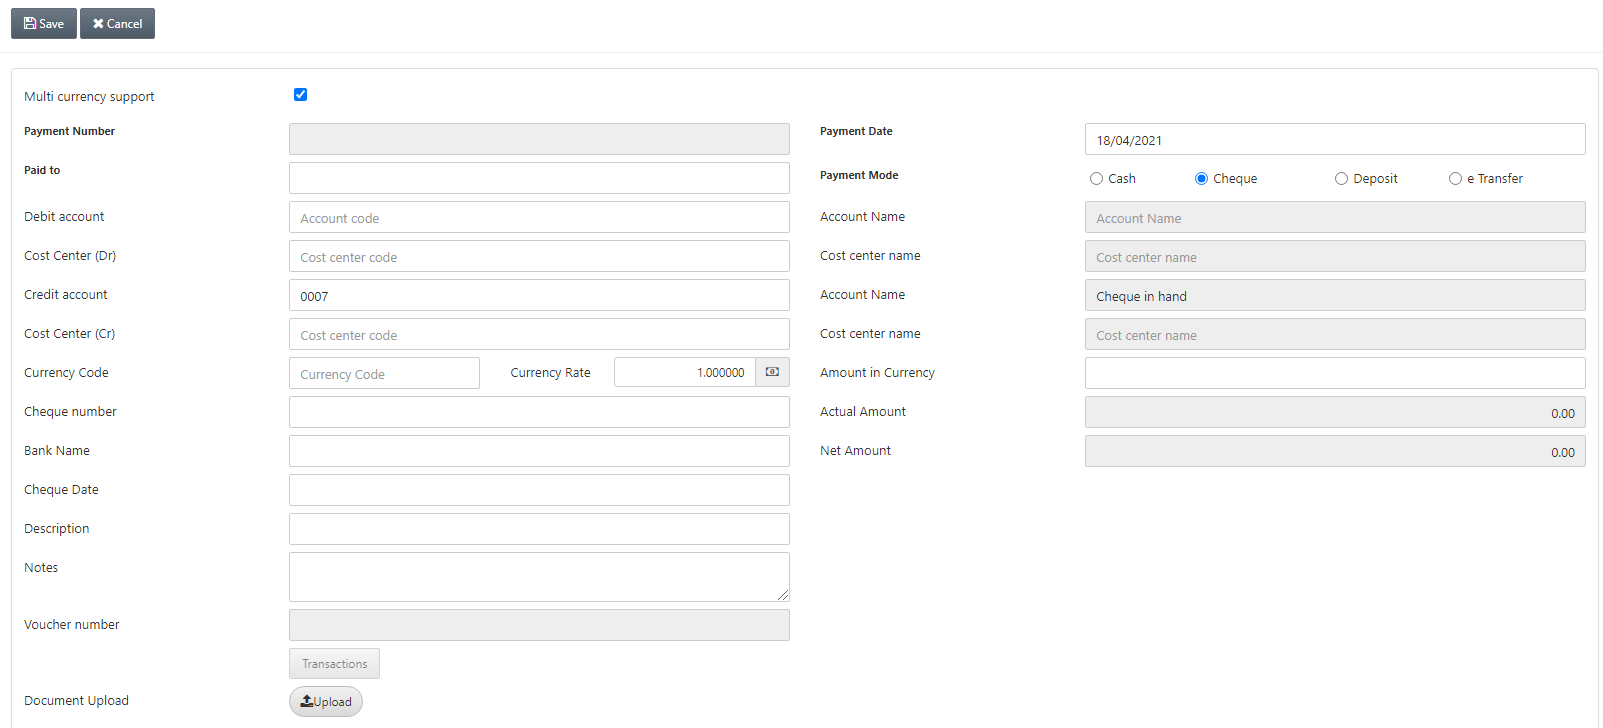
Payment Number: This number is auto-generated by the system.
Payment Date: Enter the date of payment. By default, the current date is displayed in this field.
Paid To: Enter the name of the recipient of the payment.
Payment Mode: Select the Cheque radio button.

Debit Account: Select the desired account.
Account Name: This field is auto-fetched by the system based on the debit account.
Cost Center (Dr): In case any cost center is linked with the account, this field is enabled, otherwise disabled like shown above.
Cost Center Name: This field is auto-fetched by the system based on the cost center.
Credit Account: Enter the credit account in which you want to transfer the cash received. In this case, the cheque in hand account is selected.
Cost Center (Cr): In case any cost center is linked with the account, this field is enabled, otherwise disabled like shown above. You can also manually enter the cost center.
Cost Center Name: This field is auto-fetched by the system based on the cost center.
![]()
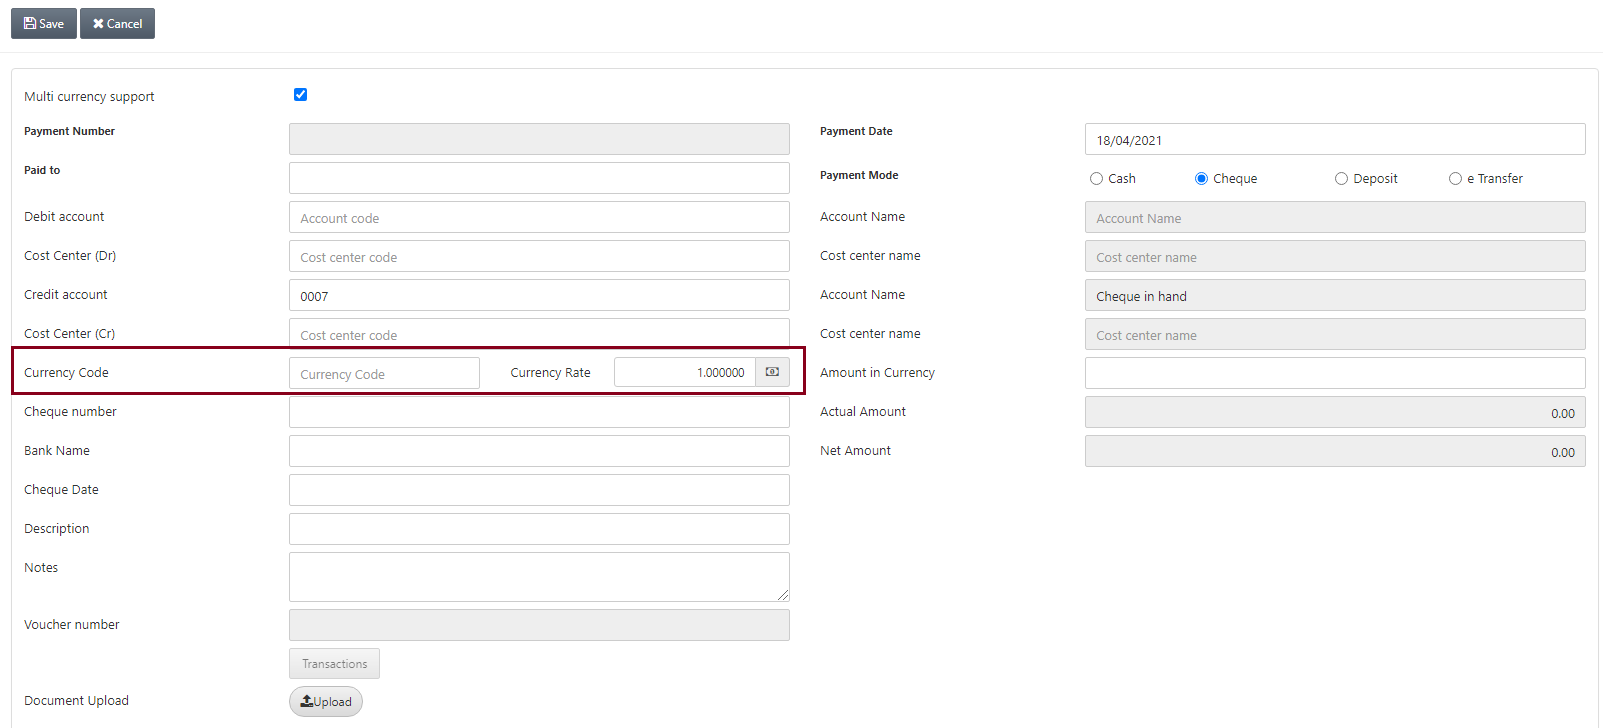
Currency Code: This field allows the selection of currency code from the drop-down list.
Currency Rate: This field is auto-fetched by the system based on the currency code.
Amount in Currency: Enter the amount in the selected currency.
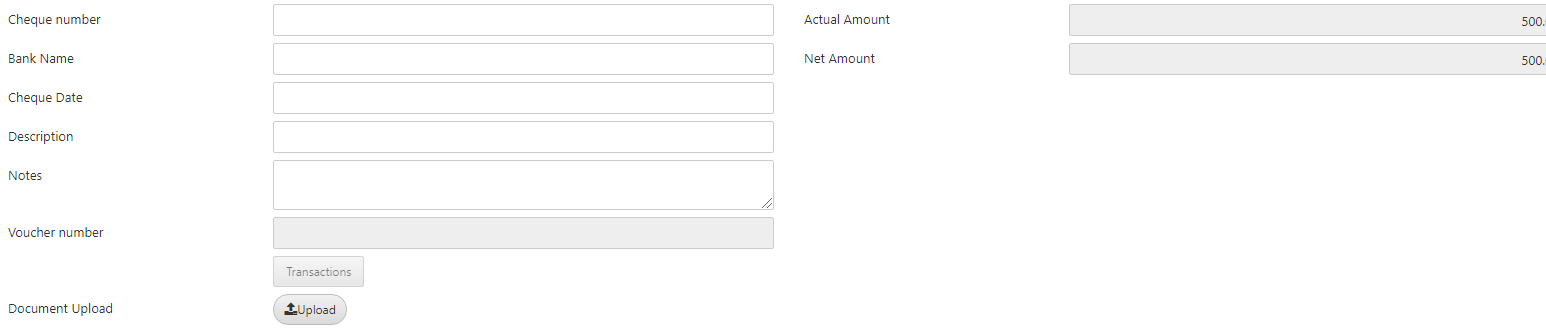
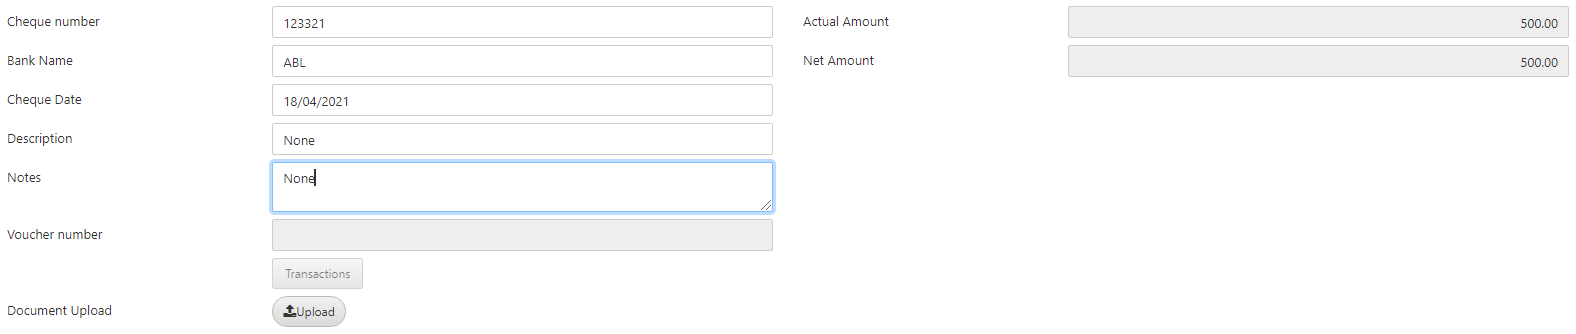
Cheque Number: Enter the cheque number against which this payment is made.
Bank Name: Enter the bank name against which this payment is made.
Cheque Date: Enter the cheque date.
Description: Enter the description of the payment like some explanation of the subject.
Notes: Enter any relevant notes for the payment.
Document Upload: Click on the Upload button.
![]()
You can upload any relevant files of images or scanned documents.
You can click on the Choose File button and click on the Ok button to insert the files.
Click on the Save button at the top of the page.
![]()
Adding a New Payment in Deposit Mode
To add a new payment in deposit mode, go to Financial Accounting > Transactions > Payments, the payments page is displayed.
Click on the Manage button at the top of the page.
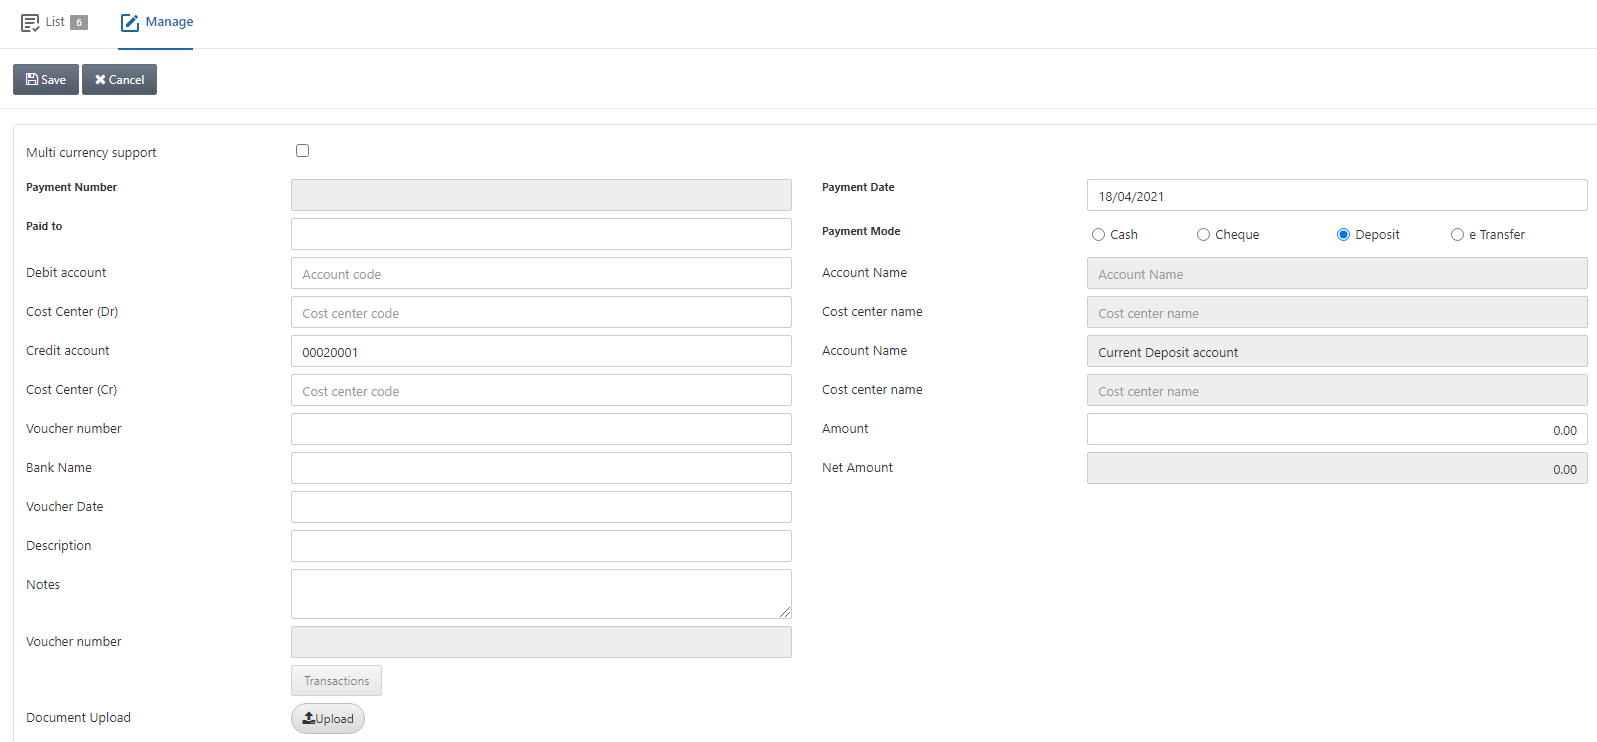
Multi currency support: This checkbox is checked to allow multiple currency support.
Payment Number: This number is auto-generated by the system.
Payment Date: Enter the date of payment. By default, the current date is displayed in this field.
Paid To: Enter the name of the recipient of the payment.
Payment Mode: Select the Deposit radio button.

Debit Account: Select the desired account.
Account Name: This field is auto-fetched by the system based on the debit account.
Cost Center (Dr): In case any cost center is linked with the account, this field is enabled, otherwise disabled like shown above.
Cost Center Name: This field is auto-fetched by the system based on the cost center.
Credit Account: Enter the credit account in which you want to transfer the cash received. In this case, the current deposit account is selected.
Cost Center (Cr): In case any cost center is linked with the account, this field is enabled, otherwise disabled like shown above. You can also manually enter the cost center.
Cost Center Name: This field is auto-fetched by the system based on the cost center.
![]()
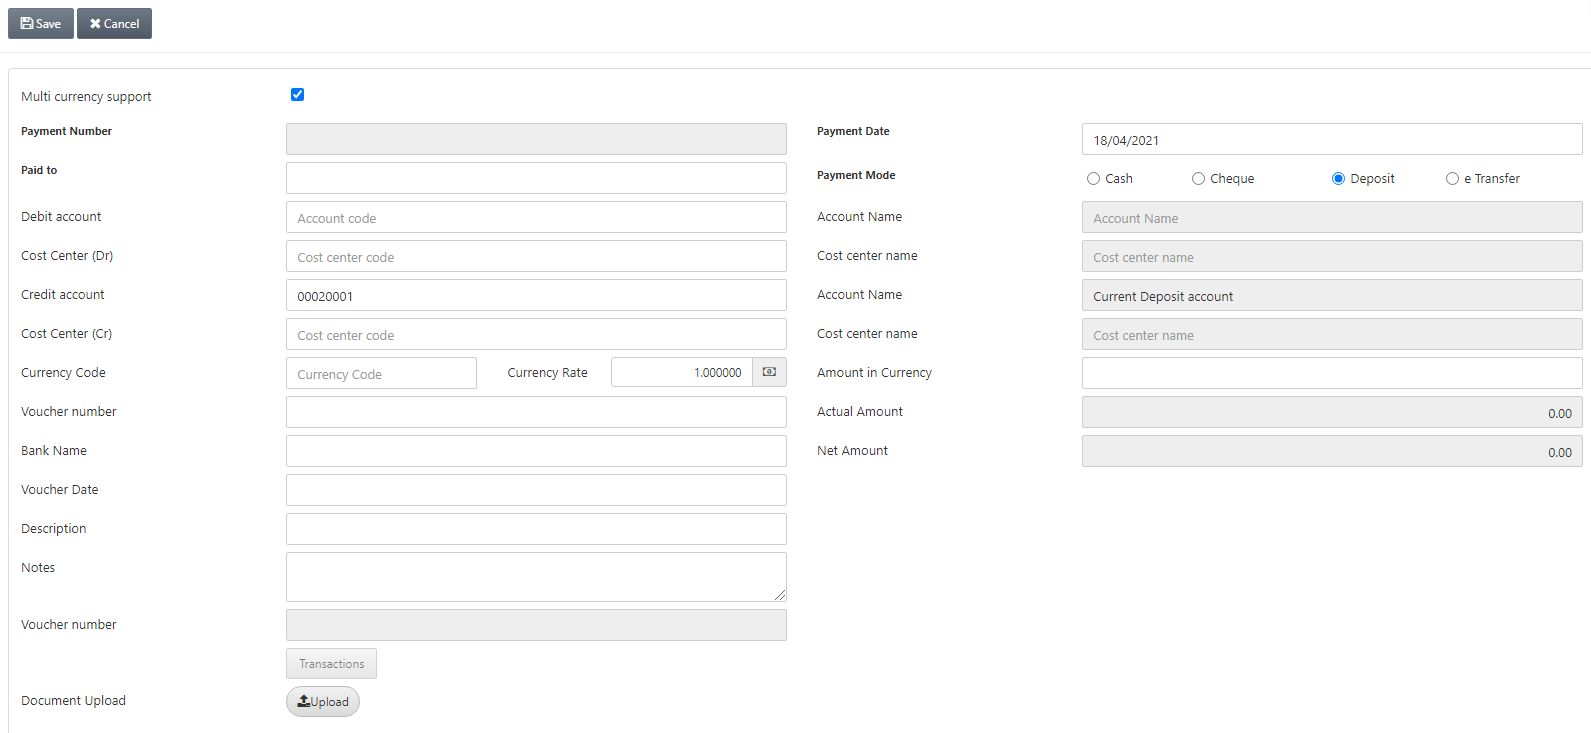
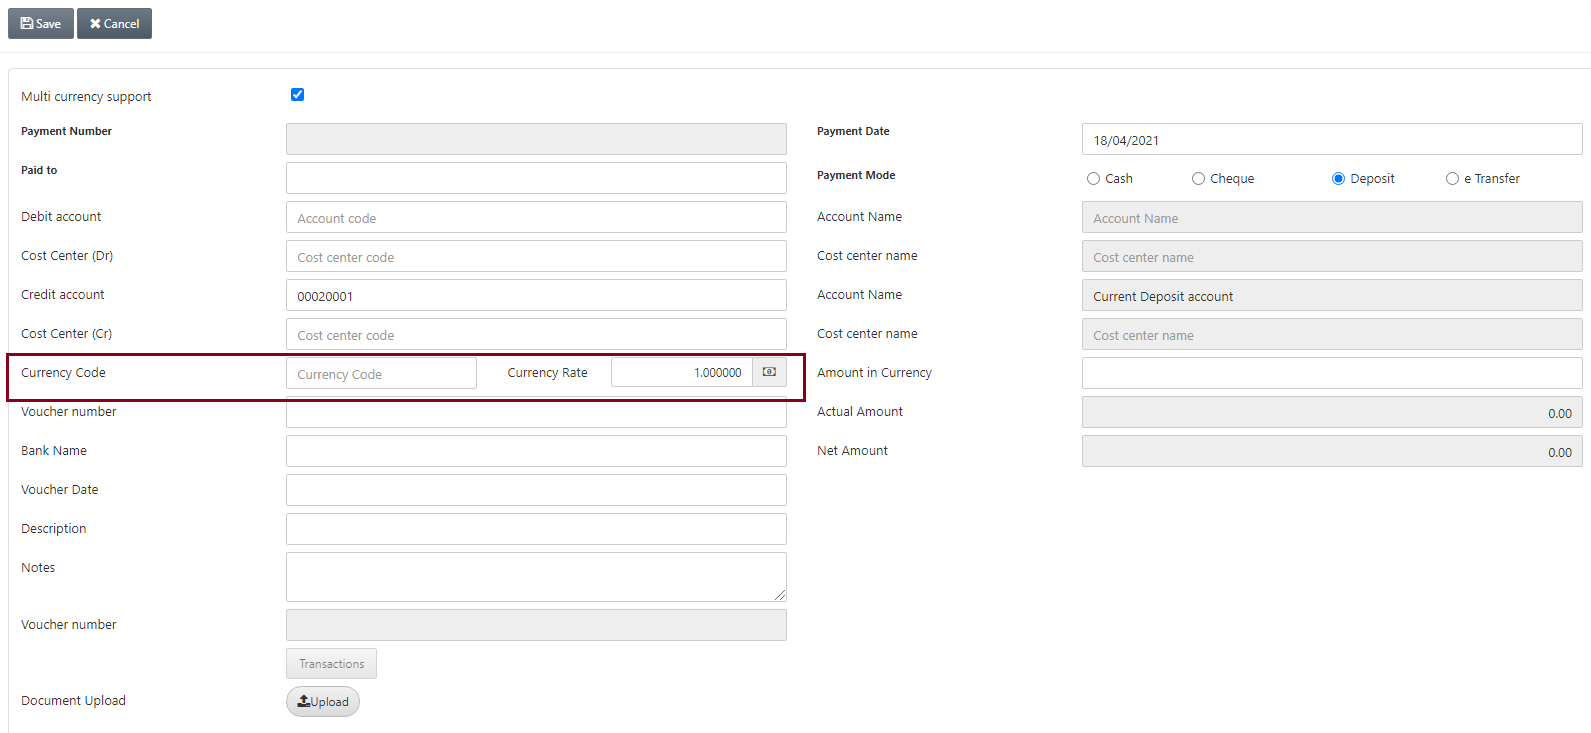
Currency Code: This field allows the selection of currency code from the drop-down list.
Currency Rate: This field is auto-fetched by the system based on the currency code.
Amount in Currency: Enter the amount in the selected currency.

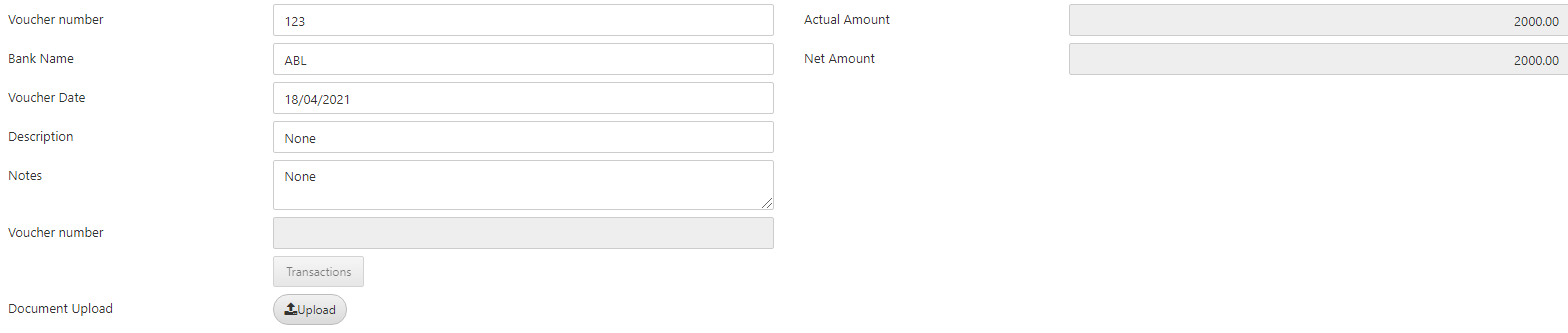
Voucher Number: Enter the voucher number against which this payment is made.
Bank Name: Enter the bank name against which this payment is made.
Voucher Date: Enter the voucher date.
Description: Enter the description of the payment like some explanation of the subject.
Notes: Enter any relevant notes for the payment.
Document Upload: Click on the Upload button.
![]()
You can click on the Choose File button and click on the Ok button to insert the files.
Click on the Save button at the top of the page.
![]()
Adding a New Payment in e Transfer Mode
To add a new payment in e Transfer mode, go to Financial Accounting > Transactions > Payments, the payments page is displayed.

Click on the Manage button at the top of the page.

Multi currency support: This checkbox is checked to allow multiple currency support.
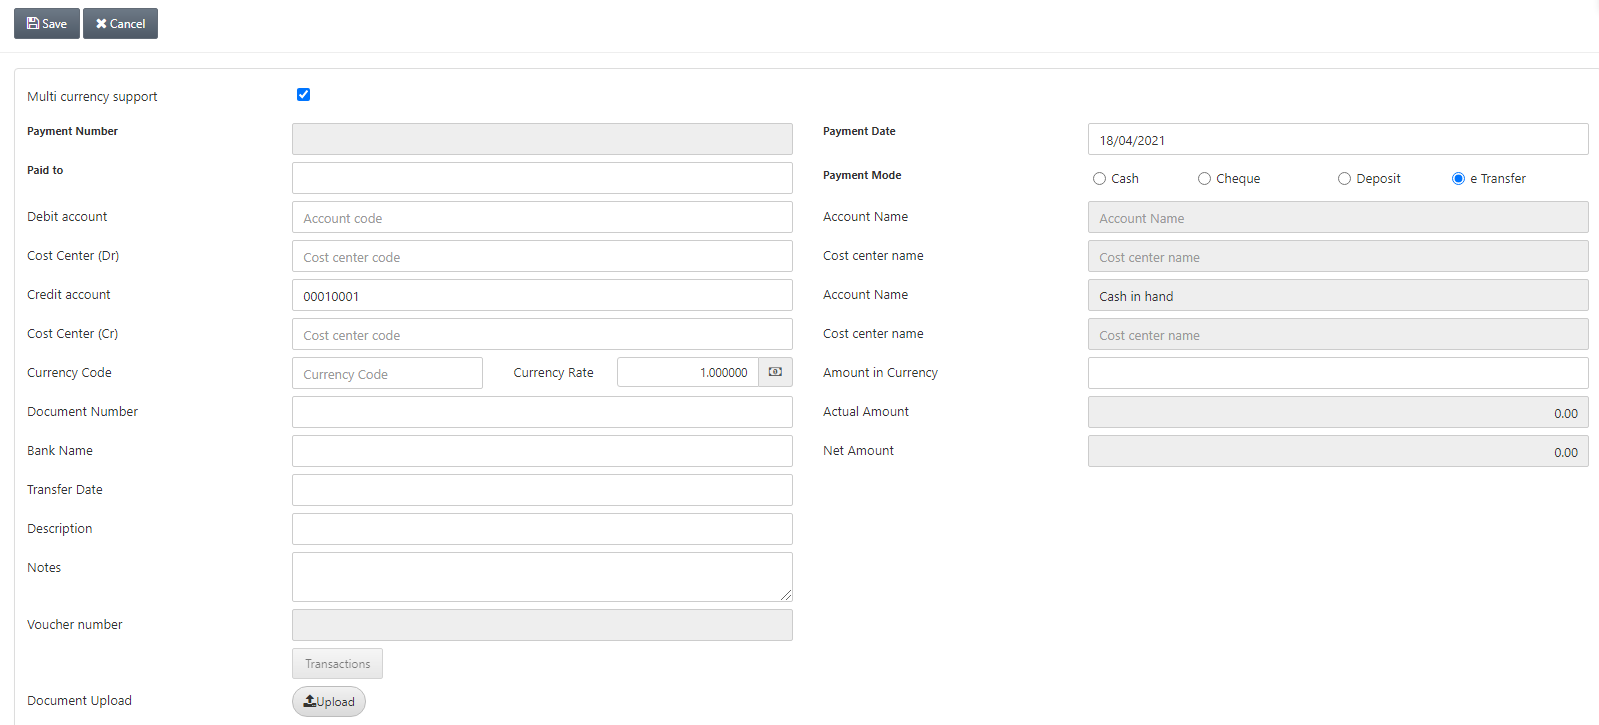
Payment Number: This number is auto-generated by the system.
Payment Date: Enter the date of payment. By default, the current date is displayed in this field.
Paid To: Enter the name of the recipient of the payment.
Payment Mode: Select the e Transfer radio button.

Debit Account: Select the desired account.
Account Name: This field is auto-fetched by the system based on the debit account.
Cost Center (Dr): In case any cost center is linked with the account, this field is enabled, otherwise disabled like shown above.
Cost Center Name: This field is auto-fetched by the system based on the cost center.
Credit Account: Enter the credit account in which you want to transfer the cash received. In this case, cash in hand account is selected.
Cost Center (Cr): In case any cost center is linked with the account, this field is enabled, otherwise disabled like shown above. You can also manually enter the cost center.
Cost Center Name: This field is auto-fetched by the system based on the cost center.
![]()
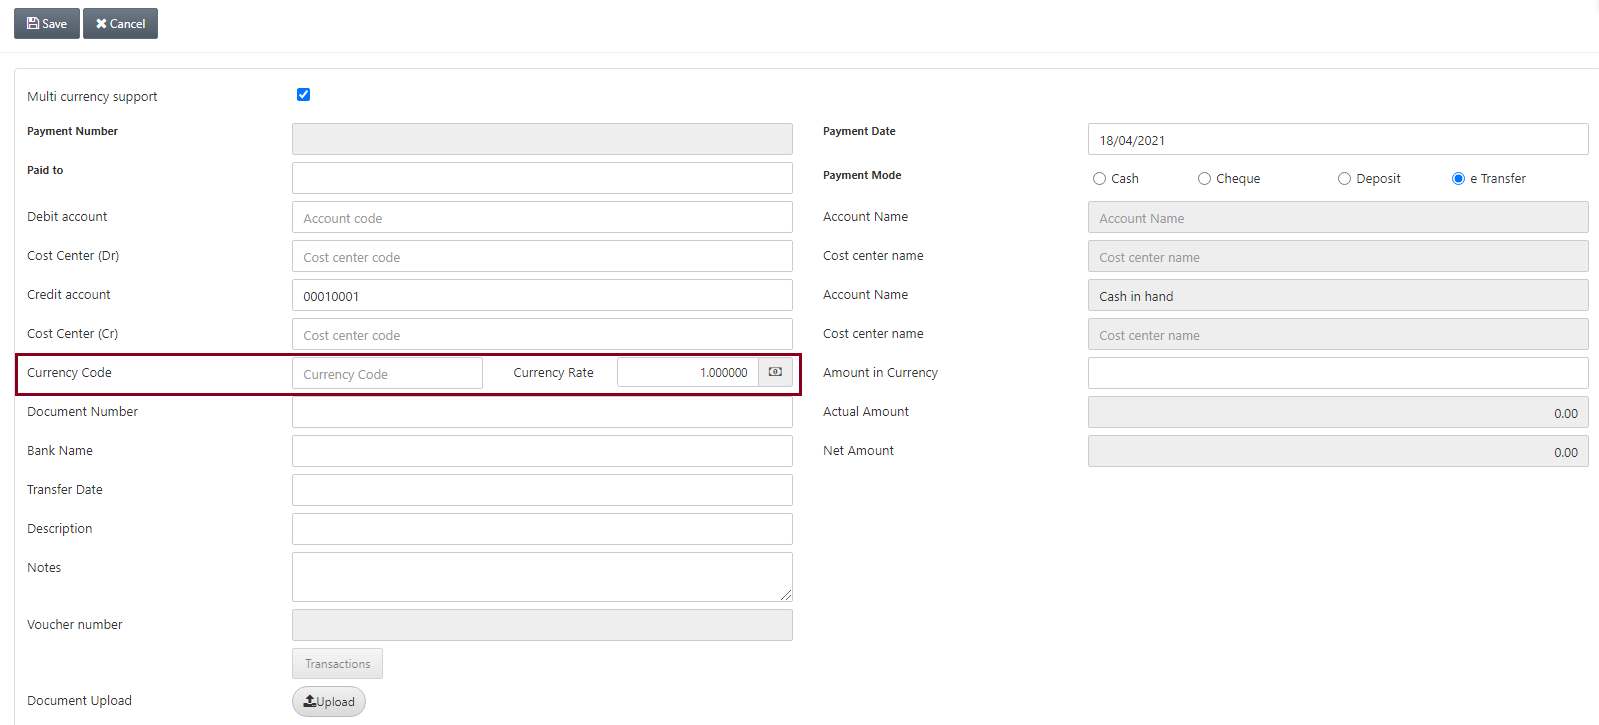
Currency Code: This field allows the selection of currency code from the drop-down list.
Currency Rate: This field is auto-fetched by the system based on the currency code.
Amount in Currency: Enter the amount in the selected currency.
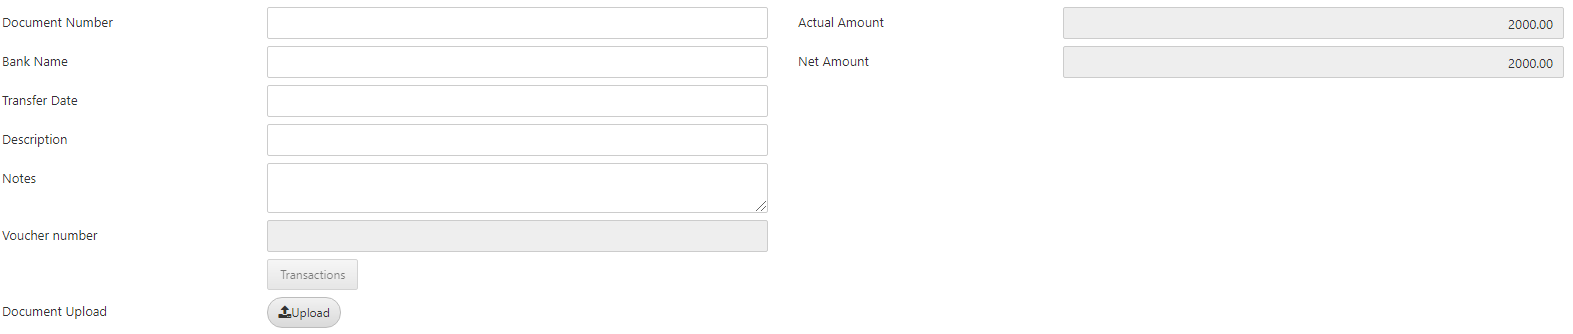
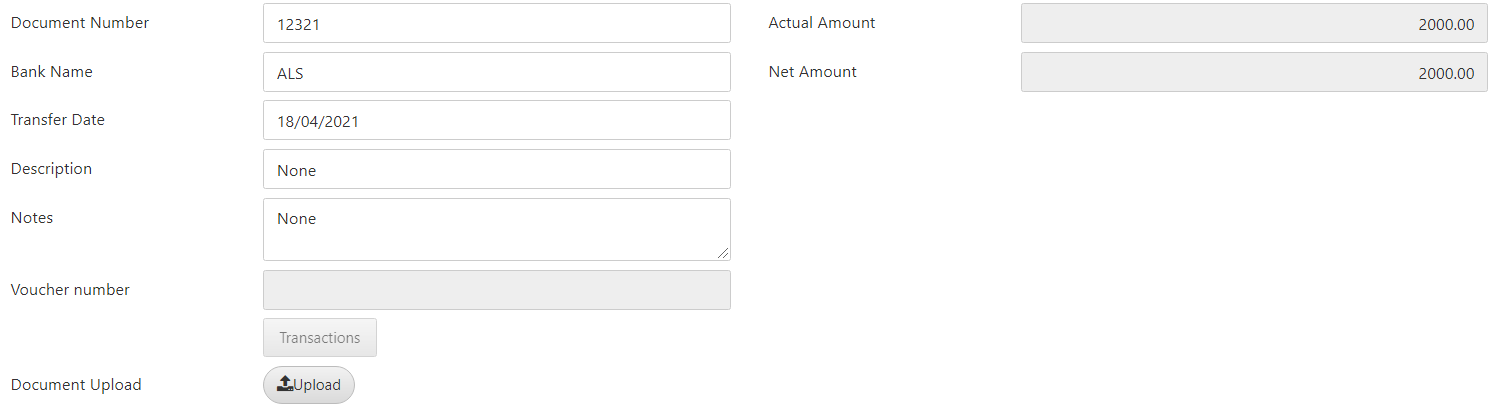
Document Number: Enter the document number against which this payment is made.
Bank Name: Enter the bank name against which this payment is made.
Document Date: Enter the document date.
Description: Enter the description of the payment like some explanation of the subject.
Notes: Enter any relevant notes for the payment.
Document Upload: Click on the Upload button.
![]()
You can click on the Choose File button and click on the Ok button to insert the files.
Click on the Save button at the top of the page.
![]()

Updating the Payment
To update the payment, go to Financial Accounting > Transactions > Payments, the payments page is displayed.
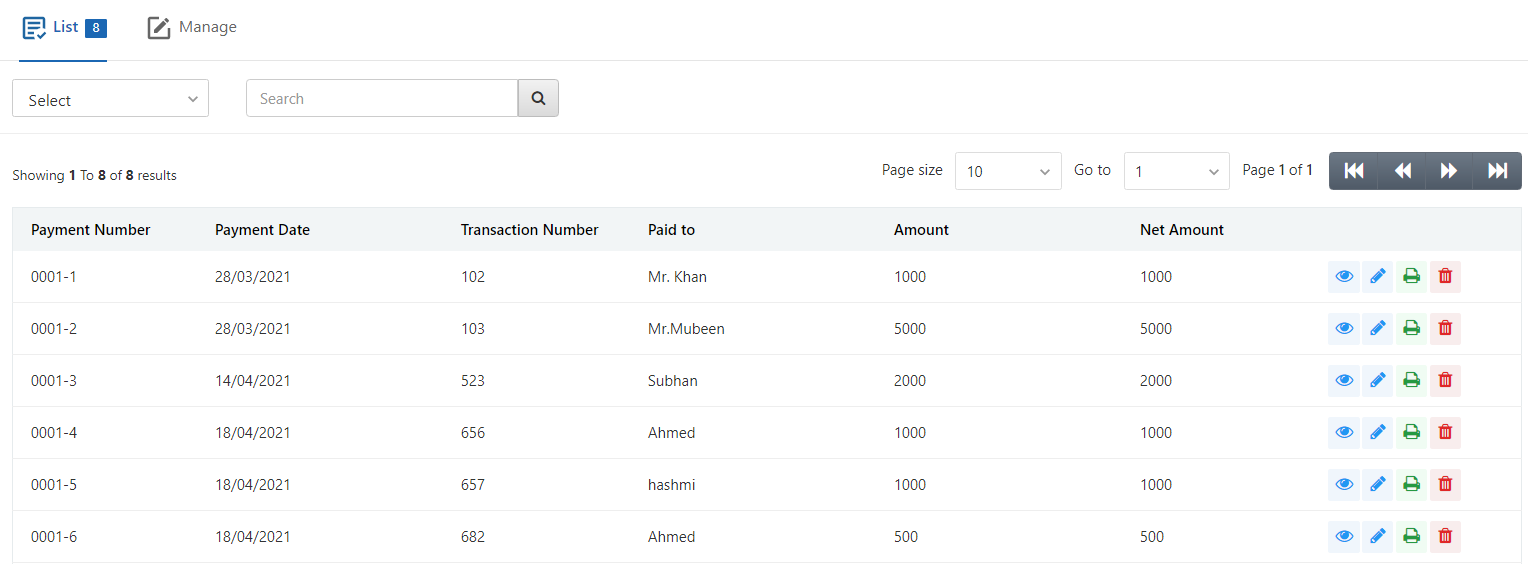
Select the desired row of payment.
There are four icons Load, Edit, Print, and Delete in front of each row:
![]()
Click on the Edit (blue pencil) icon to update:
Deleting the Payment
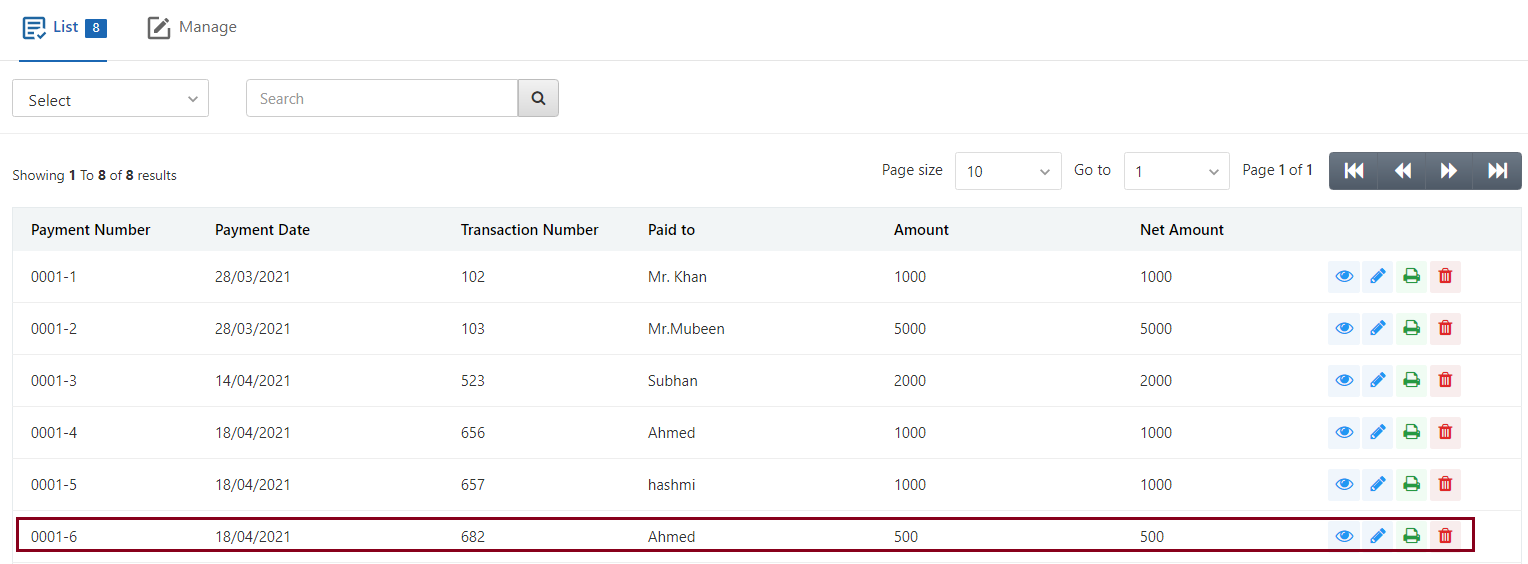
To delete the payment, go to Financial Accounting > Transactions > Payments, the payments page is displayed.
Select the desired row of payment.
There are four icons Load, Edit, Print, and Delete in front of each row:
![]()
Click on the Delete (red) icon to delete:
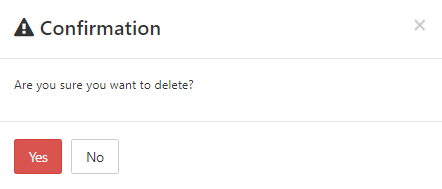
Click on the Yes button to confirm the deletion.
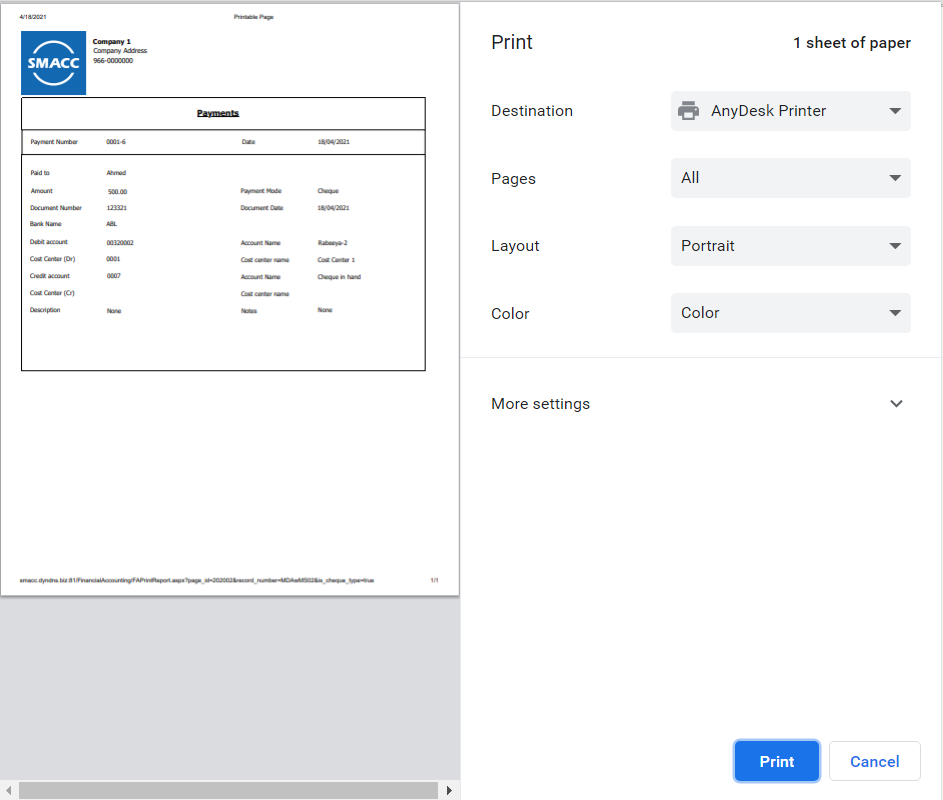
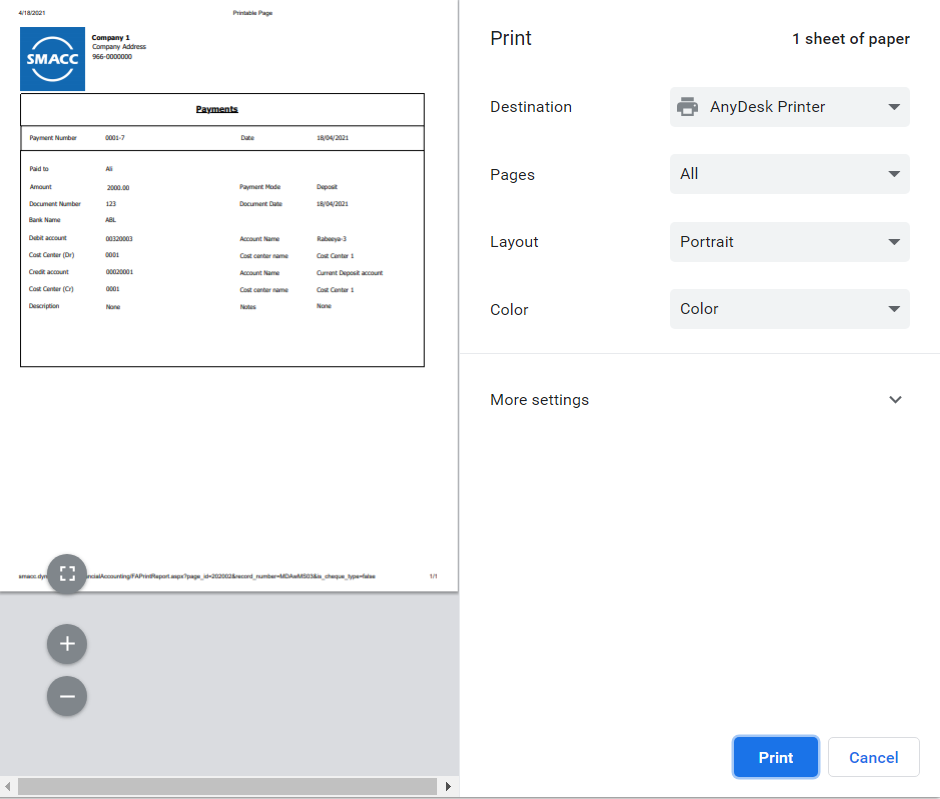
Printing the Payment
To print the payment, go to Financial Accounting > Transactions > Payments, the payments page is displayed.
Select the desired row of payment.
There are four icons Load, Edit, Print, and Delete in front of each row:
![]()
Click on the Print (green) icon to print:
