In the asset transaction, you can add a new asset transaction. You can also update, delete and print the required information.
Adding a New Asset Transaction for New Purchase
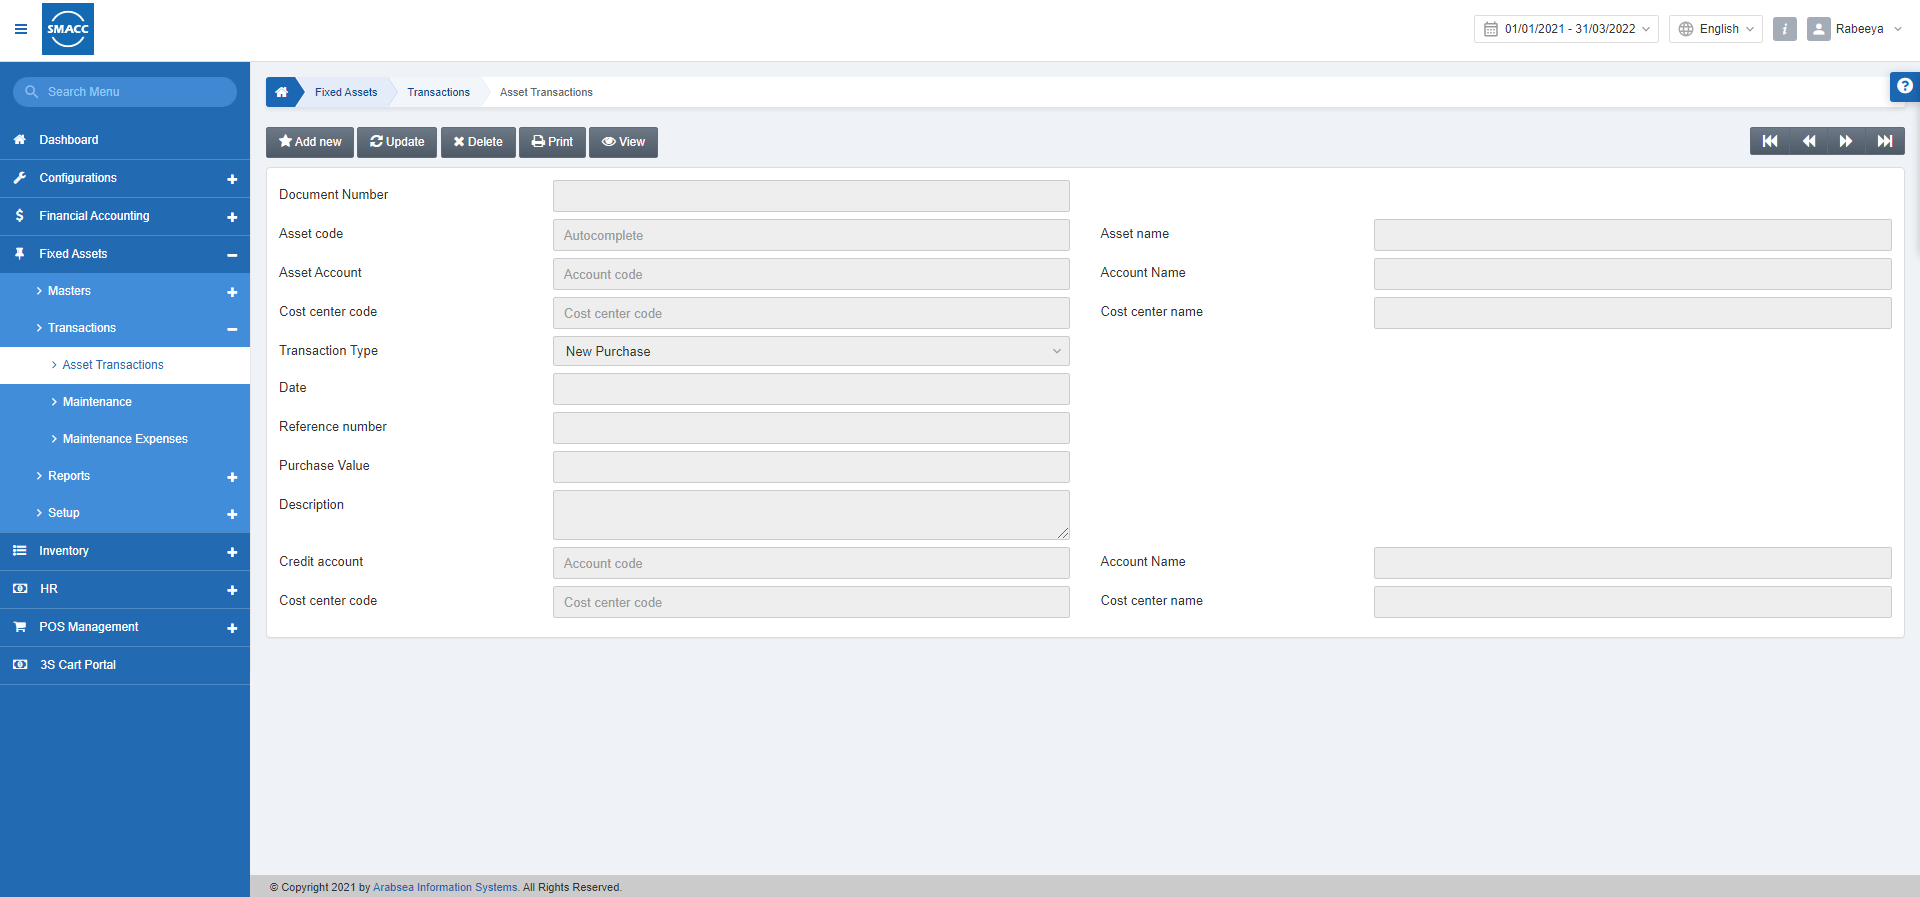
To add a new asset transaction, go to Fixed Assets > Transactions > Asset Transactions, the asset transactions page is displayed.

Click on the Add new button at the top of the page.

Document Number: This field is auto-generated by the system.
Asset Code: Select the asset you want to purchase.
Asset Name: This field is auto-fetched by the system based on the asset code.
Asset Account: This field is auto-fetched by the system based on the asset code.
Account Name: This field is auto-fetched by the system based on the asset account.
Cost Center Code: This field is either auto-fetched by the system or manually entered.
Cost Center Name: This field is auto-fetched by the system based on the Cost Center Code.

Transaction Type: Select the New Purchase.
Date: Enter the date of purchase. By default, the current date is selected.
Reference number: Enter a unique reference number.
Purchase Value: Enter the purchase amount of the asset.
Description: Enter the detail of the asset purchase.
Credit Account: Enter the credit account (this is the account of the vendor of the asset)
Account Name: This field is auto-fetched by the system based on the credit account.
Cost Center Code: This field is either auto-fetched by the system or manually entered.
Cost Center Name: This field is auto-fetched by the system based on the Cost Center Code.
Click on the Save button to save the information.
“Insertion Successful” message is shown at the top of the page.
Adding a New Asset Transaction for Opening Value
To add a new asset transaction, go to Fixed Assets > Transactions > Asset Transactions, the asset transactions page is displayed.

Click on the Add new button at the top of the page.

Document Number: This field is auto-generated by the system.
Asset Code: Select the asset you want to purchase.
Asset Name: This field is auto-fetched by the system based on the asset code.
Asset Account: This field is auto-fetched by the system based on the asset code.
Account Name: This field is auto-fetched by the system based on the asset account.
Cost Center Code: This field is either auto-fetched by the system or manually entered.
Cost Center Name: This field is auto-fetched by the system based on the Cost Center Code.
Transaction Type: Select the Opening Value.
Note: Opening value is the case when you have any asset coming into your system with an initial value or amount.
Date: This date is selected by default.
Opening Book Value: Enter the initial amount (opening value) of the asset.
Purchase Date: This field sets the date of purchase.
Purchase Value: Enter the purchase value or amount at the time of purchase of the asset.

Click on the Save button to save the information.
Adding a New Asset Transaction for Sold Out
To add a new asset transaction, go to Fixed Assets > Transactions > Asset Transactions, the asset transactions page is displayed.

Click on the Add new button at the top of the page.
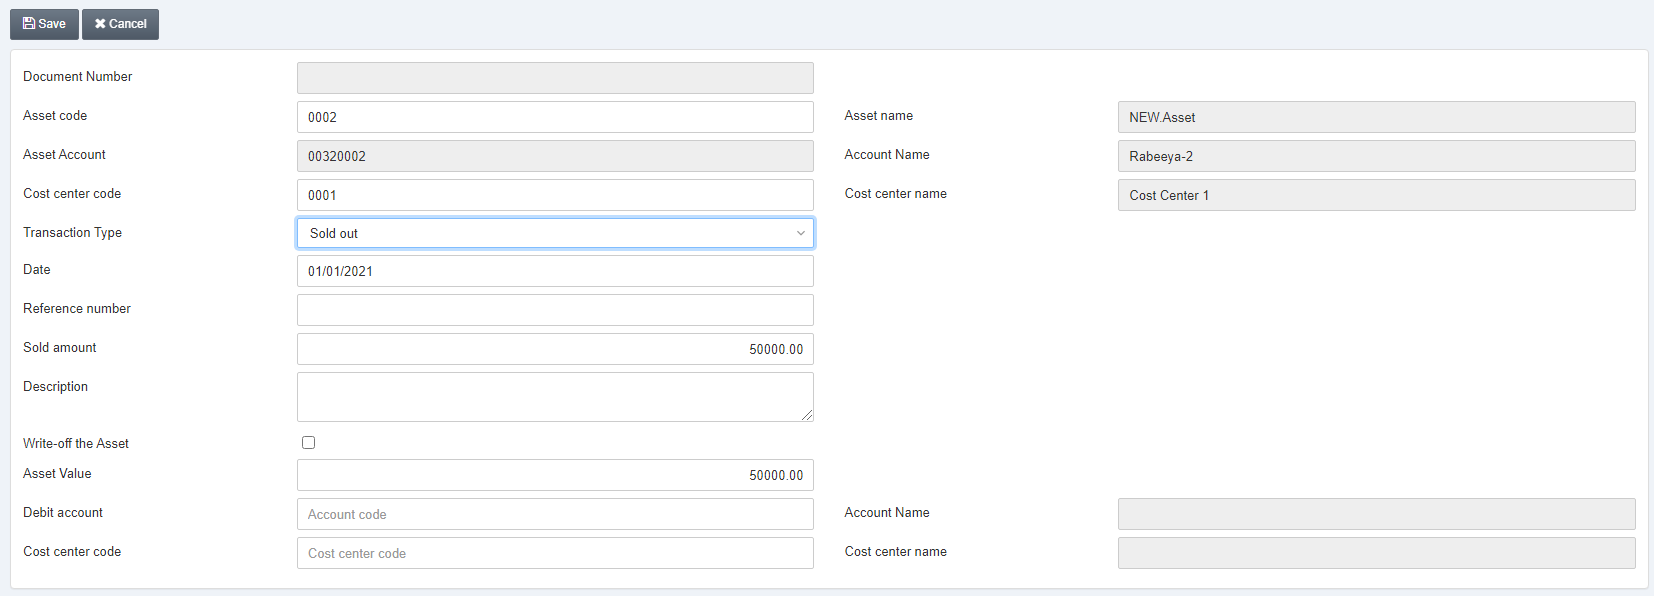
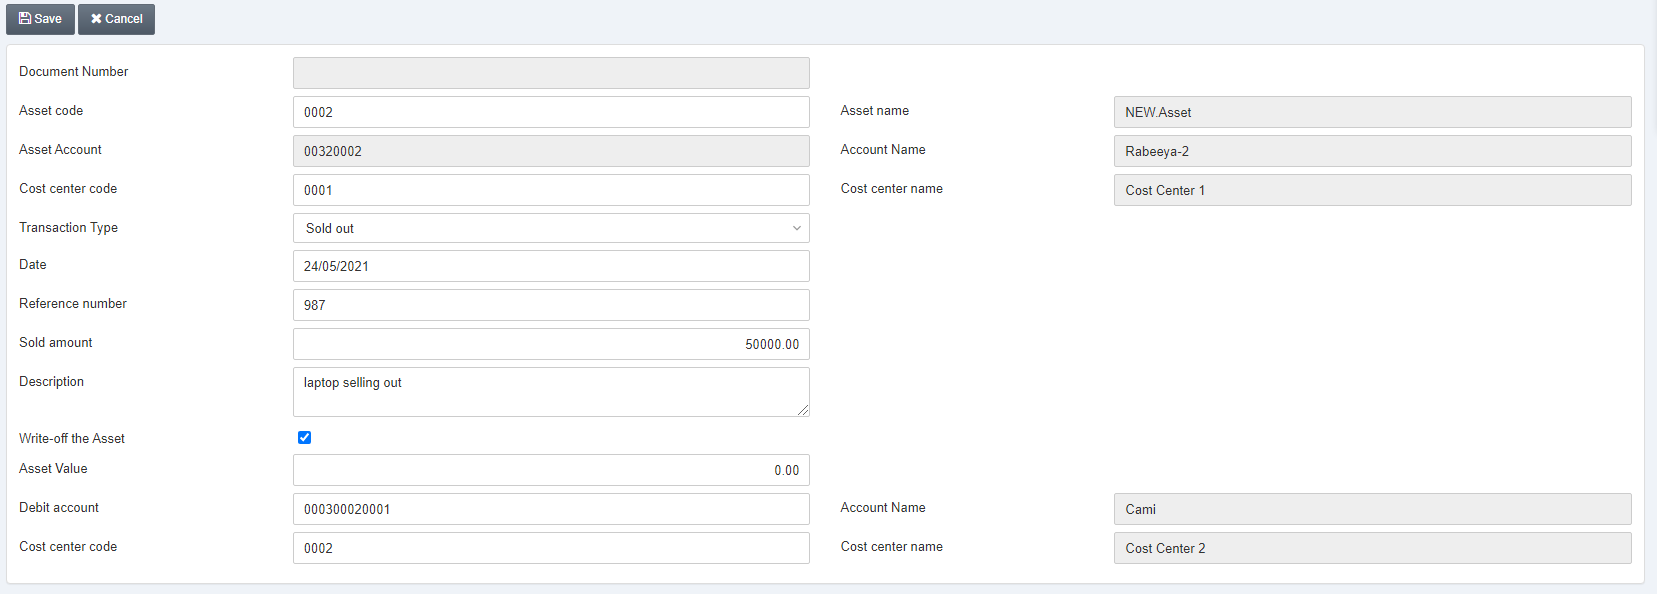
Document Number: This field is auto-generated by the system.
Asset Code: Select the asset you want to purchase.
Asset Name: This field is auto-fetched by the system based on the asset code.
Asset Account: This field is auto-fetched by the system based on the asset code.
Account Name: This field is auto-fetched by the system based on asset account.
Cost Center Code: This field is either auto-fetched by the system or manually entered.
Cost Center Name: This field is auto-fetched by the system based on the Cost Center Code.
Transaction Type: Select the Sold Out.
Date: This date is selected by default r can be set manually.
Reference number: Enter a unique reference number.
Sold Amount: Enter the selling amount of the asset.
Description: Enter the detail of the asset selling out.
Write-off the Asset: This checkbox when checked makes the asset value equals to zero.
Asset Value: It is dependent on the above checkbox.
Debit Account: Enter the debit account (this is the account of the seller of the asset)
Account Name: This field is auto-fetched by the system based on the credit account.
Cost Center Code: This field is either auto-fetched by the system or manually entered.
Cost Center Name: This field is auto-fetched by the system based on the Cost Center Code.
Click on the Save button to save the information.
“Insertion Successful” message is shown.
Adding a New Asset Transaction for Damage
To add a new asset transaction, go to Fixed Assets > Transactions > Asset Transactions, the asset transactions page is displayed.

Click on the Add new button at the top of the page.
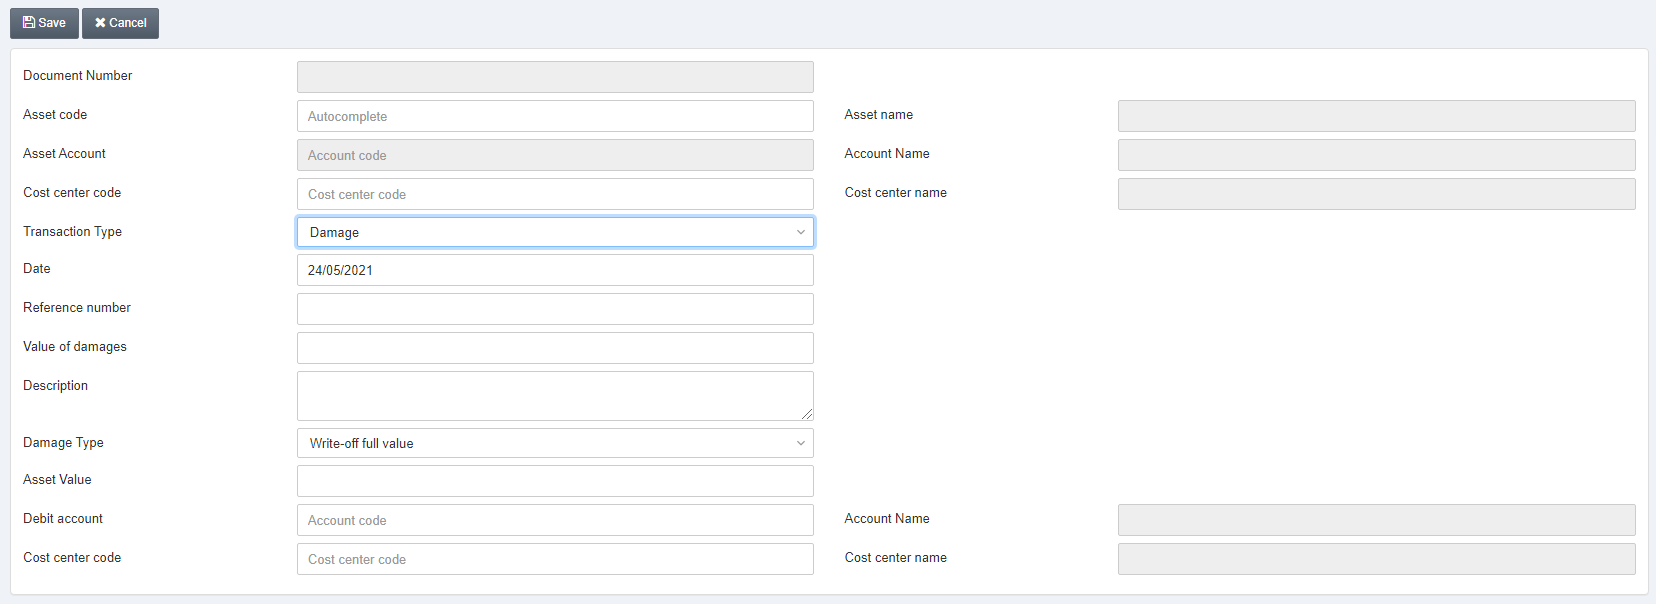
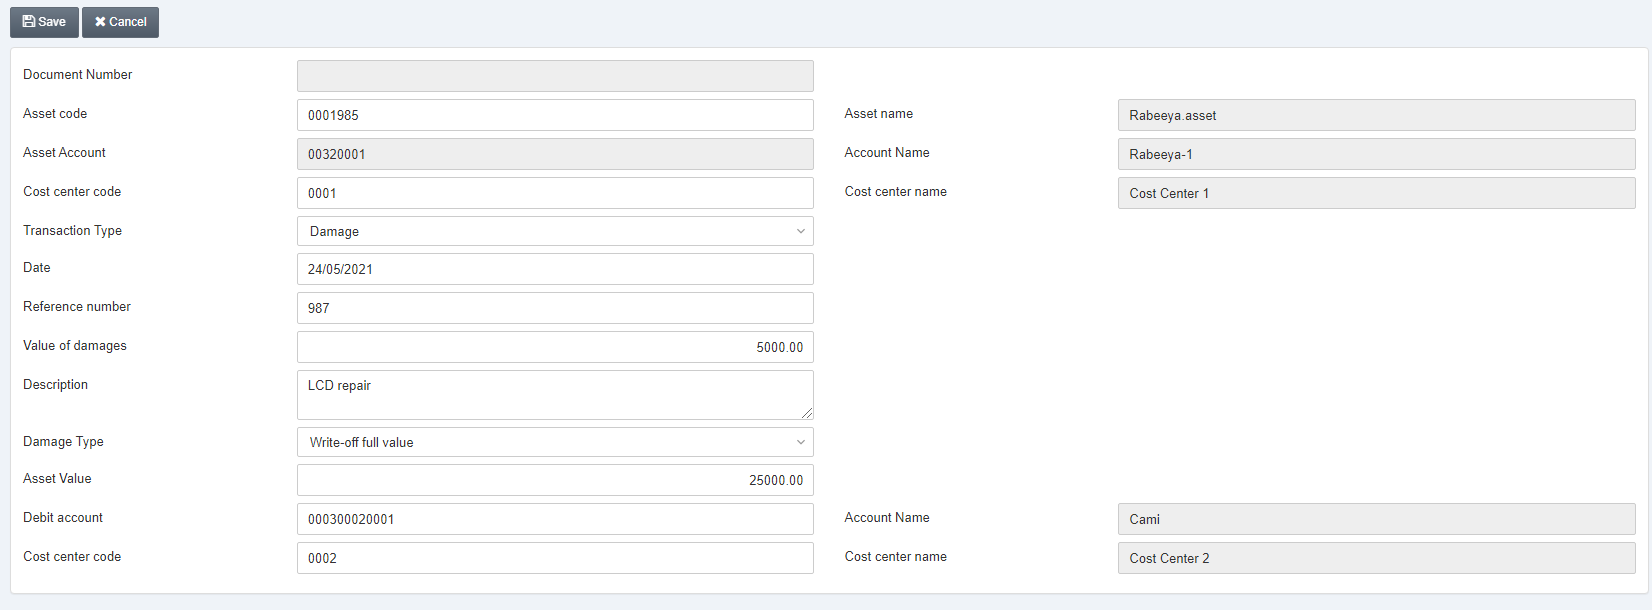
Document Number: This field is auto-generated by the system.
Asset Code: Select the asset you want to purchase.
Asset Name: This field is auto-fetched by the system based on the asset code.
Asset Account: This field is auto-fetched by the system based on the asset code.
Account Name: This field is auto-fetched by the system based on asset account.
Cost Center Code: This field is either auto-fetched by the system or manually entered.
Cost Center Name: This field is auto-fetched by the system based on the Cost Center Code.
Transaction Type: Select Damage.
Date: This date is selected by default as current date or can be set manually.
Reference number: Enter a unique reference number.
Value of Damages: Enter the damaging amount of the asset.
Description: Enter the detail of the asset selling out.
Damage Type: Select write-off full amount or reduce the amount or information only. Write-off full amount reduces its amount to zero, reduce the amount reduces its amount by some factor and information only is for data entry purpose only.
Asset Value: It is dependent on the above checkbox.
Debit Account: Enter the debit account (this is the account of the seller of the asset)
Account Name: This field is auto-fetched by the system based on the credit account.
Cost Center Code: This field is either auto-fetched by the system or manually entered.
Cost Center Name: This field is auto-fetched by the system based on the Cost Center Code.
Click on the Save button to save the information.
“Insertion Successful” message is shown at the top of the page.
Adding a New Asset Transaction for Re-evaluation
To add a new asset transaction, go to Fixed Assets > Transactions > Asset Transactions, the asset transactions page is displayed.

Click on the Add new button at the top of the page.
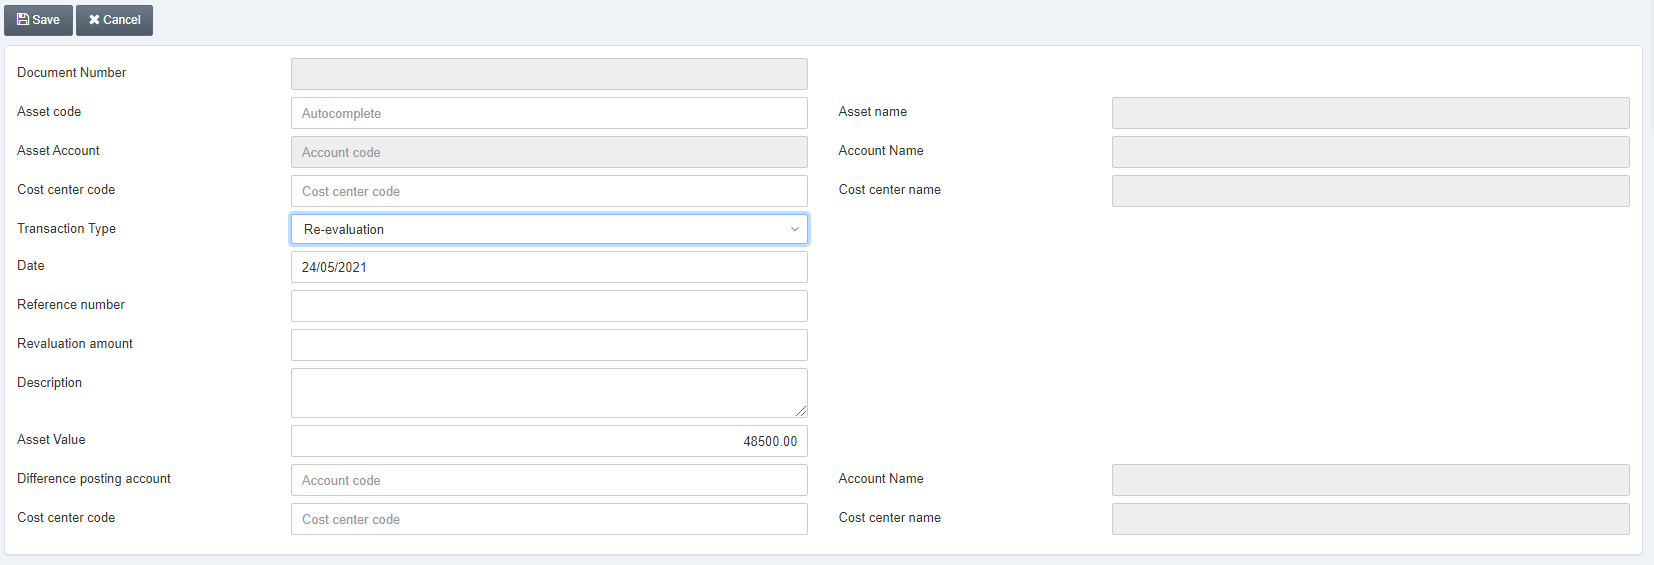
Document Number: This field is auto-generated by the system.
Asset Code: Select the asset you want to purchase.
Asset Name: This field is auto-fetched by the system based on the asset code.
Asset Account: This field is auto-fetched by the system based on the asset code.
Account Name: This field is auto-fetched by the system based on asset account.
Cost Center Code: This field is either auto-fetched by the system or manually entered.
Cost Center Name: This field is auto-fetched by the system based on the Cost Center Code.
Transaction Type: Select Re-evaluation.
Date: This date is selected by default as current date.
Reference number: Enter a unique reference number.
Revaluation Amount: Enter the re-evaluation amount of the asset.
Description: Enter the detail of the asset selling out.
Asset Value: It is dependent on the above checkbox.
Difference Posting Account: Enter the difference posting account (this is the account of the difference in re-evaluation)
Account Name: This field is auto-fetched by the system based on the credit account.
Cost Center Code: This field is either auto-fetched by the system or manually entered.
Cost Center Name: This field is auto-fetched by the system based on the Cost Center Code.
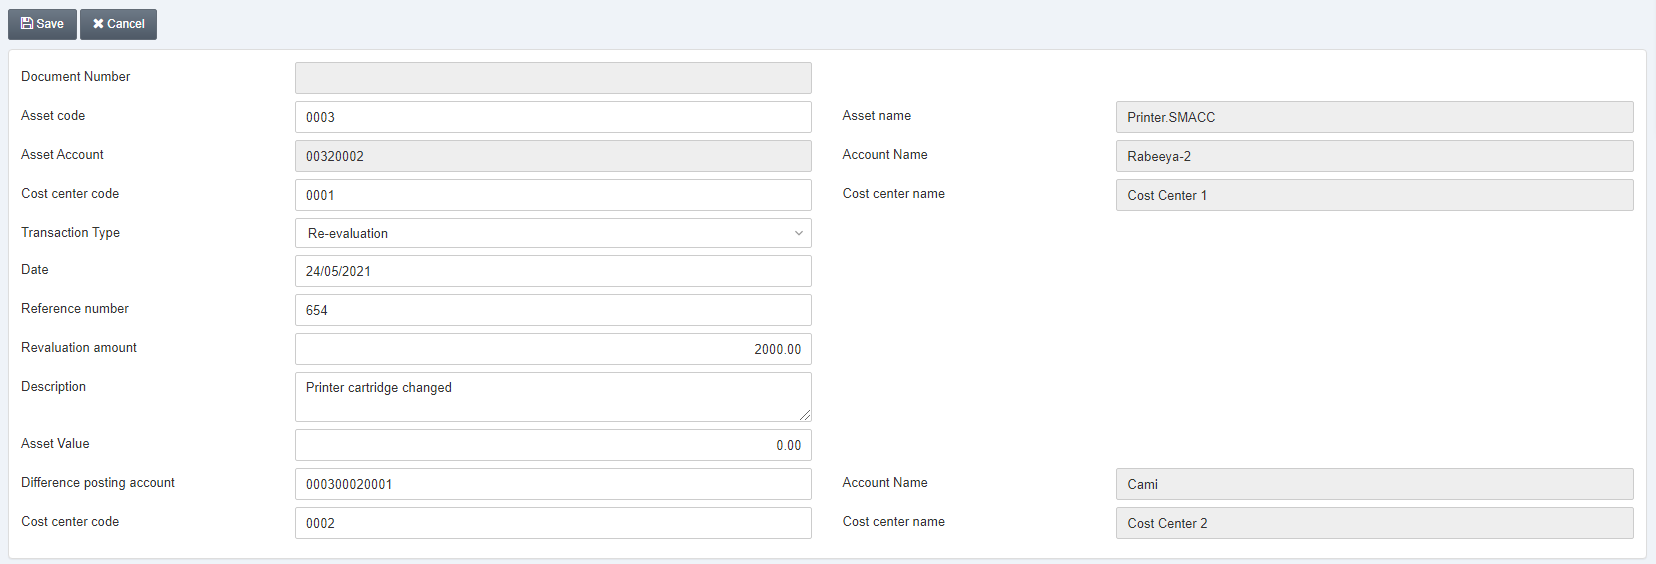
Click on the Save button to save the information.
“Insertion Successful” message is shown on the top of the page.
Updating the Asset Transaction
To edit/update the asset transaction, go to Fixed Assets > Transactions > Asset Transactions, the asset transactions page is displayed.

Click on the Update button at the top of the page.

Document Number: Enter the desired document number.

Click on the Load button at the top of the page.

You can Update the detail and click on the Save button to save the information.
Deleting the Asset Transaction
To delete the asset transaction, go to Fixed Assets > Transactions > Asset Transactions, the asset transactions page is displayed.

Click on the Delete button at the top of the page.

Document Number: Enter the desired document number.

Click on the Load button at the top of the page.
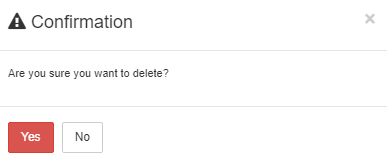
Click on the Yes button to confirm the deletion.
Note: In case the asset value is depreciated and calculated already, the entry cannot be deleted.
Printing the Asset Transaction
To print the asset transaction, go to Fixed Assets > Transactions > Asset Transactions, the asset transactions page is displayed.

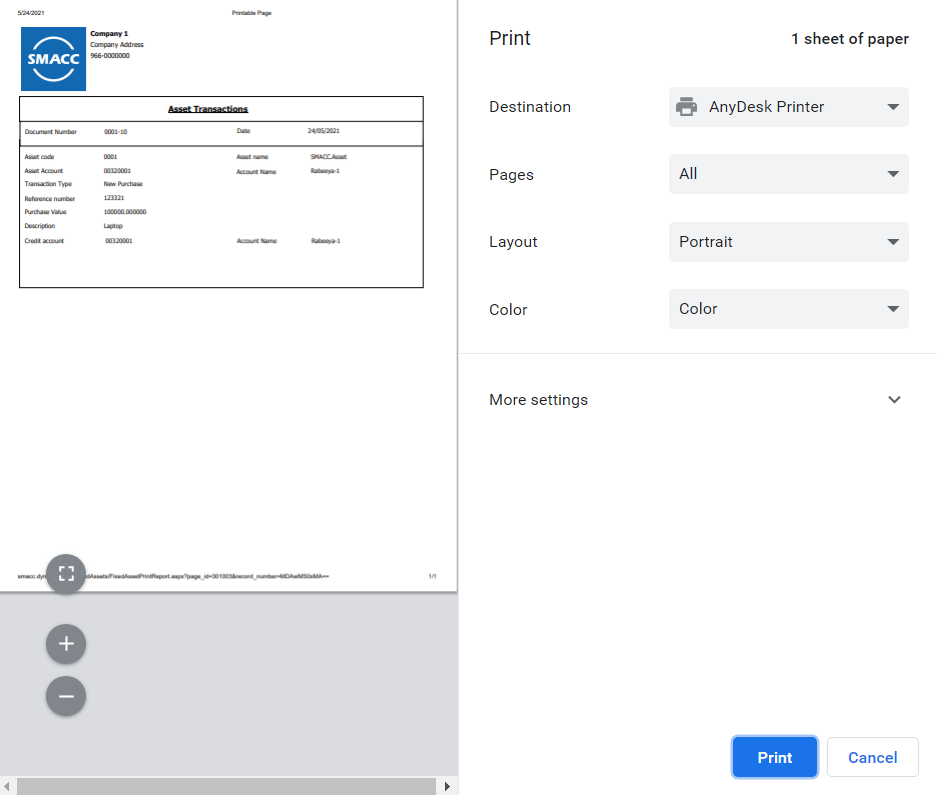
Click on the Print button at the top of the page.

Document Number: Enter the desired document number.

Click on the Load button at the top of the page.
