في تحصيل الفاتورة الاجلة ، يمكنك إضافة وطباعة وحذف الإدخالات. انها تتعامل مع جميع الفواتير الاجلة
إضافة تحصيل فواتير اجلة جديدة
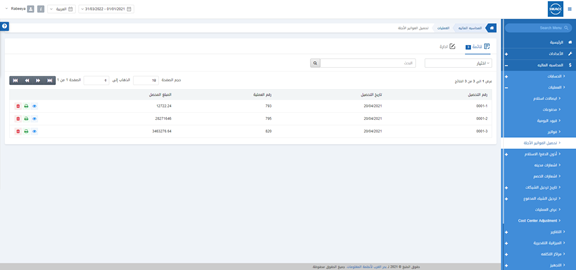
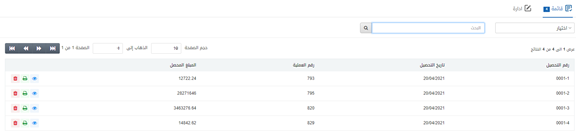
لإضافة تحصيل فاتورة اجلة جديدة ، انتقل إلى المحاسبة المالية > العمليات > تحصيل فواتير اجله ، يتم عرض صفحة تحصيل الفواتير الاجلة.
انقر فوق رمز إدارة في الجزء العلوي من الصفحة
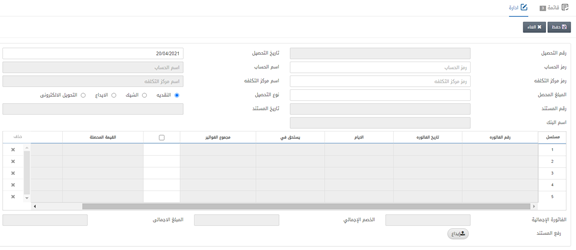
رقم التحصيل : يتم جلب هذا الحقل تلقائيًا بواسطة النظام
تاريخ التحصيل : أدخل تاريخ التحصيل. او بشكل افتراضي ، يتم تحديد التاريخ الحالي
رمز الحساب : أدخل رمز الحساب المطلوب الذي سيتم تحصيل الرصيد واضافتة اليه
اسم الحساب : يتم جلب هذا الحقل تلقائيًا بواسطة النظام بناءً على رمز الحساب
المبلغ المحصل : أدخل المبلغ المحصل.
ملاحظة : يجب أن يكون المبلغ المحصل مساويًا لمبلغ الفاتورة او الفواتير المطلوب تحصيلها
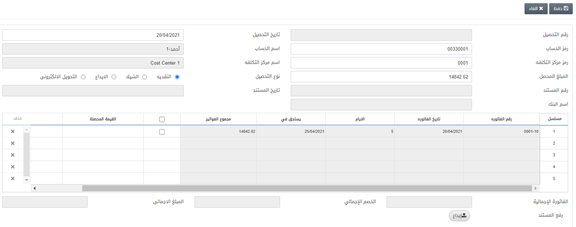
نوع التحصيل: حدد أيًا من أزرار الاختيار الأربعة المحددة
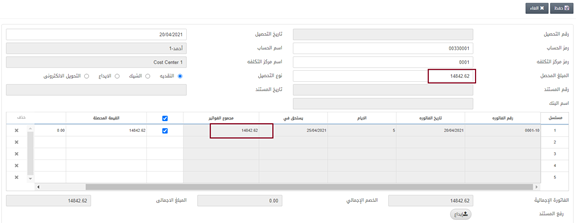
خانة الاختيار: حدد خانة الاختيار في الشاشة مقابل الفواتير المطلوبه
تحميل المستند: انقر فوق الزر تحميل.
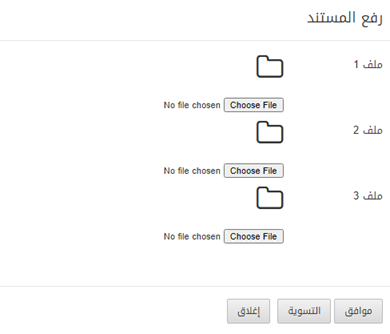
اختر ملفًا : انقر فوق هذا الزر لإرفاق ما يصل إلى ثلاثة ملفات أو صور.
انقر على زر موافق لإدخال المعلومات.
انقر فوق الزر حفظ في الجزء العلوي من الصفحة.
![]()
حذف تحصيل الفواتير الاجله
لحذف تحصيل الفواتير الاجلة ، انتقل إلى المحاسبة المالية > العمليات > تحصيل الفواتيرالاجلة ، يتم عرض صفحة تحصيل الفواتير الاجله.
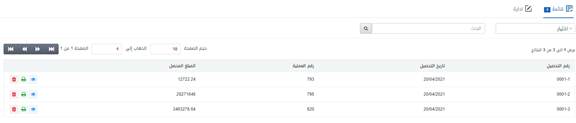
حدد الصف المطلوب لتحصيل الفواتيرالاجلة
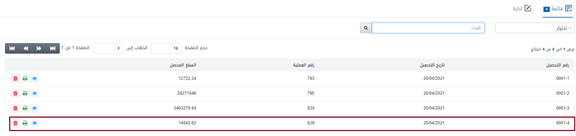
توجد ثلاثة رموز أمام كل صف: عرض وطباعة وحذف.

انقر فوق رمز حذف (الأحمر) لحذف الإدخال.
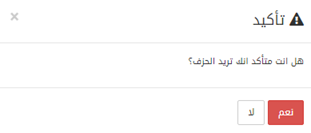
انقر فوق الزر “نعم” لتأكيد الحذف.
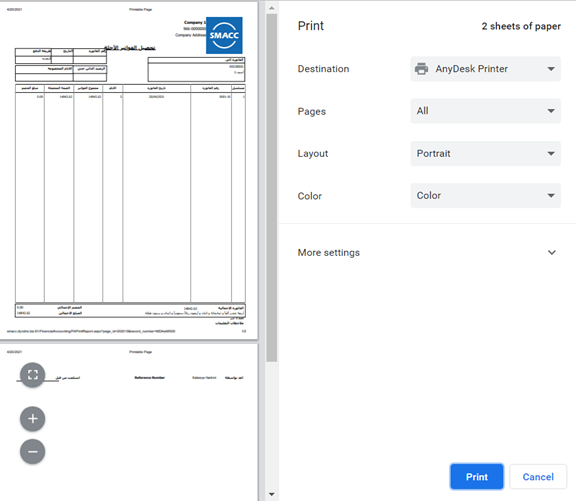
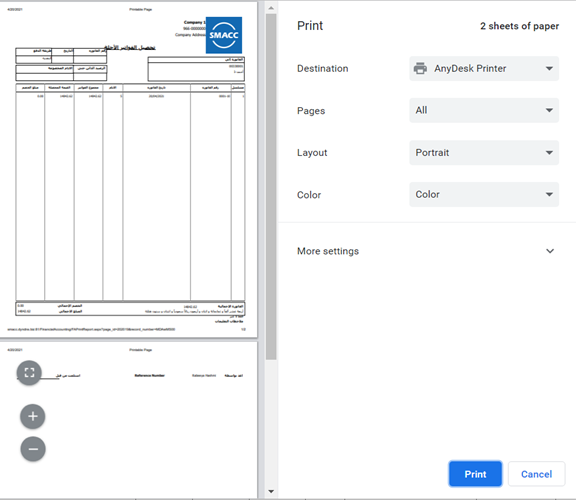
طباعة تحصيل الفواتير الاجلة
لطباعة تحصيل الفواتيرالاجلة ، انتقل إلى المحاسبة المالية > العمليات > تحصيل الفواتيرالاجلة ، يتم عرض صفحة تحصيل الفواتير الاجله.

حدد الصف المطلوب لتحصيل الفواتيرالاجلة.
توجد ثلاثة رموز أمام كل صف: عرض وطباعة وحذف.

انقر فوق رمز الطباعة (الأخضر) لطباعة الإدخال.