

The report setup allows the setting of format, language, and detailed structure of all the pages of inventory regarding their print invoices receipts.
Updating the Report Setup
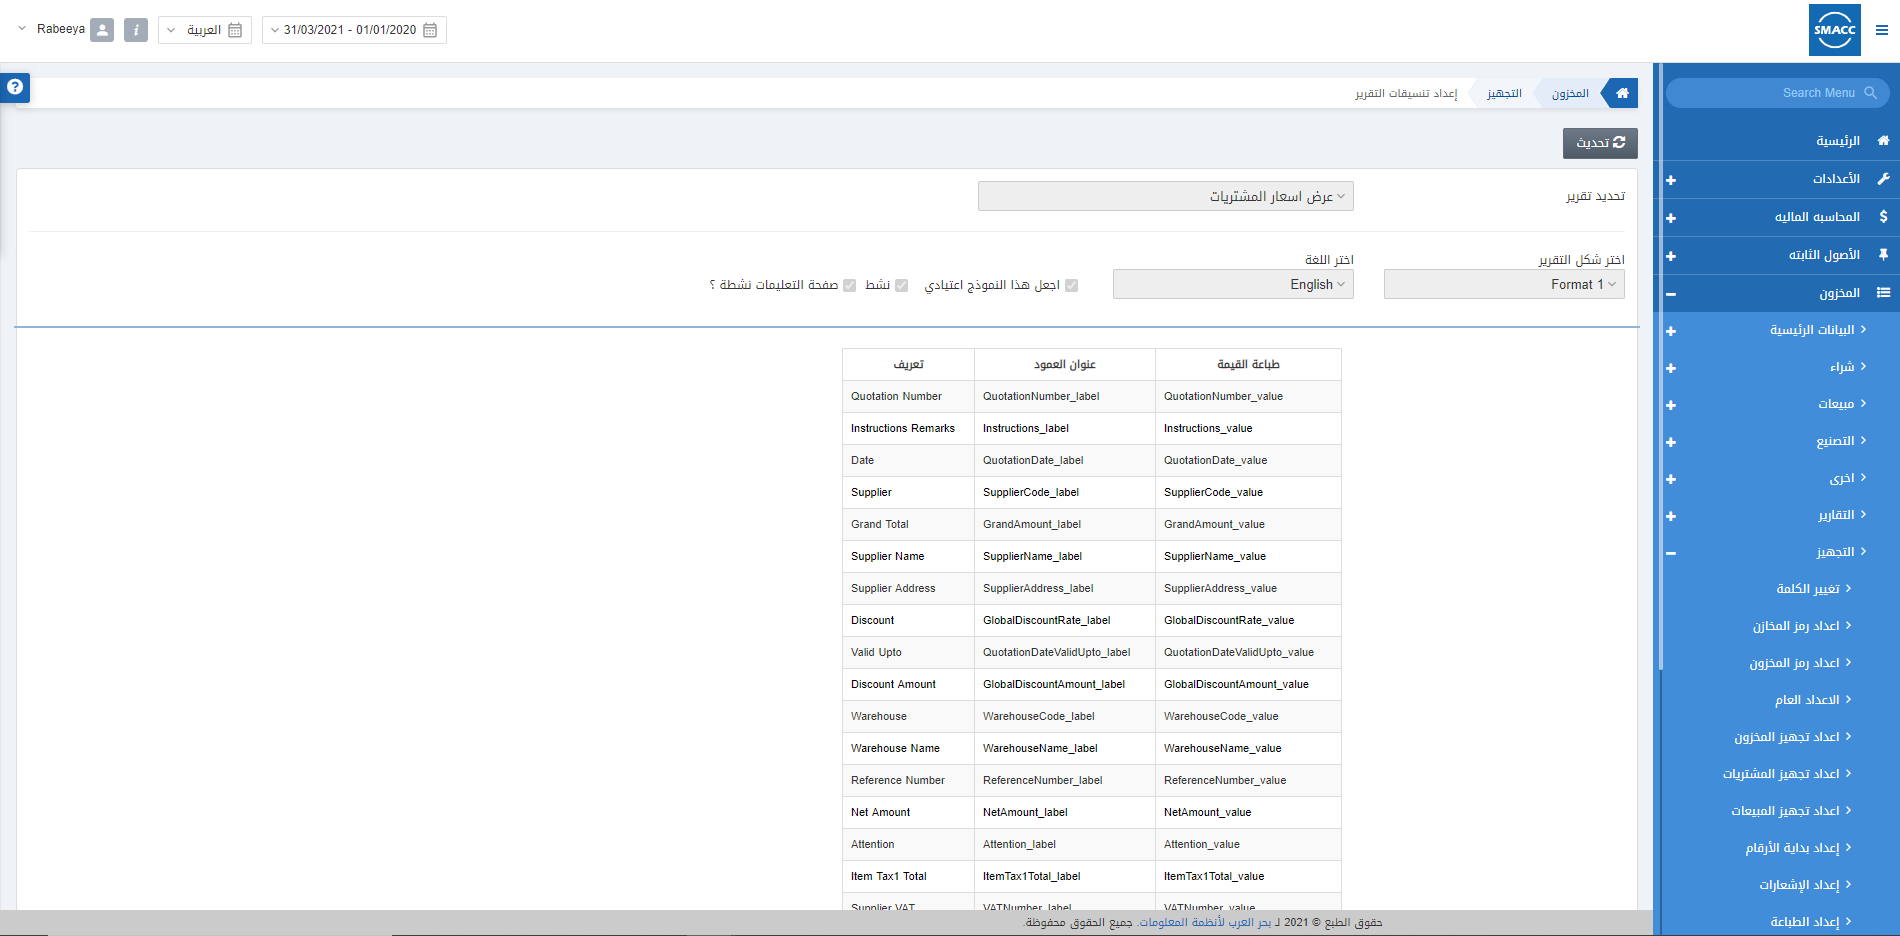
To update the report setup, go to Inventory > Setup > Report Setup, the report setup page is displayed.

Click on the Update button at the top of the page.
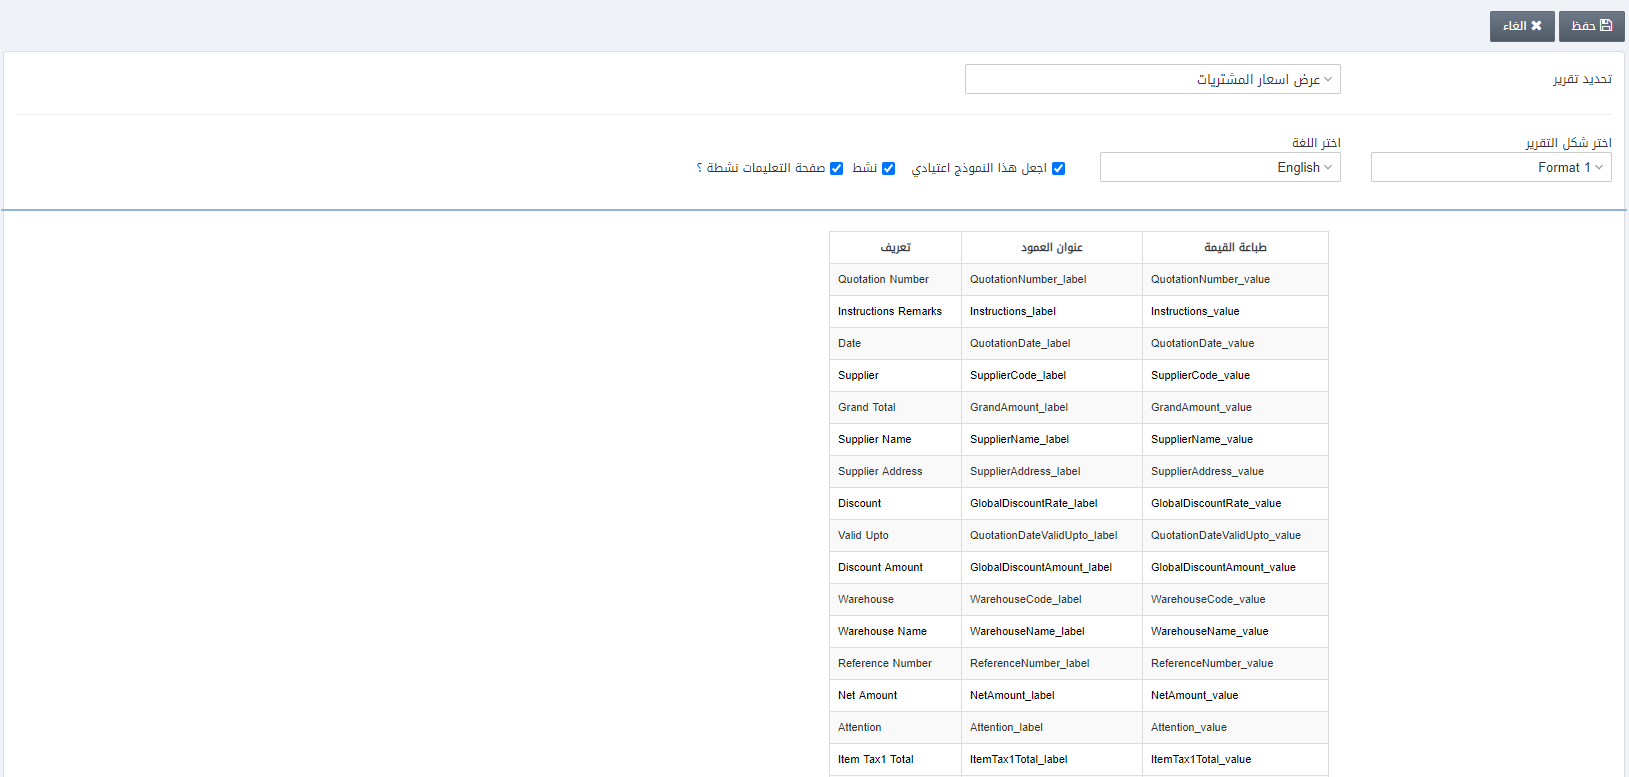
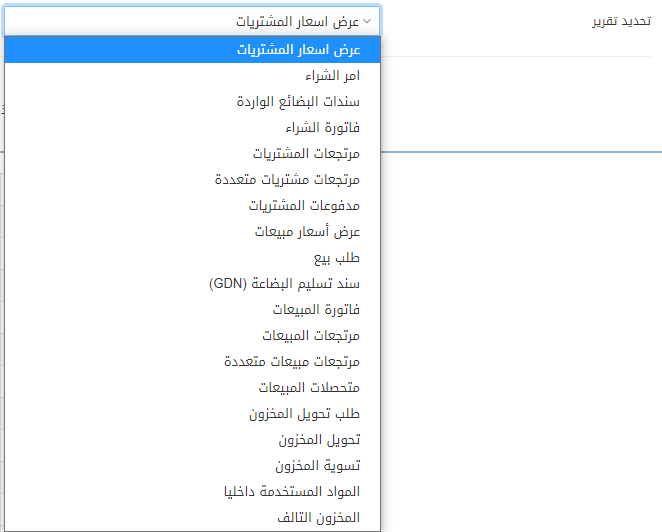
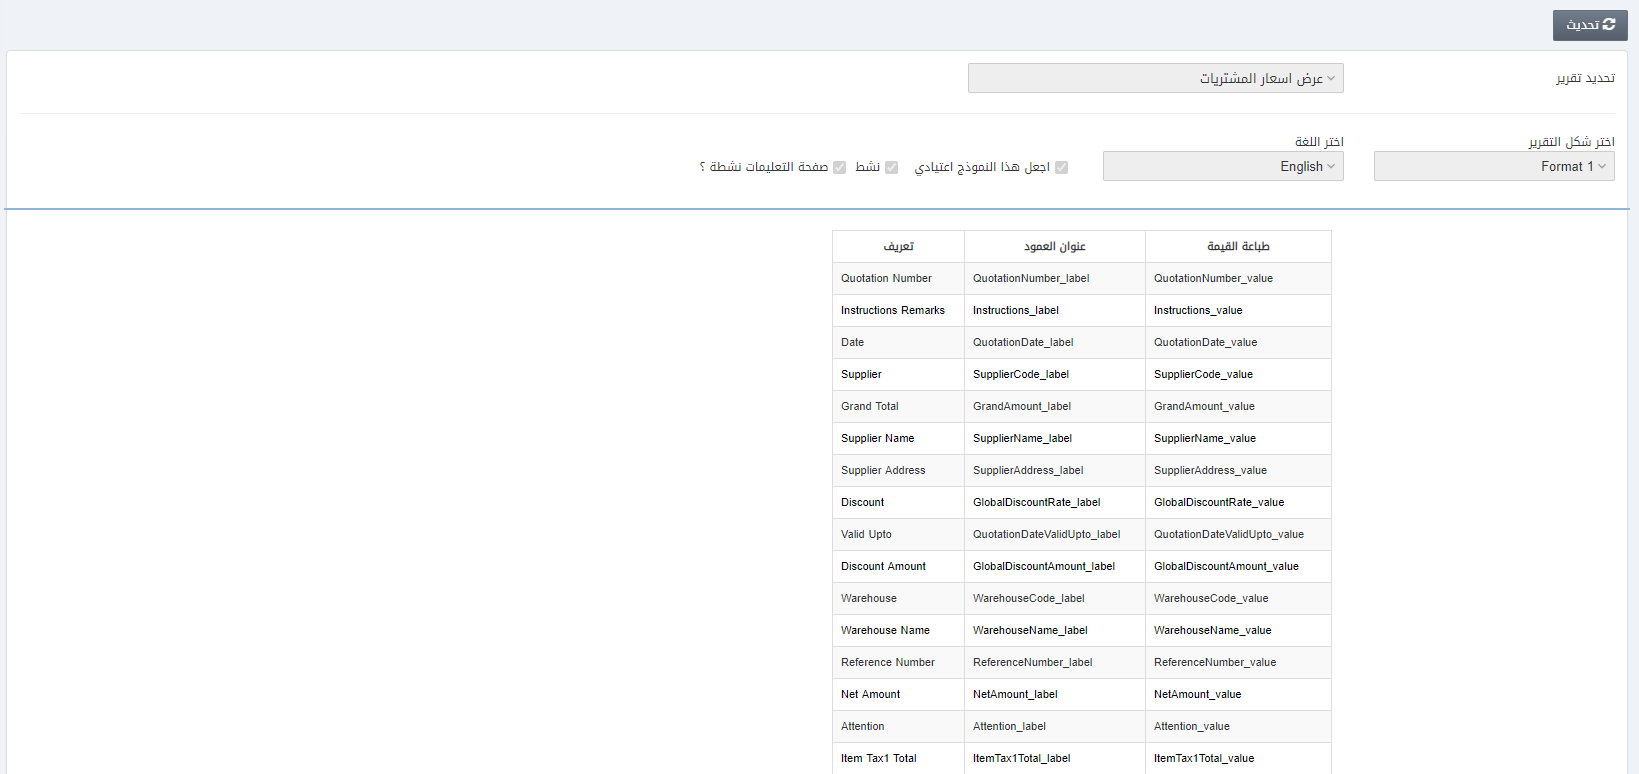
Select Report: This field allows the selection of reports from the drop-down list of 19 report pages. You can select the report page one by one and define the settings for its report.
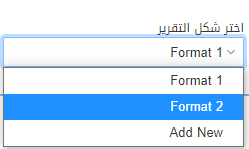
Select Report Format: This field allows the selection of report format from the drop-down list. Format 1 and Format 2 are defined as Default settings. Format 1 is for the English language and Format 2 is for the Arabic language. However, you can Add New to define a new format as per your requirement.

Choose Language: This field allows the selection of the language from the drop-down list against a report format selection.
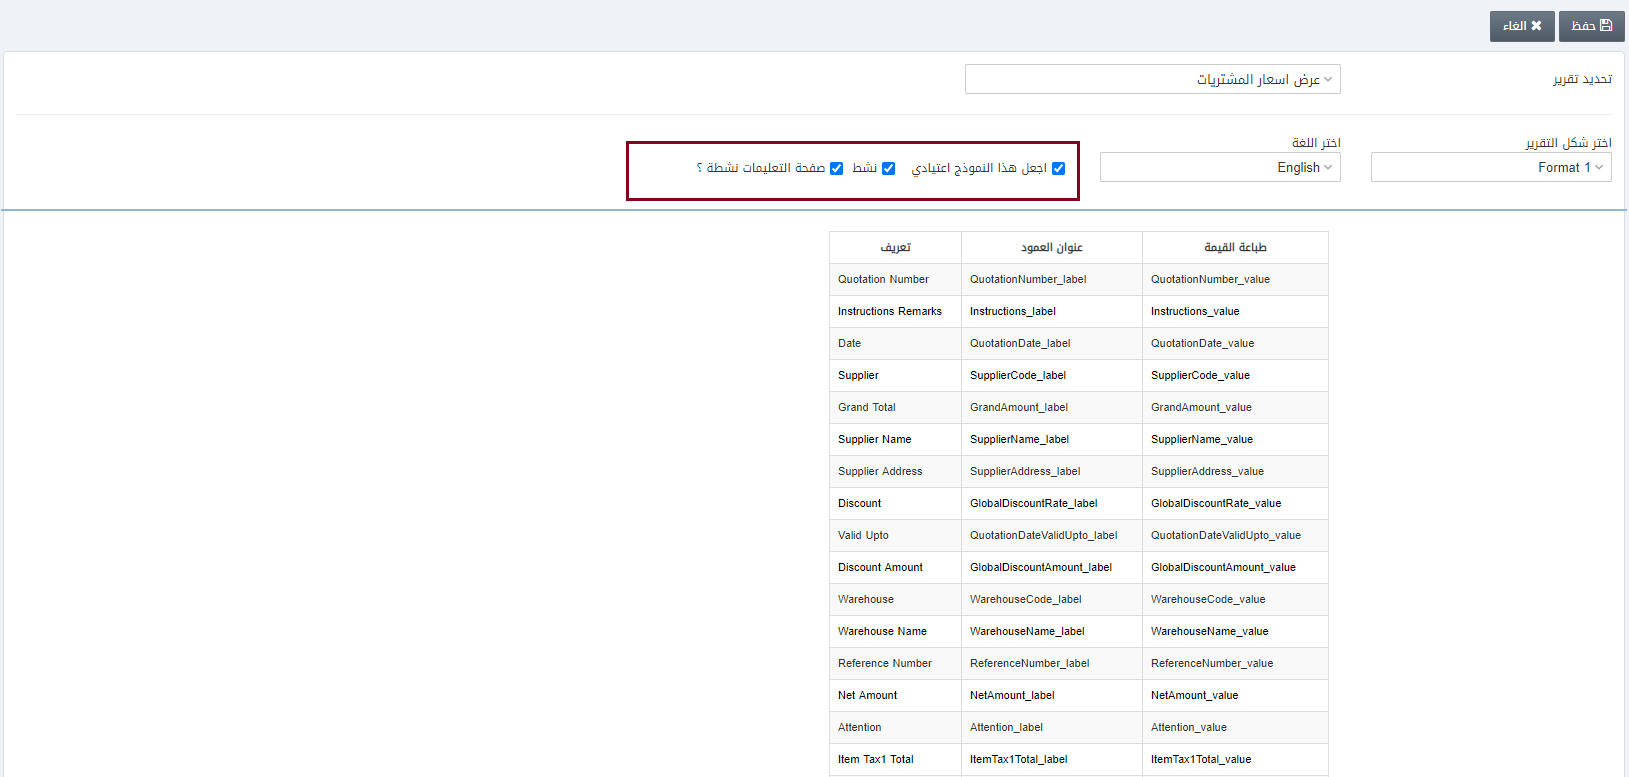
Checkboxes:
Make this format as Default: This checkbox when checked sets this format as the default format for all the reports.
Is Active: This checkbox when checked allows the application of the current settings.
Is Instruction Page Active: This checkbox when checked allows the instruction page at the end of every print invoice receipt.
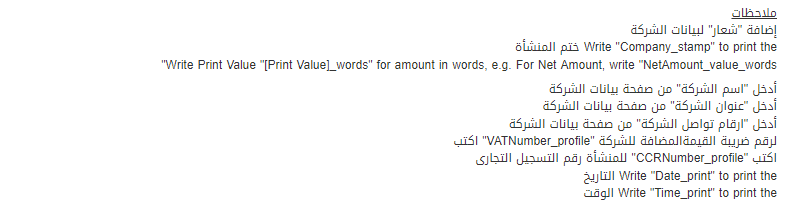
The above-mentioned are the notes for this current format. It represents the fields for the print report of all the pages of inventory. When you make a header or footer you must follow the points mentioned herein Notes. You can add or remove points from Notes as per your requirement.
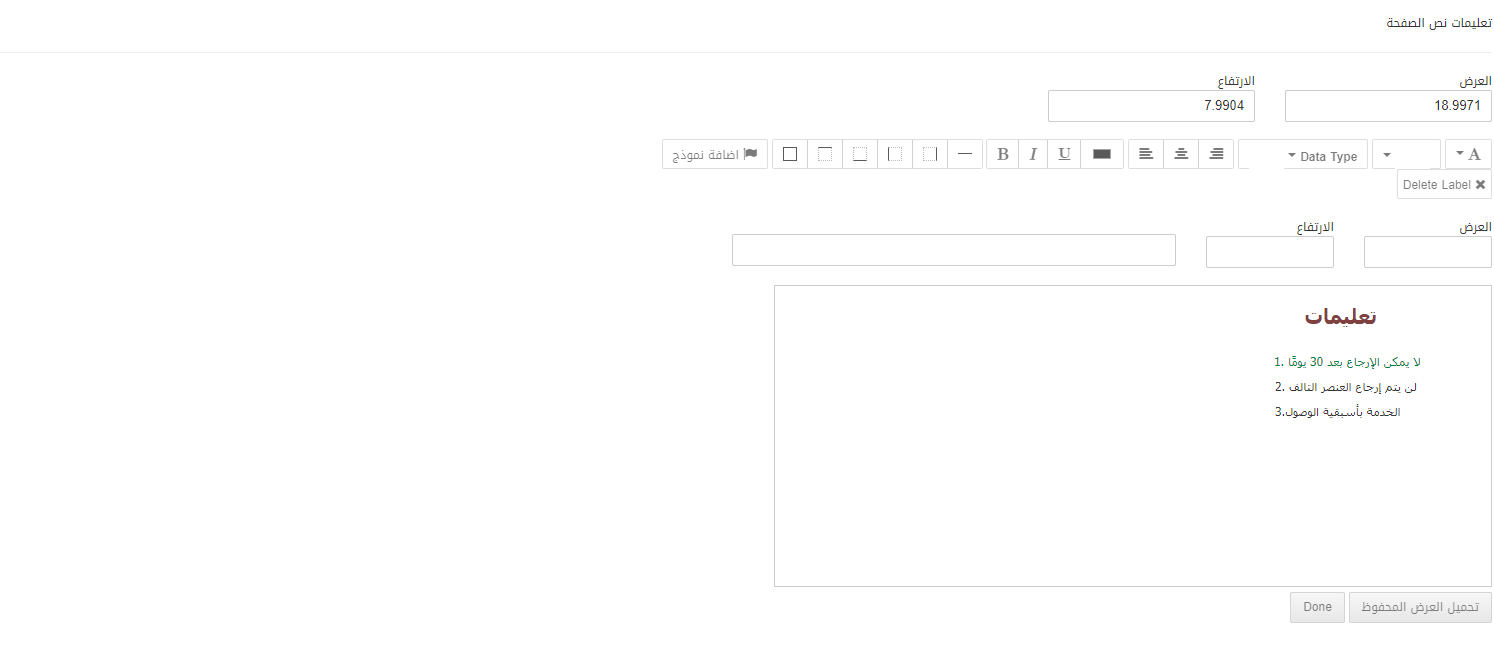
Setting the Header of Report Setup
To update the report setup, go to Inventory > Setup > Report Setup, the report setup page is displayed.
Click on the Update button at the top of the page.

Scroll down the page till you see the Report Header:
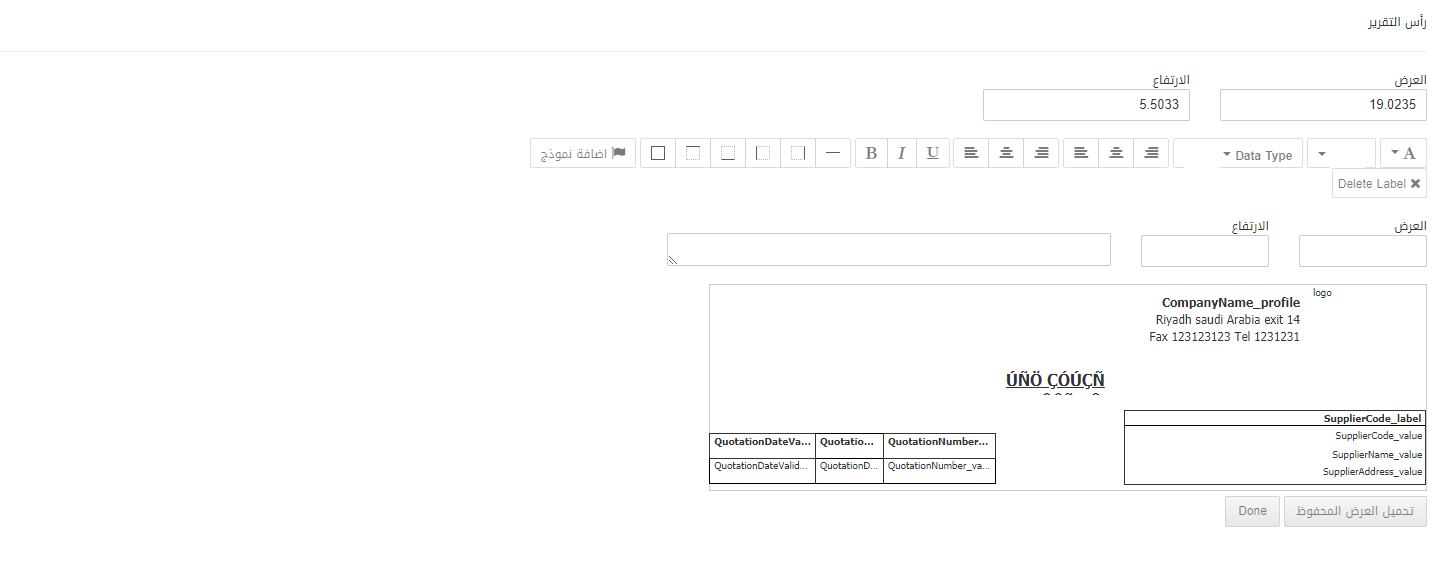

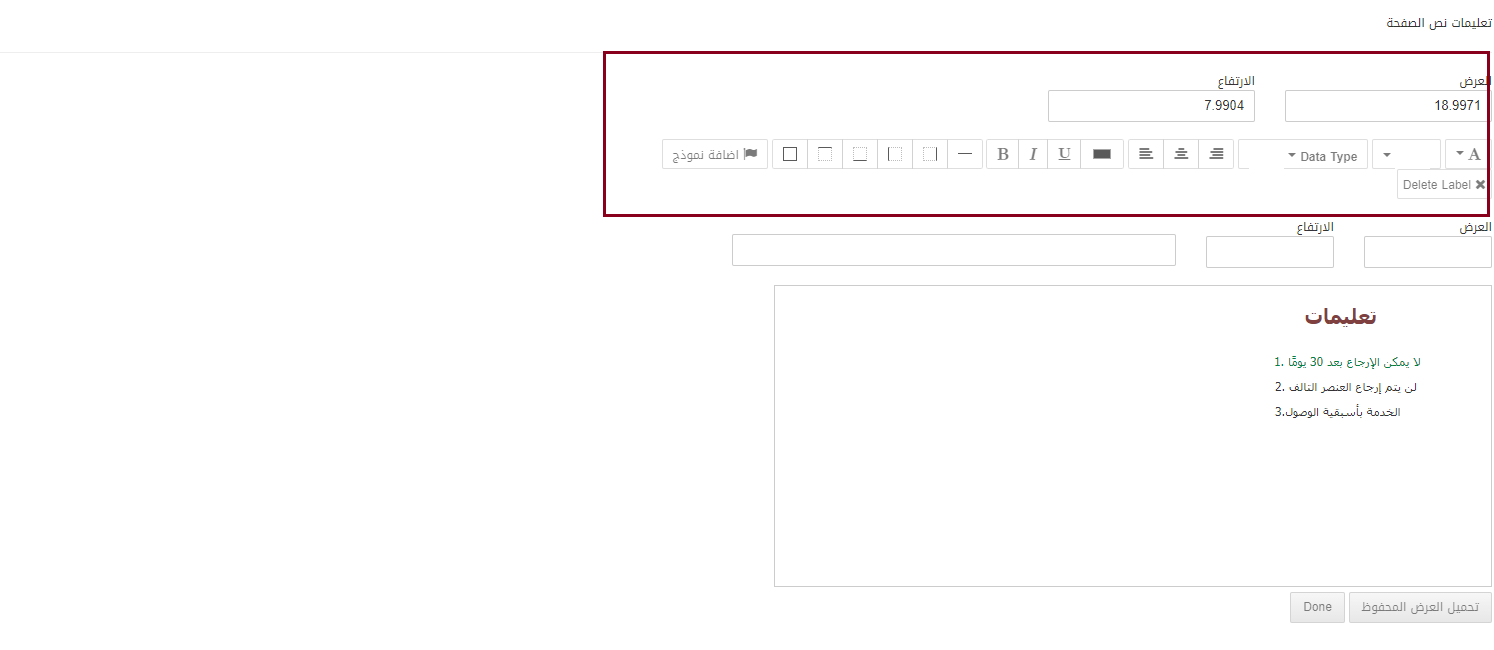
Width: It sets the width of the label box.
Height: It sets the height of the label box.
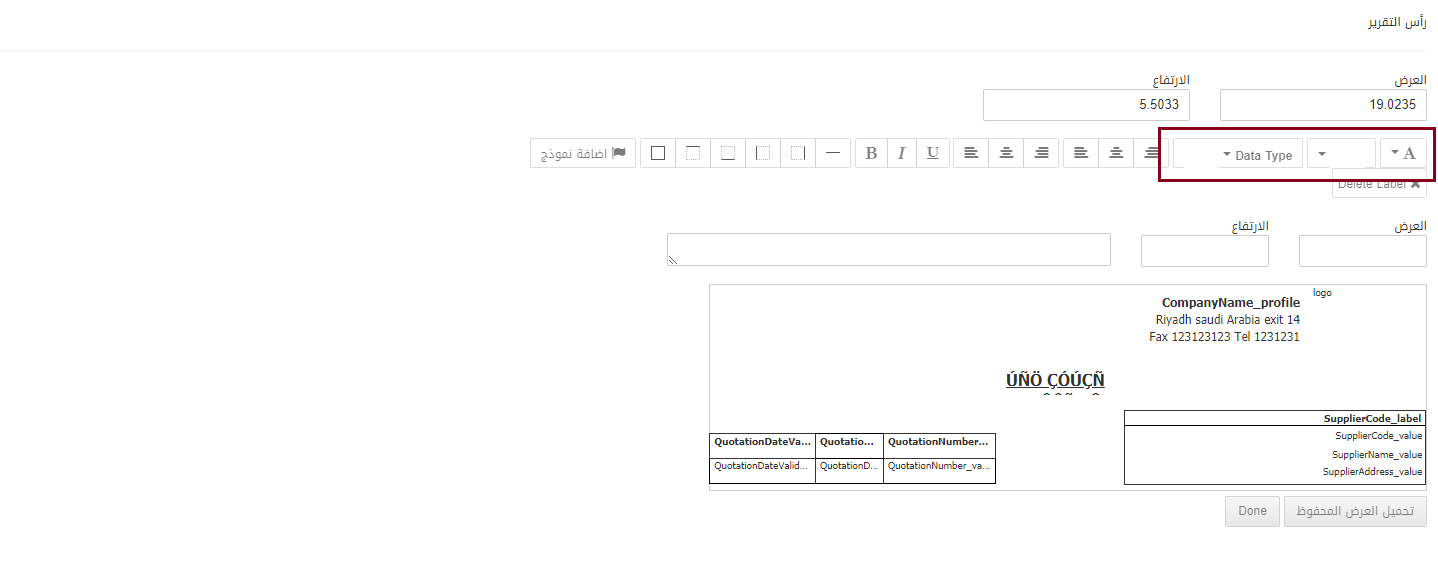
The highlighted portion has three buttons.
First Button: It sets the Font Type, for example, Arial
Second Button: It sets the Font Size, for example, 14.
Third Button: It sets the Data Type, for example, string, price, quantity, amount, currency, and date.
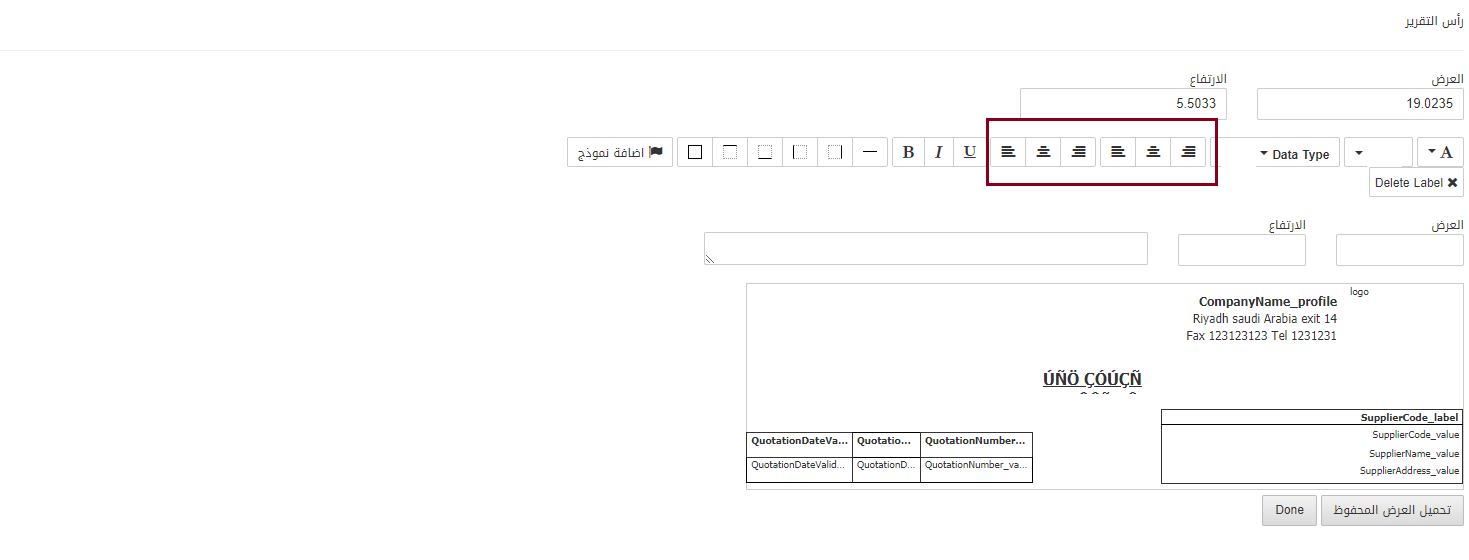
The highlighted portion has six buttons.
Note: These highlighted buttons allow the alignment of the text and its direction either left to right or right to left.
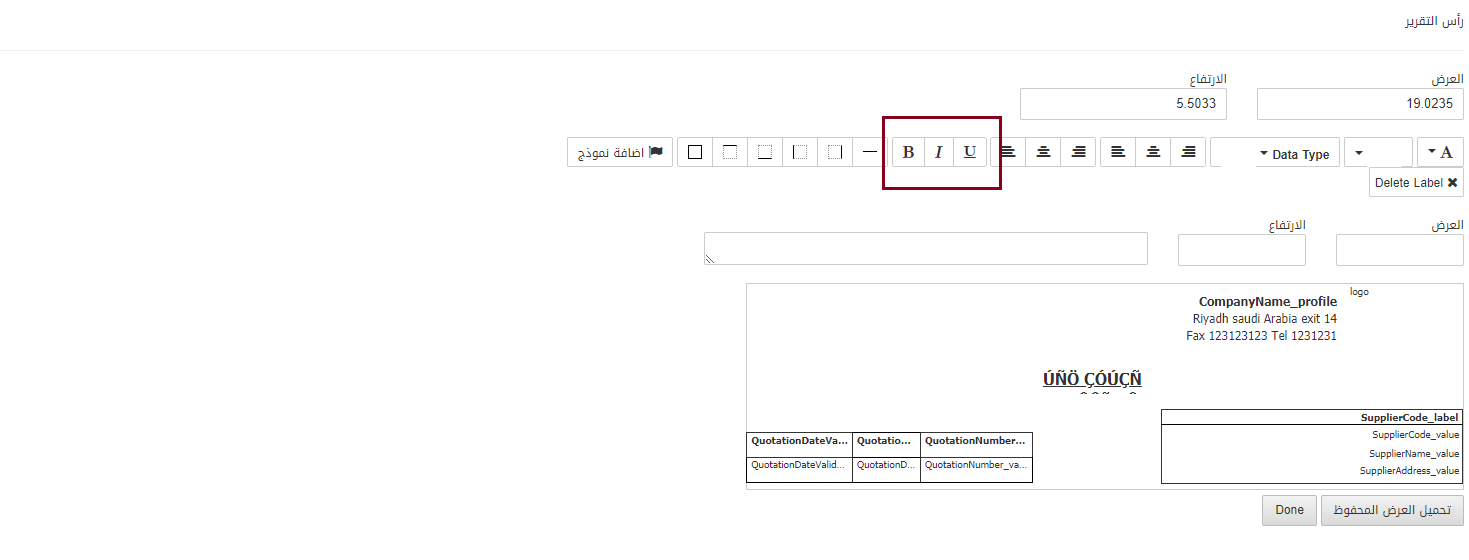
The highlighted portion has three buttons.
First Button: It sets the font text as Bold.
Second Button: It sets the font text as Italic.
Third Button: It sets the font text as Underline.
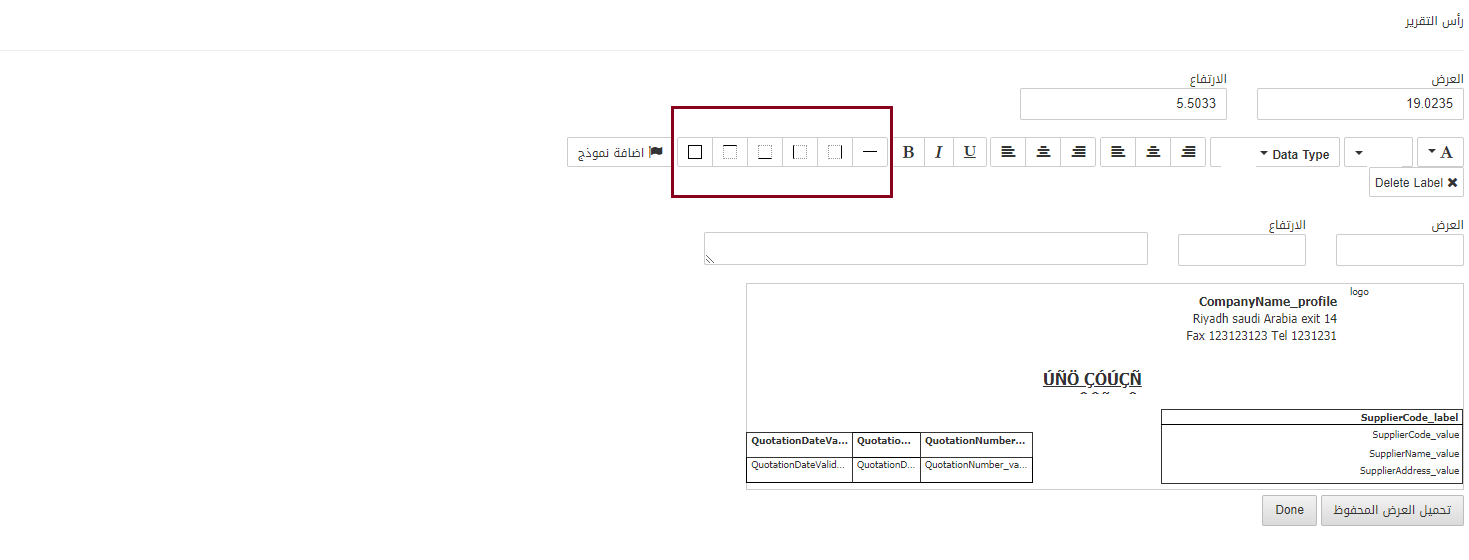
The highlighted portion has seven buttons.
Note: The first six buttons give options of label border types.
Label All Side Border: This button sets a border for all four sides of the label box.
Label Top Border: This button sets the border for the top side of the label box.
Label Bottom Border: This button sets the border for the bottom side of the label box.
Label Left Border: This button sets the border for the left side of the label box.
Label Right Border: This button sets the border for the right side of the label box.
Label Center Border: This button sets the border for the center of the label box.
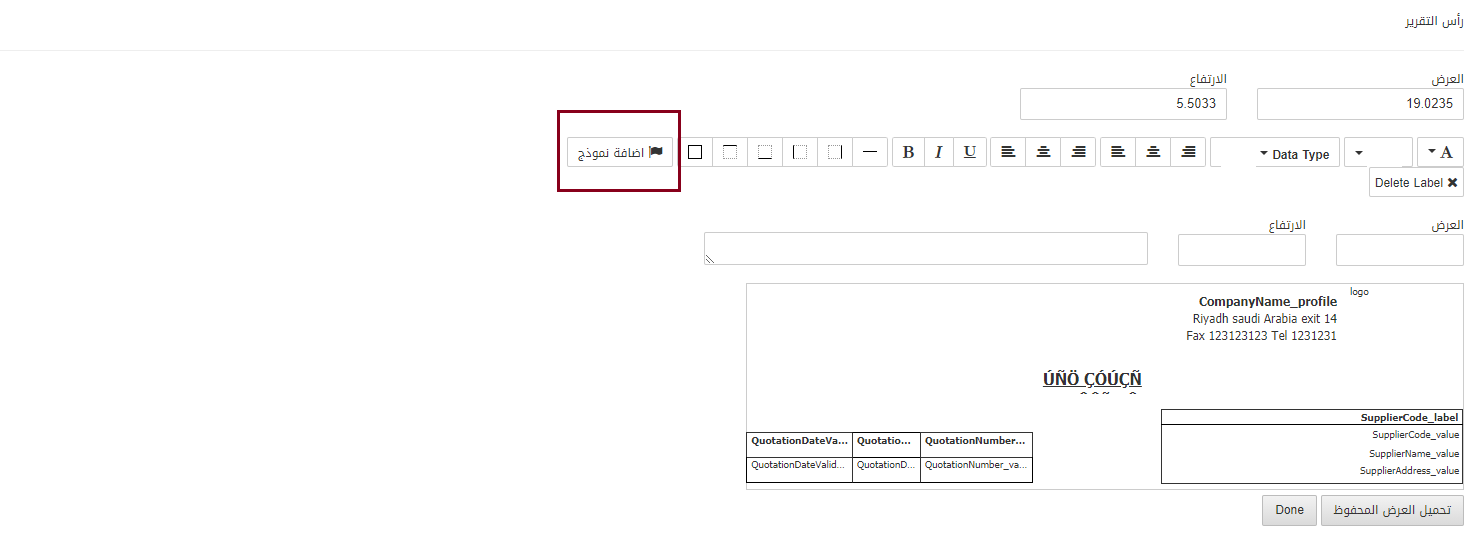
Add Label: The last highlighted button is used to add a new label in the header section.
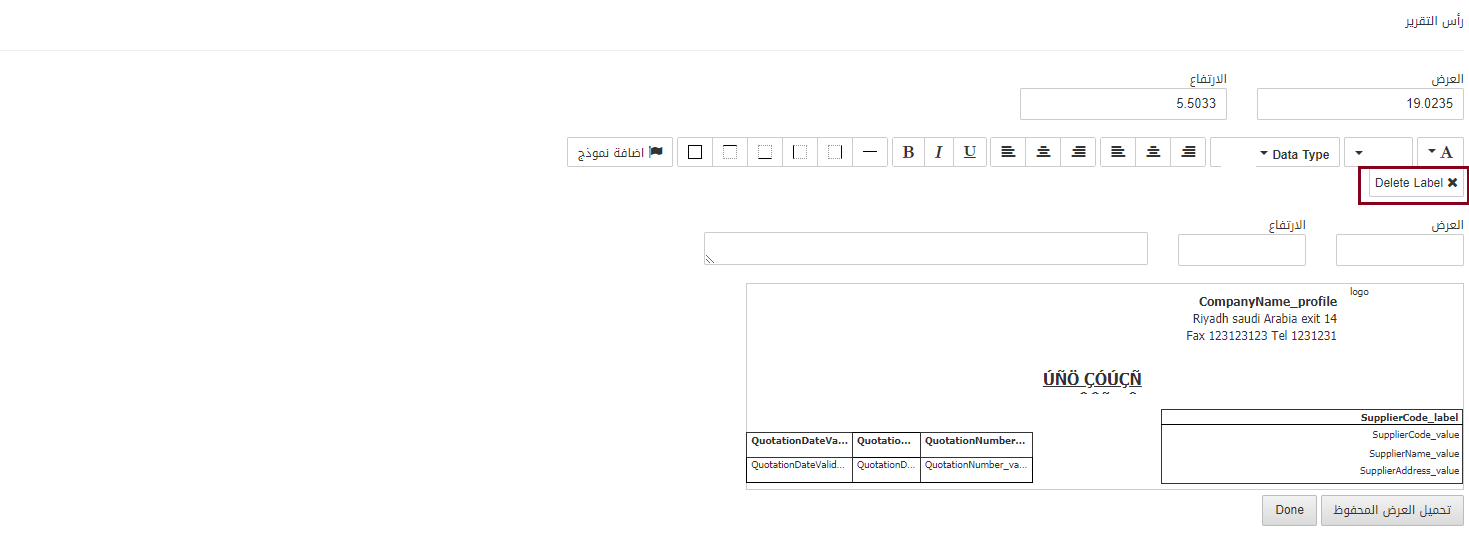
Delete Label: You can delete any label by selecting it on the header section and clicking on the button of Delete Label.
Note: You can add labels as per your requirement and delete them. This feature gives you complete control over the editing of this report setup.

Load Saved View: This button is used to load the previously saved view
Done: This button is used to approve the changes you have made and save them.
Steps for Adding a New Label:
- Click on the Add New Label.
- A box appears in the header section which can be dragged to desired location or position inside the header section.
- Now click on the box.
- Enter the height and width of the label box and its text.
- Select the Data type that which type of text you want to enter like string=date.
- Text can be edited by the buttons of the font.
- Once you have edited the desired text and value/amount click on the Done button below.
- The last step is to click on the Load button at the top of the page.
- Operation Successful message appears to confirm the implementation of changes that you have just made.
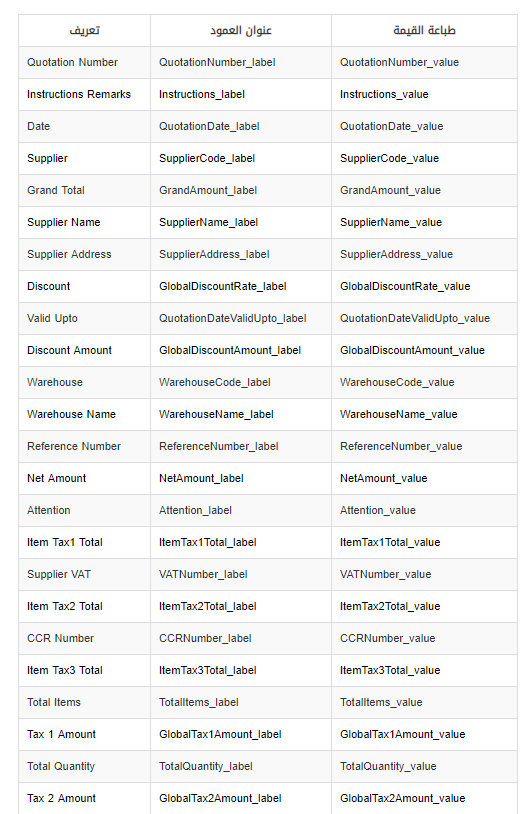
- You can add the labels and values from Column Title and Print Value in the chart below:
Setting the Footer of Report Setup
To update the report setup, go to Inventory > Setup > Report Setup, the report setup page is displayed.
Click on the Update button at the top of the page.
Scroll down the page till you see the Footer Header:
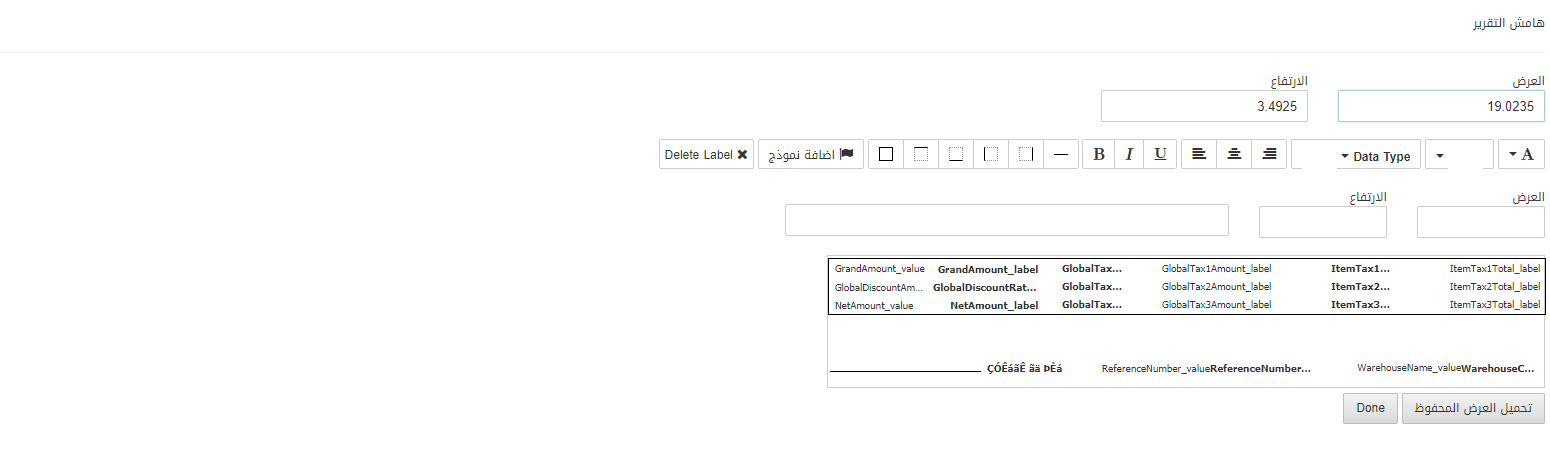
Note: All the editing buttons of the footer section are the same as the header section. The only difference is the requirement of what to print in the report receipts. To understand the footer section see the Header section explanation above.
Load Saved View: This button is used to load the previously saved view
Done: This button is used to approve the changes you have made and save them.
You can add the labels and values from Column Title and Print Value in the chart below:
Setting the Report Detail Section
To update the report setup, go to Inventory > Setup > Report Setup, the report setup page is displayed.

Click on the Update button at the top of the page.

Scroll down the page till you see the Report Detail Section:

Scroll down the page:
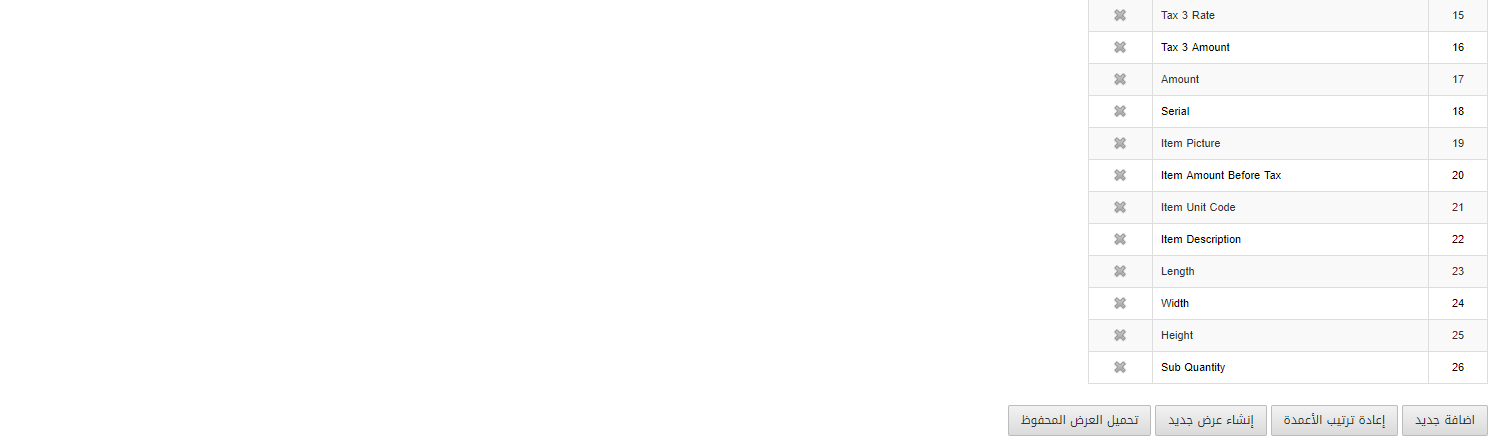
Look at the buttons of this section:
Generate Columns: This button is used to generate columns.
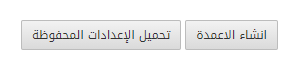
Load Saved Settings: This button loads the previously saved settings.

Add new: This button is used to add new columns.
Reorder Columns: This button is used to rearrange the columns.
Generate Fresh View: This button generates the fresh view.
Load Saved View: This button loads or shows the previously saved view.
Setting the Instruction Page Body
To update the report setup, go to Inventory > Setup > Report Setup, the report setup page is displayed.

Click on the Update button at the top of the page.

Scroll down the page till you see the Instruction Page Body:
Note: You can add the label from Add Label button and delete any label by the Delete Label button while selecting the label.
For the editing section, go to the Header Section for the detailed functioning of this section.
Load Saved View: This button is used to load the previously saved view
Done: This button is used to approve the changes you have made and save them.
Click on the Save button at the top of the page.
“Operation Successful” message is shown at the top of the page.
![]()
Note: For every page, you need to select it and implement the change separately and individually.