

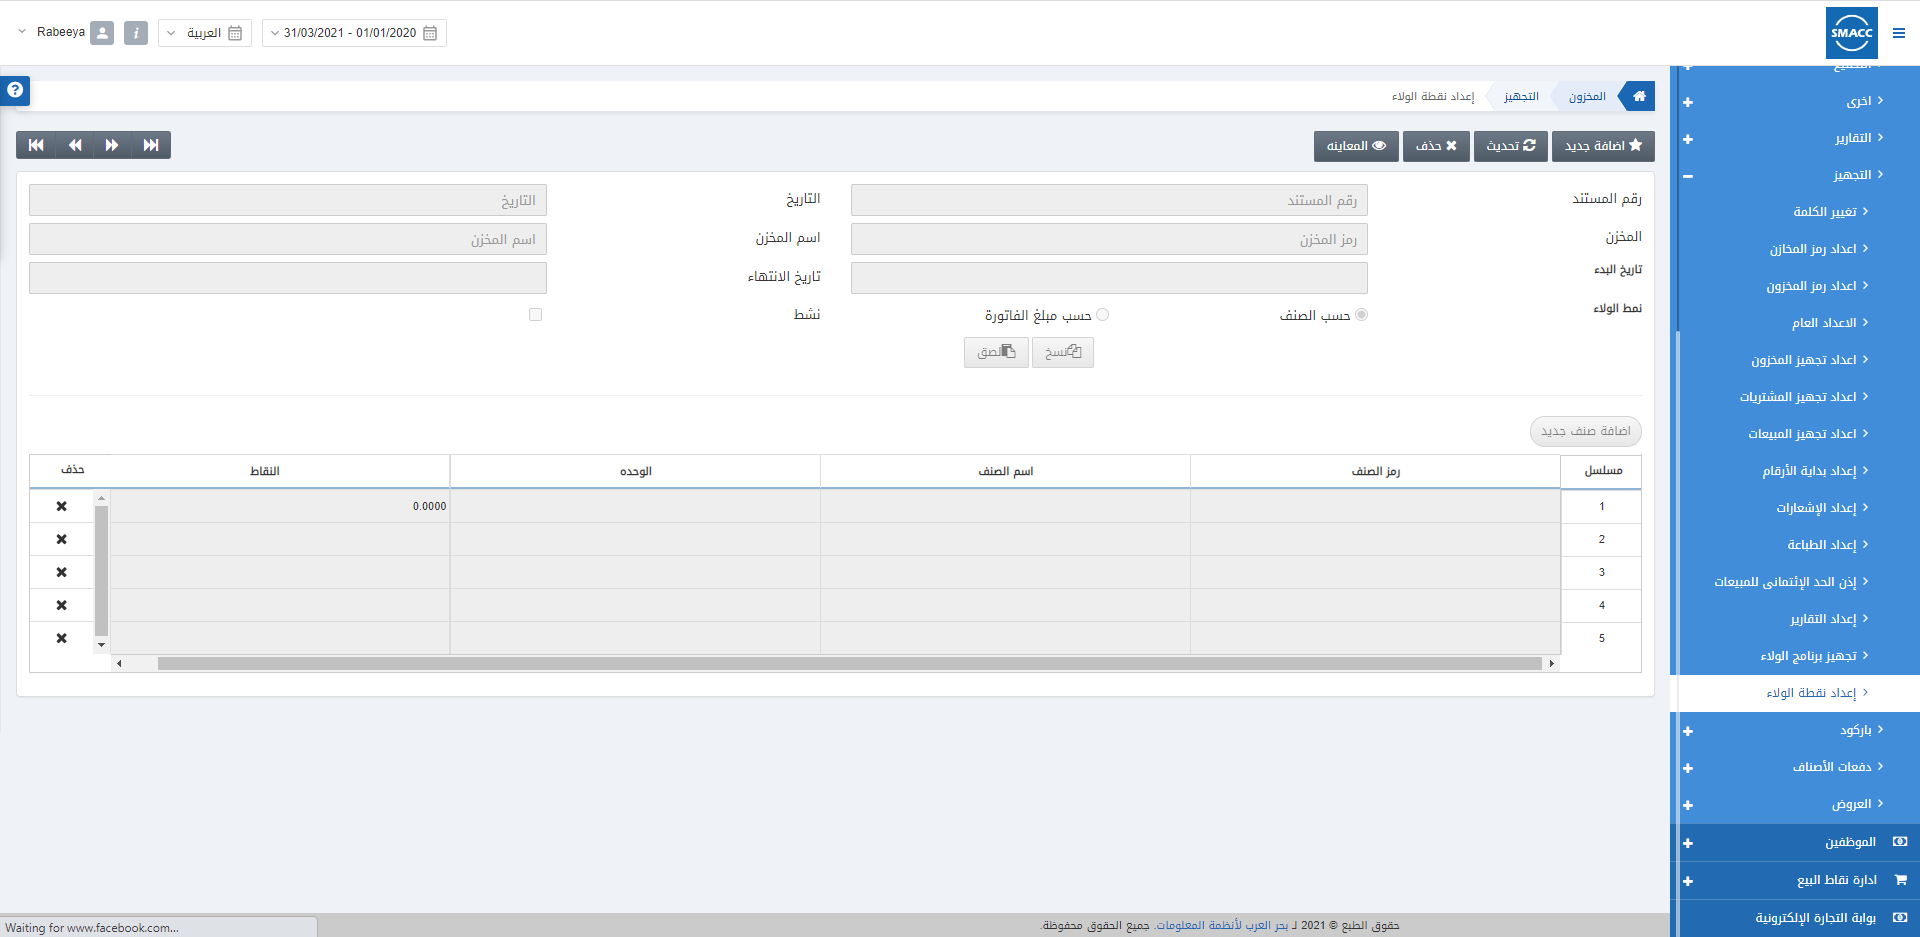
The loyalty point setup allows the setting of the point’s setup for the loyalty customers. Either you can make the settings according to invoice amount or item-wise where the time slots must not overlap.
Adding a Loyalty Point Setup Item Wise
To add a loyalty point setup, go to Inventory > Setup > Loyalty Point Setup, the loyalty point setup page is displayed.
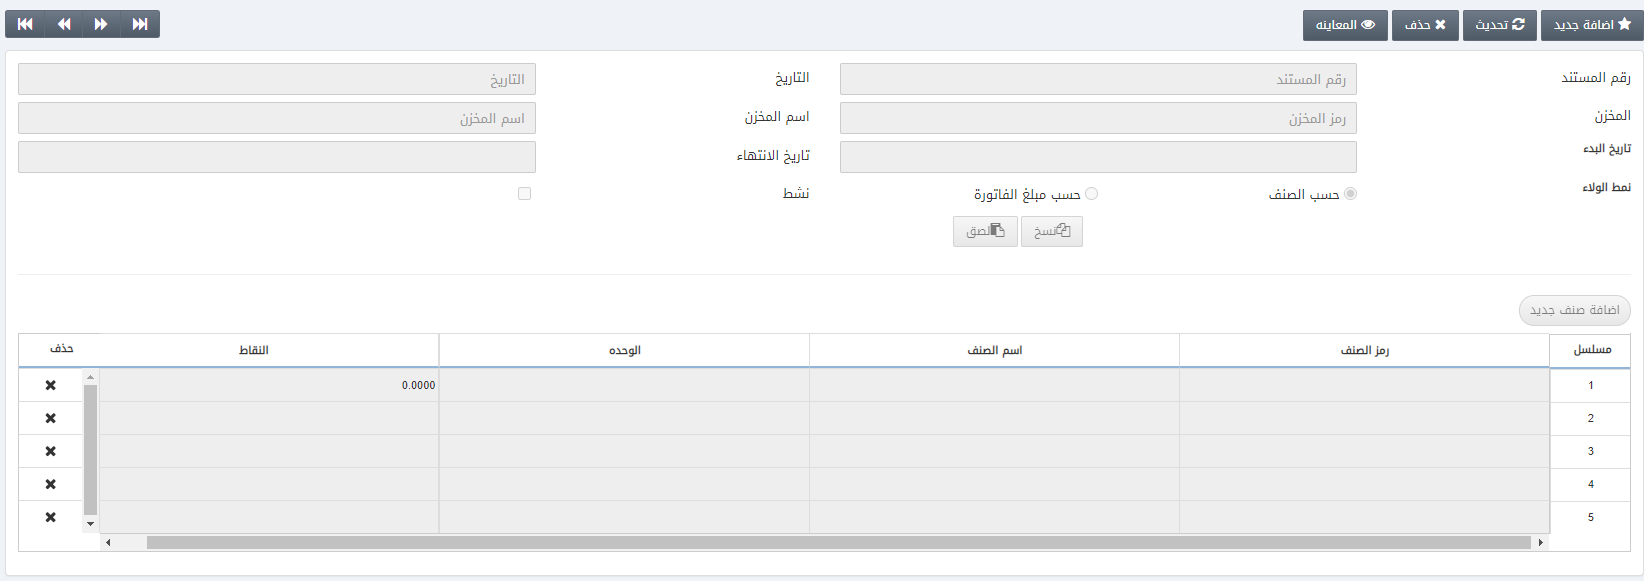
Click on the Add New button.
Warehouse: This field selects the warehouse code for which you want to implement the loyalty points.
Start Date: This field sets the starting date of the item-wise loyalty points.
End Date: This field sets the ending date of the item-wise loyalty points.
Is Active: This checkbox allows the enabling of the item-wise loyalty point setup.
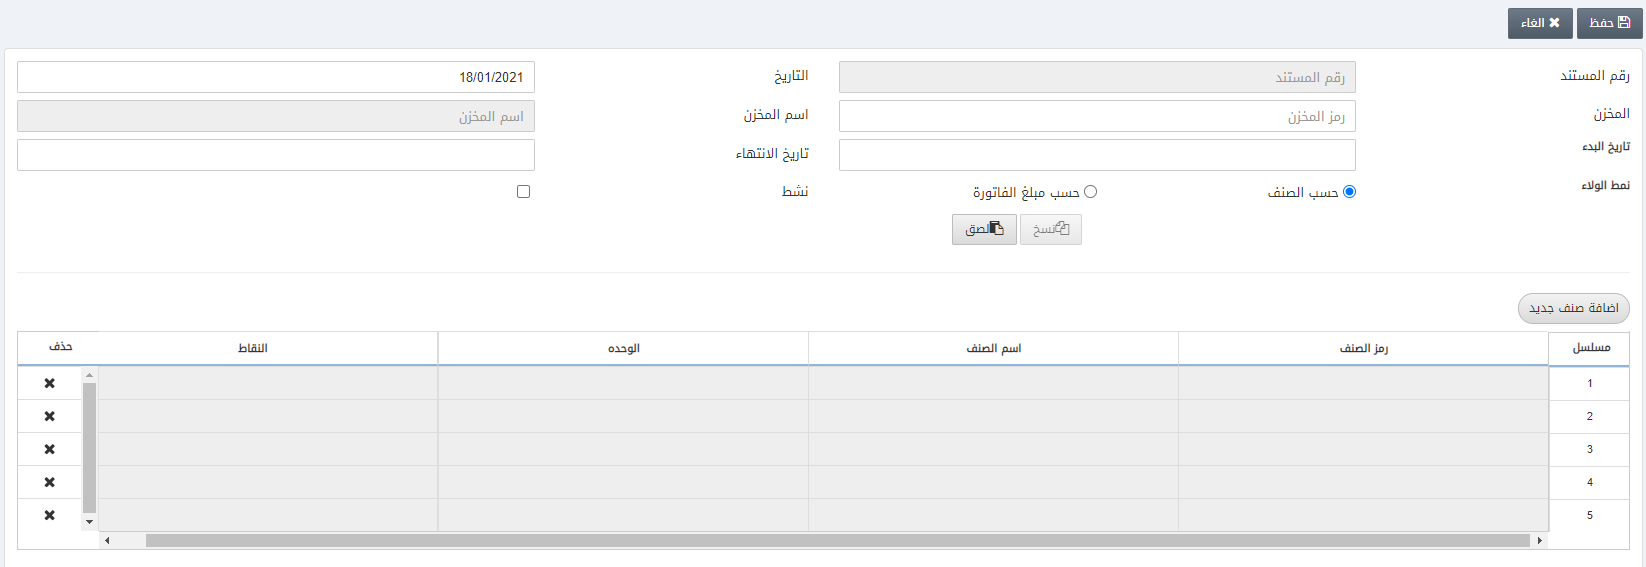
Click on the Add New Item button.

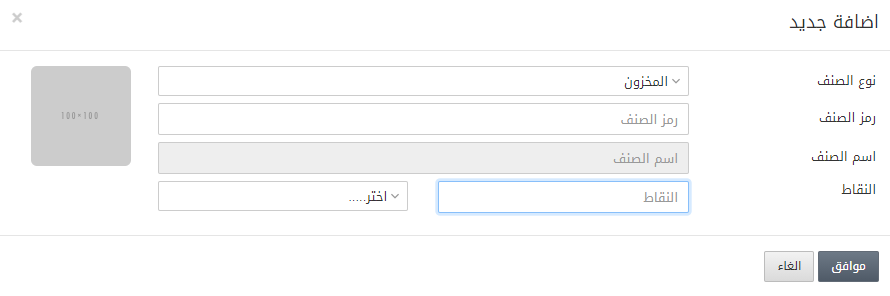
Enter the Item code and Points affiliated with the item.

Click on the Ok button to save the information.

Click on the Save button at the top of the page. Insertion successful message is displayed at the top of the screen.
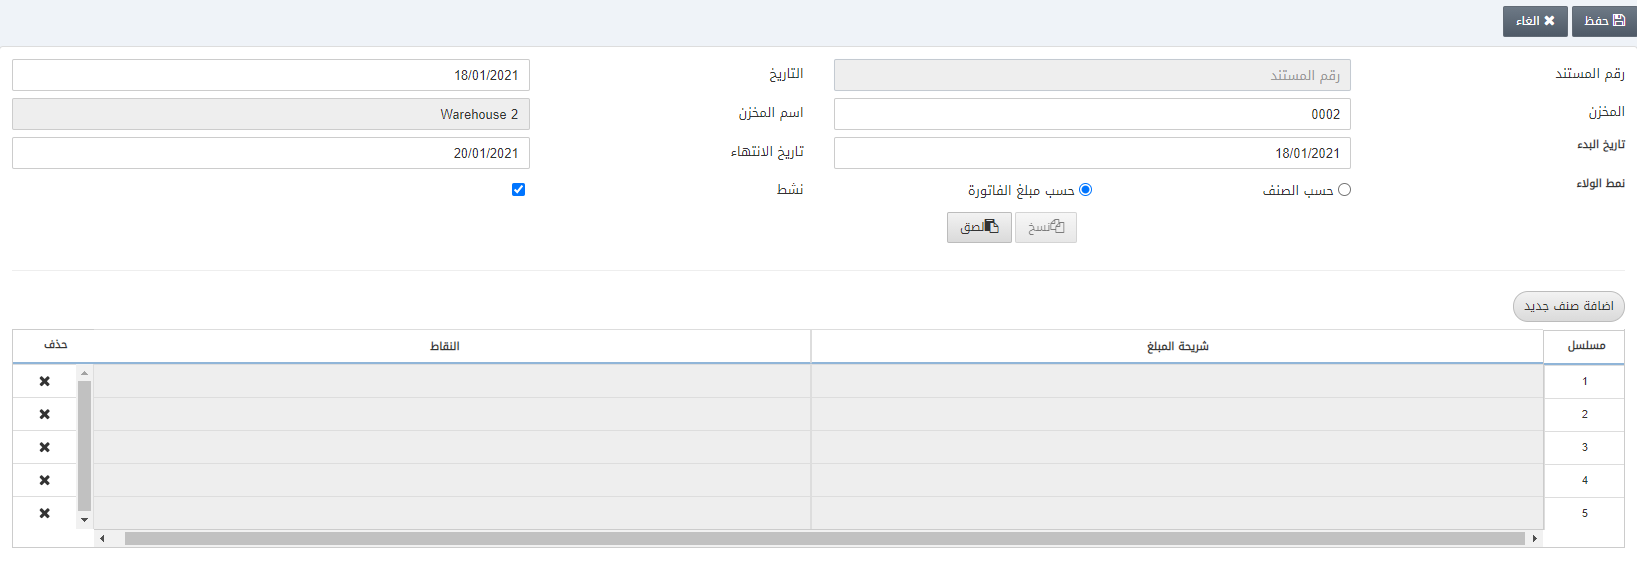
Adding a Loyalty Point Setup Amount Wise
To add a loyalty point setup, go to Inventory > Setup > Loyalty Point Setup, the loyalty point setup page is displayed.

Click on the Add New button.

Warehouse: This field selects the warehouse code for which you want to implement the loyalty points.
Start Date: This field sets the starting date of the amount wise loyalty points.
End Date: This field sets the ending date of the amount wise loyalty points.
Is Active: This checkbox allows the enabling of the amount wise loyalty point setup.
Click on the Add New Item button.
Slab Amount: This field sets the slab of the amount of invoice.
Points: This field sets the points against the above field.

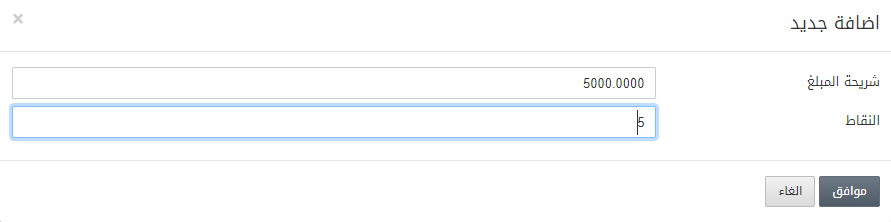
Click on the Ok button to save the information.
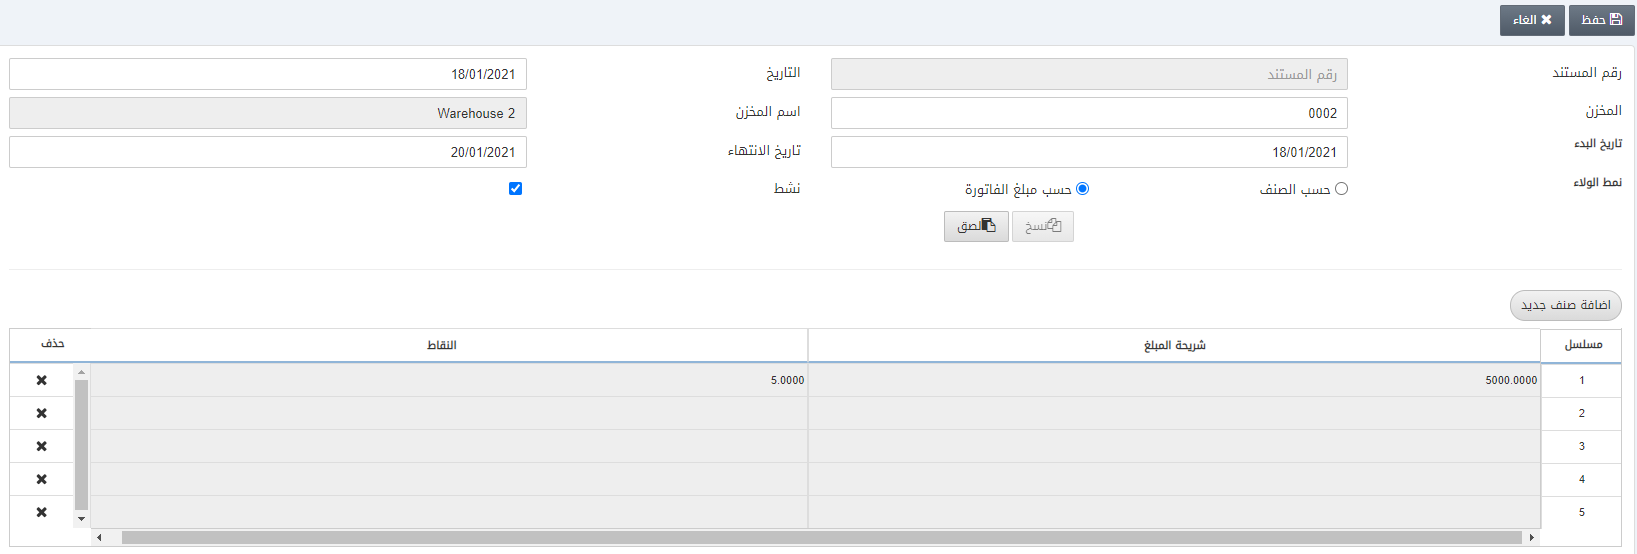
Note: You can update or delete the loyalty point setup as long as the loyalty point setup is not consumed by the customer. In the case of consumption of the loyalty point setup, you cannot update or delete the entry using the Update and Delete buttons at the top of the screen.
Click on the Save button to save the setup information. ”Insertion successful” message is displayed at the top of the screen.
Note: You can use the Copy-Paste buttons to copy any loyalty setup from one warehouse and paste it to another warehouse. In such a way your time is saved if you want to apply the same loyalty setup to many warehouses.