

In counter setup, you can add, update, and delete counter details for POS Management in SMACC. This module of POS Management in the SMACC cloud also supports the SMACC POS Desktop Application.
Setting the Counter
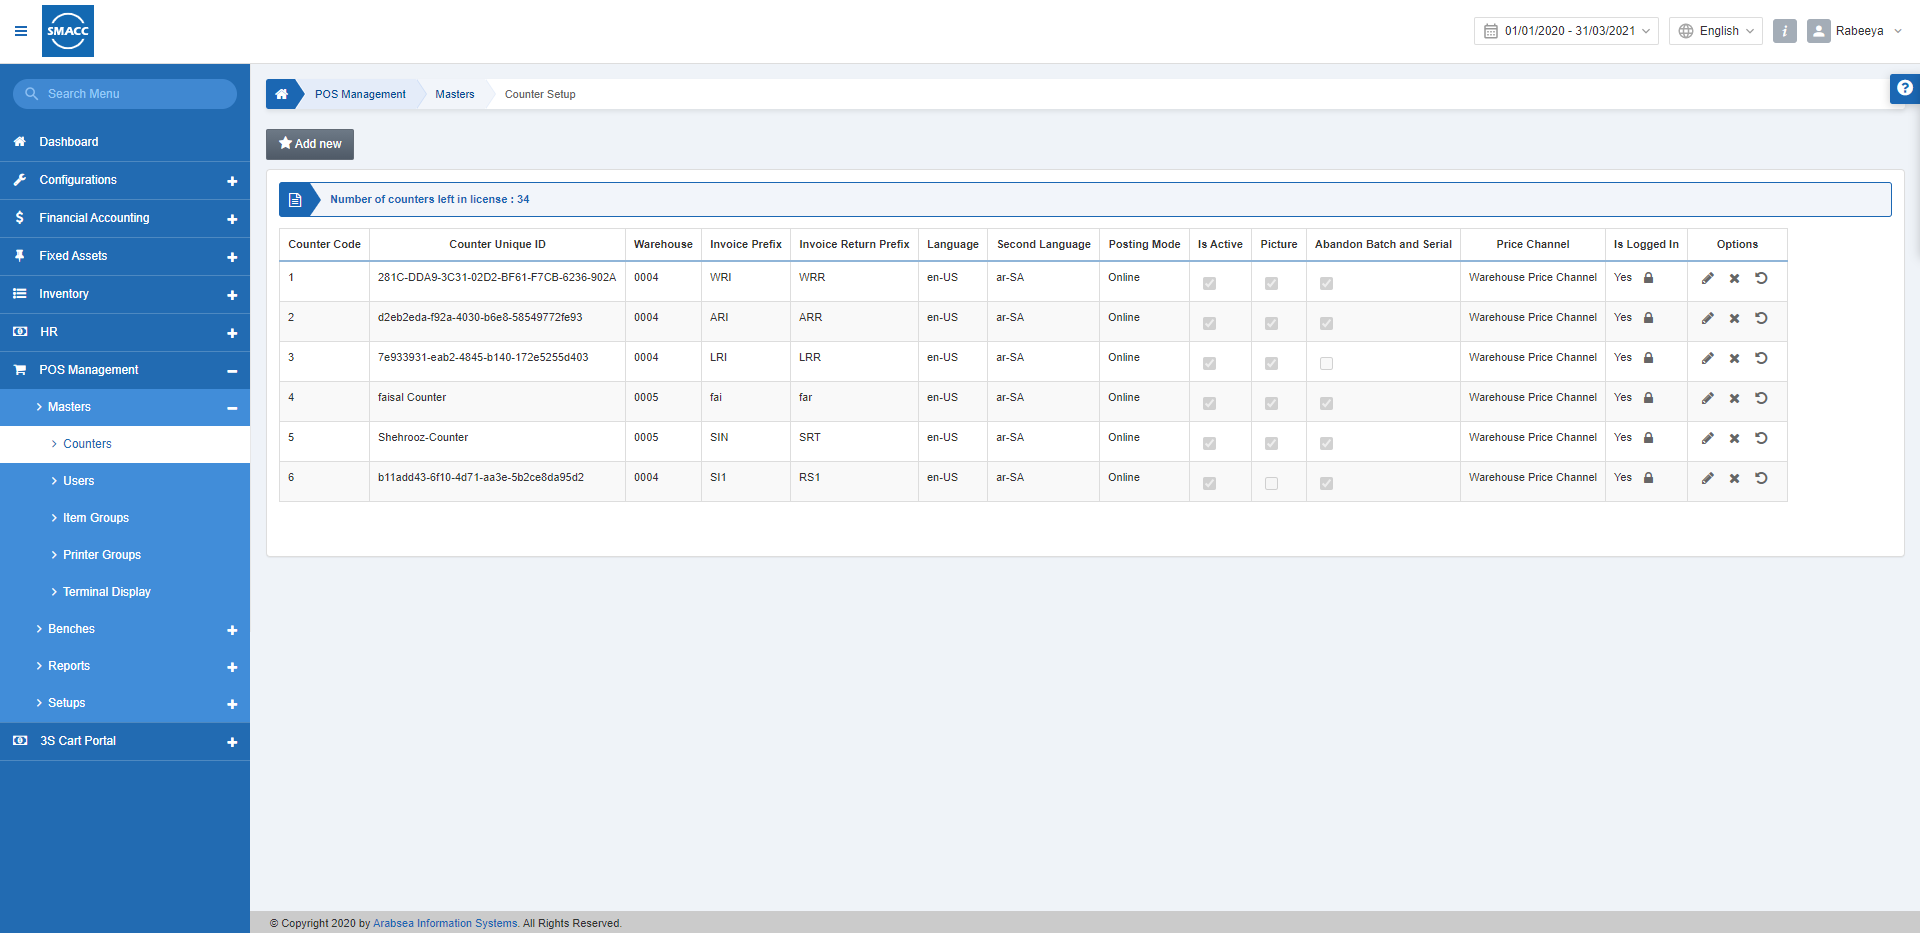
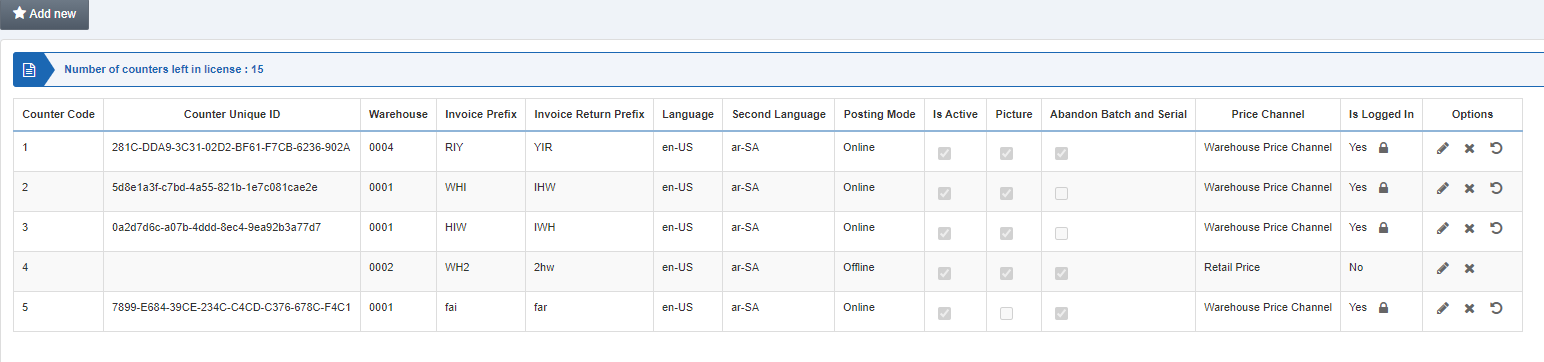
To set a counter, go to POS Management > Masters > Counters, the Counters page is displayed.
Click the Add New button on top of the page.
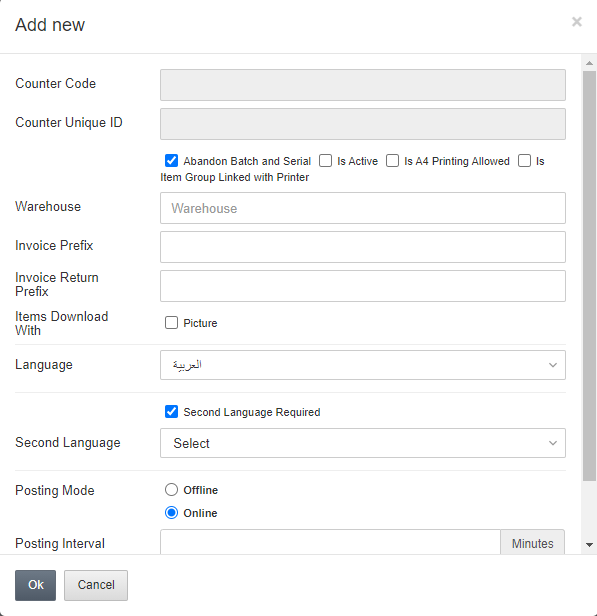
Counter Code:
The counter code is auto-generated by the system.
Counter Unique ID:
The counter unique ID is auto-generated by the POS Application and is linked to one counter only.
Abandon Batch and Serial:
If this checkbox Abandon Batch and Serial is checked, batch and serial information will not be required against the items in the POS Application, the user has to enter the Batch & Serial against the Sales Invoice using Inventory > Stock Batch > Stock Batch Outward page.
Is Active:
This checkbox allows the functionality of your counter. POS Counter login can be suspended by unchecking the Is Active checkbox.
Is A4 Printing Allowed:
This checkbox allows the printing with A4 page format.
Is Item Group Linked with Printer:
If this checkbox is checked, you can link the items of Item Group to specific printers.
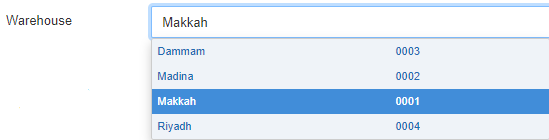
Warehouse:
The Warehouse code is mandatory here. Every counter should be linked to a specific warehouse. The System maintains the stock of all items warehouse-wise. You can select the warehouse from a drop-down list.
Invoice Prefix:
This field is mandatory and unique among all counters. It determines the Prefix for the invoices.
Invoice Return Prefix:
This field is mandatory and unique among all counters. It determines the Prefix for the return invoices.
Items Download with:
You can download the items with the following information:
Picture: The picture of items will be shown on checking this checkbox.
Language:
You can set the primary language from this drop-down list.

Second Language:
You can set the second language from the drop-down list and it will be used on the receipt printer to print the labels in a second language.

Scroll down the input box:
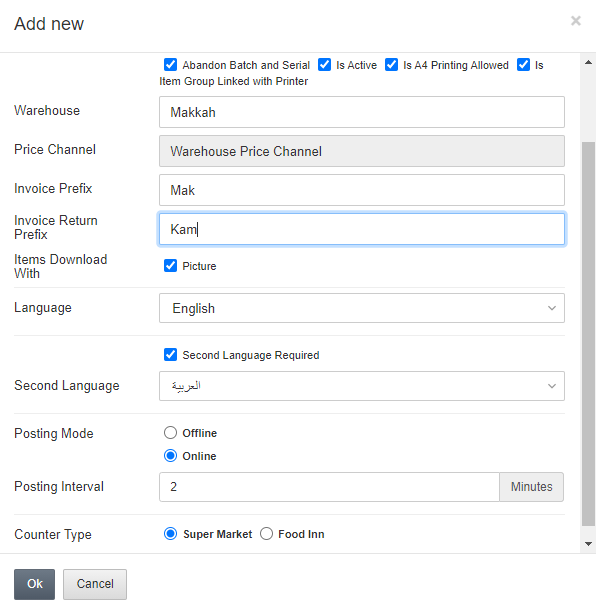
Posting Mode:
It defines the posting mode of your counter either Online or Offline.
1. Offline:
If “Offline” is checked, the counter will function in the Offline Mode. There will be no automatic posting of invoices on the server. Invoices will be posted on Logout if an internet connection is available otherwise invoices will be posted on login. If Offline is checked then we have a further option below
Offline Login:
(i)Yes: If checked, Offline Login is allowed. But the first login will be online.
(ii) No: If checked, Offline Login is not allowed.

2. Online:
If “Online” is checked, Counter is functioning in online mode with an active internet connection.
Posting Interval: It is a mandatory field and must be defined in minutes and makes the posting to the server on an interval of defined minutes.
Note: The Credit Sales Invoice and Return Sales Invoice reach the server on runtime with an active internet connection only.
Counter Type:
You have to define your counter’s type.
(i) Super Market:
You can either select “Super Market” or “Food Inn”.
The Super Market is for the sale of grocery and non-dimensional/dimensional items in various industries. Food Inn is for a restaurant or fast-food chain.
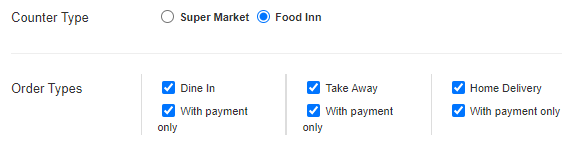
(ii) Food Inn:
There are further three types of orders which are listed below:
Order Types:
Dine-in: This is for Dine-in orders.
With Payment Only: On order placement, payment is mandatory for Dine-in orders.
Take Away: This is for Takeaway orders.
With Payment Only: On order placement, payment is mandatory for Take Away orders.
Home Delivery: This is for Home delivery orders.
With Payment Only: On order placement, payment is mandatory for Home Delivery orders.
Note: To allow hold invoices of any order type, the “Payment Only” checkbox must be unchecked.
Click on the OK button to save the information.

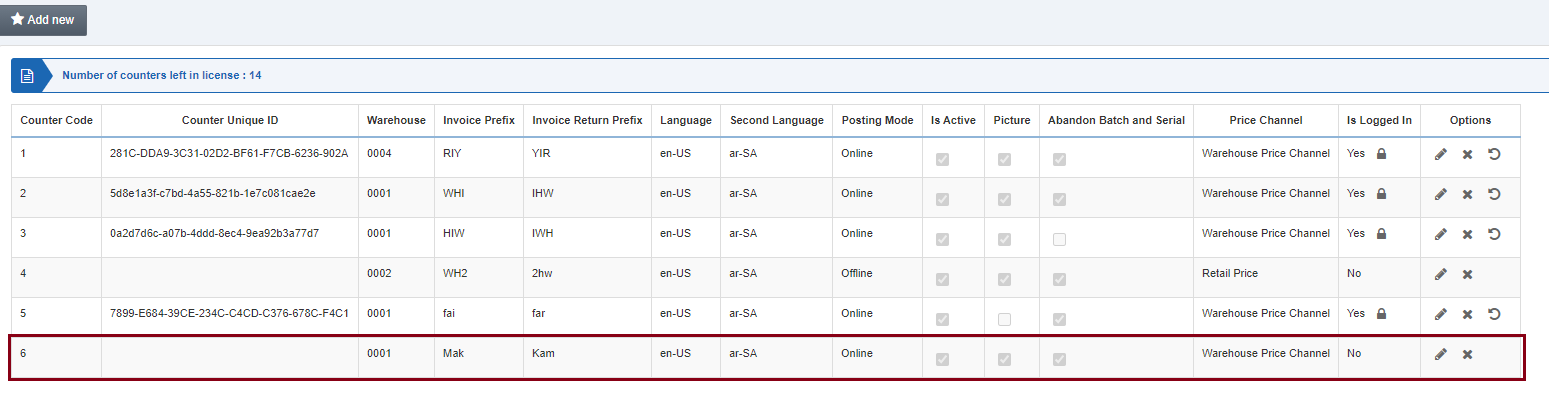
Note: When you log in onto the POS Desktop Application, the Counter Unique ID is allotted against the specific counter. Enter the counter number, for example, 6 in POS Application Pop up.
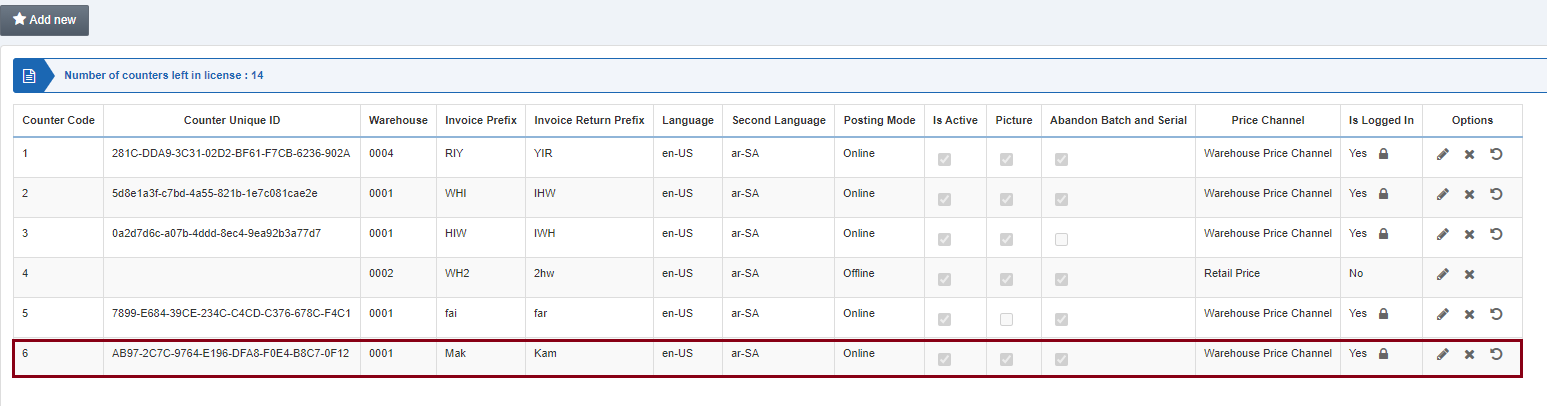
The counter is now active with Counter Unique ID assigned to it.
Editing the Counter
To edit a counter, go to POS Management > Masters > Counters, the Counters page is displayed.
Click on the Edit icon under the Options.

The following display is shown:
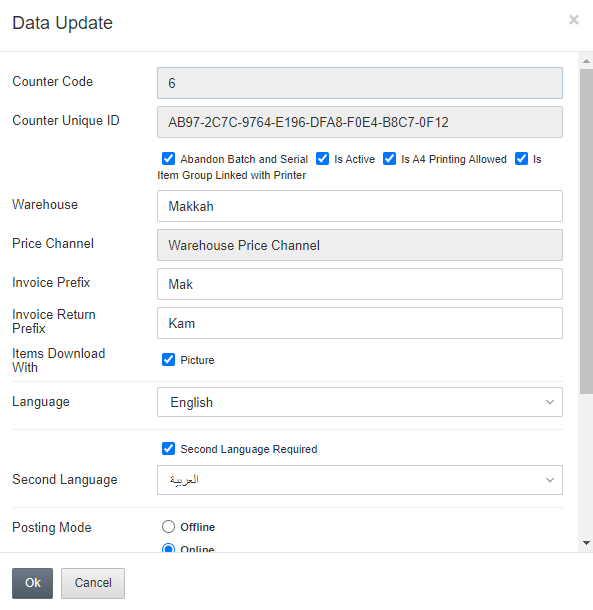
Please edit the active fields and update them as per the requirement.
Deleting the Counter
To delete a counter, go to POS Management > Masters > Counters, the Counters page is displayed.
Click on the Delete icon under the Options.
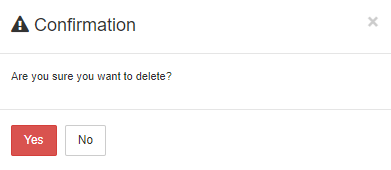
Click on the Yes button to delete the counter.
Resetting the Counter
To reset or clear a counter, go to POS Management > Masters > Counters, the Counters page is displayed.
Click on the Reset icon (right-side) under the Options.
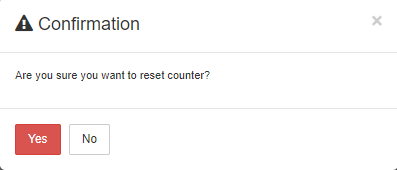
Click on Yes to confirm the resetting of the counter. The information on the counter is cleared/refreshed.
Note: Now you will have to link the counter again with the POS desktop application.